PRS-350
3
SECTION 2
DISASSEMBLY
• This set can be disassembled in the order shown below.
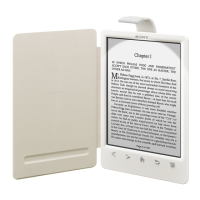
2-1. DISASSEMBLY FLOW
Note: Follow the disassembly procedure in the numerical order given.
2-2. ORNAMENT BOTTOM
2-4. BATTERY ASSY (BAT1)
(Page 4)
2-5. MAIN BOARD
(Page 5)
2-7. CASE UPPER BLOCK
(Page 6)
2-3. CASE LOWER
(Page 4)
2-6. ORNAMENT TOP ASSY
(Page 5)
2-8. CHASSIS ASSY
(Page 6)
SET
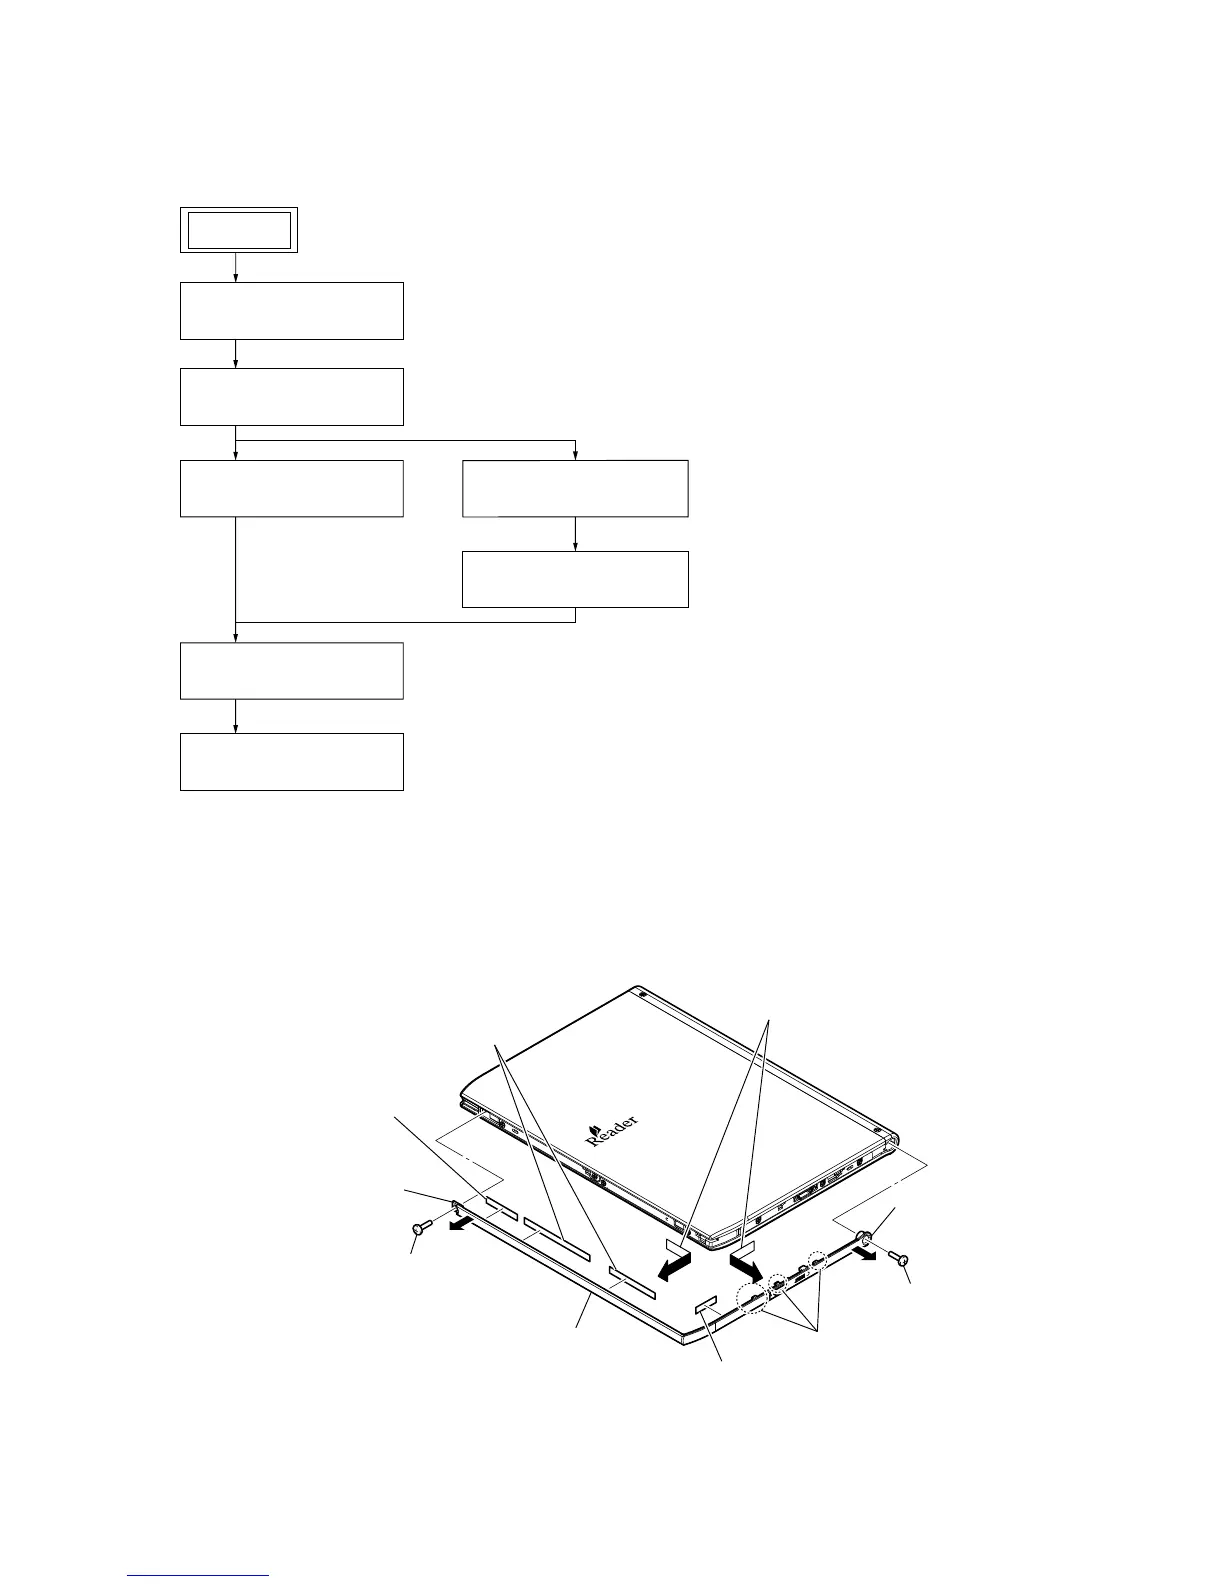
2-2. ORNAMENT BOTTOM
(Page 3)
Note 1: Please detach the STYLUS ASSY beforehand.
Note 2: Please take care not to lose the STYLUS ASSY.
1 screw
(M1.4)
1 screw
(M1.4)
3 Shifting this part of ornament
bottom slightly in the direction
of arrow B.
2 Shifting this part of ornament
bottom slightly in the direction
of arrow A and peel off paper
adhesive (ornament).
4 Move the ornament bottom in the
direction of arrow C and D.
8 ornament bottom
6 adhesive (ornament 2)
6 adhesive (ornament 2)
7 two adhesives (ornament)
5 three claws
B
A
C
D
– Rear side view –