1-13
55
Recording
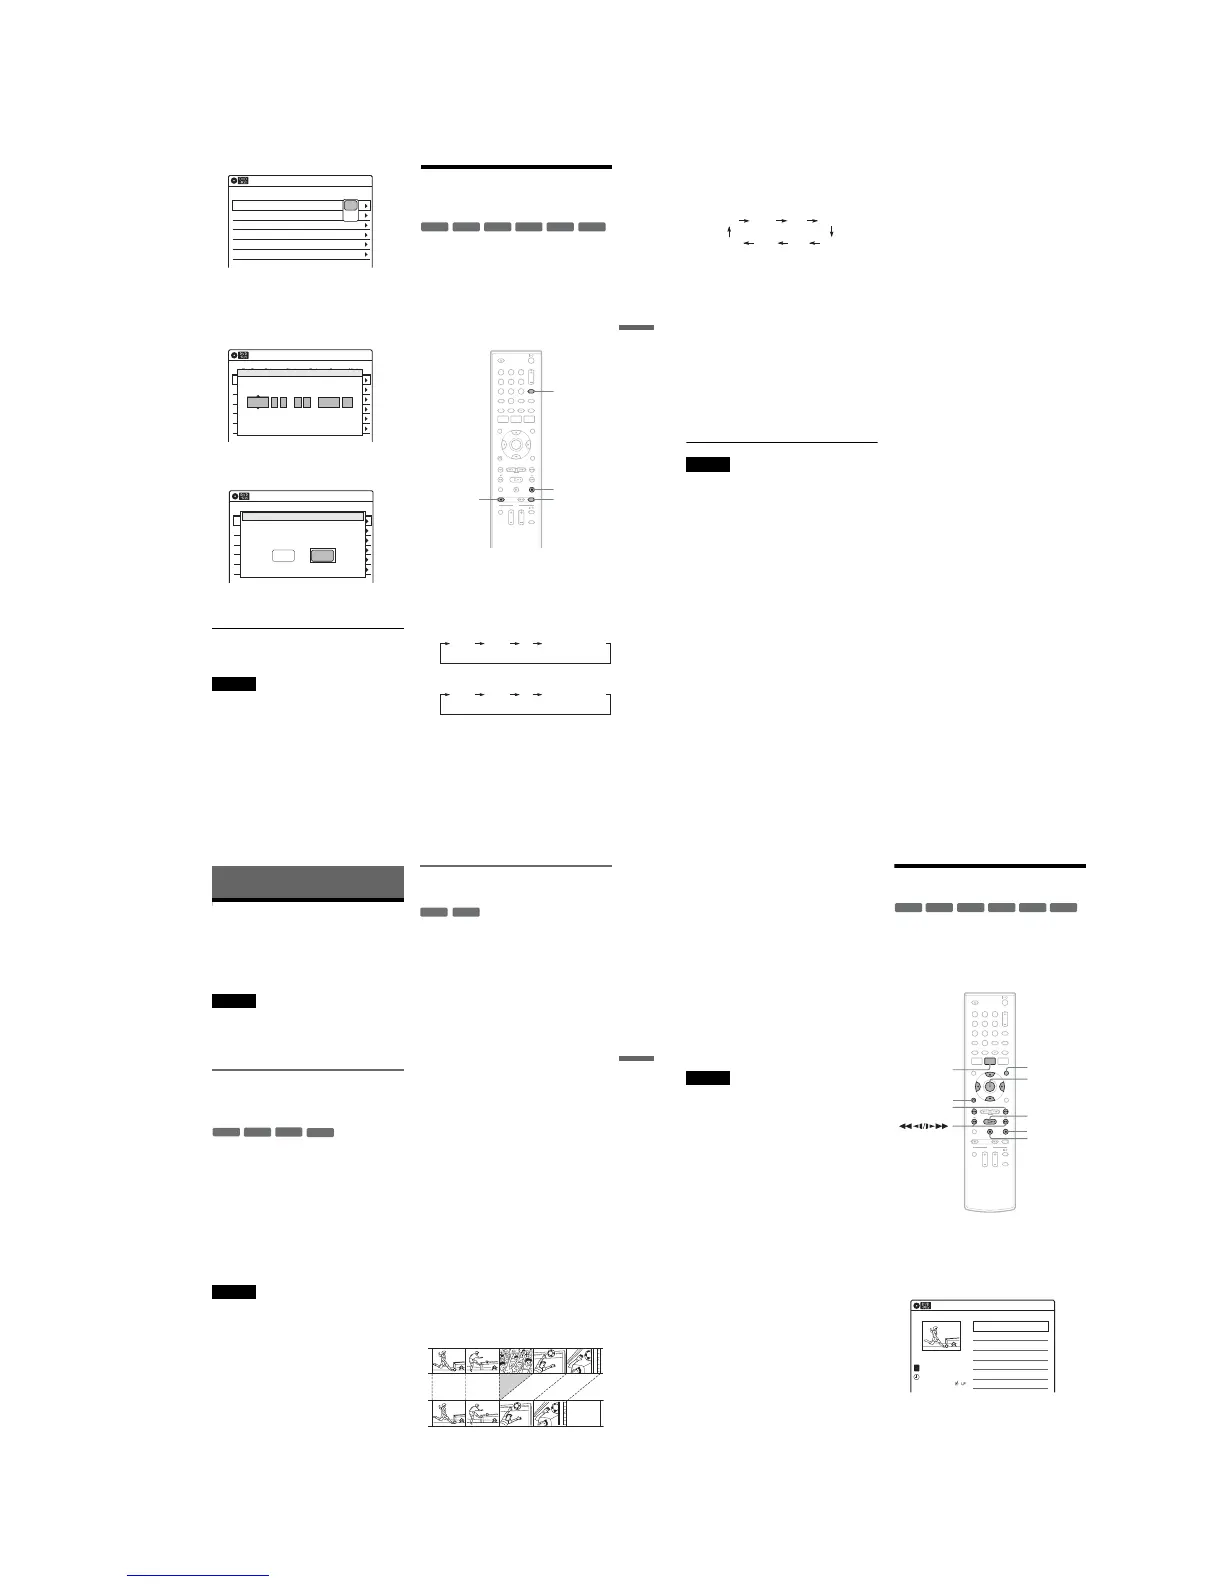
5 Select one of the options, and press
ENTER.
“Edit”: Changes the timer setting.
Select an item using </, and adjust using
M/m. Press ENTER.
“Erase”: Erases the timer setting.
Select “OK” and press ENTER when asked
for confirmation.
6 Press SYSTEM MENU to turn off the Timer
List.
To return to the previous display
Press O RETURN.
Notes
•Even when correctly set, the program may not be
recorded if another recording is underway, or other
prioritized timer setting overlaps. For priority, see
page 52.
•You cannot change the timer settings for a recording
currently underway.
Recording From Connected
Equipment Without a Timer
You can record from a connected VCR or similar
device. For connection details, see “Connecting a
VCR or Similar Device” on page 32.
Use the DV IN jack on the front panel if the
equipment has a DV/D8 output jack (i.LINK
jack).
To record from a digital video camera connected
to the DV IN jack, see page 71.
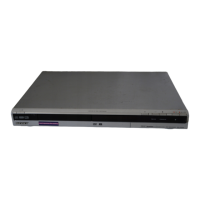
1 Insert a recordable disc.
2 Press INPUT repeatedly to select an input
source according to the connection you
made.
The front panel display changes as follows:
When selecting a digital channel
When selecting an analog channel
01 04/15 09:00PM 10:00PM Ch 8
--/-- --:-- --:-- ---- ---04
--/-- --:-- --:-- ---- ---05
--/-- --:-- --:-- ---- ---06
03 --/-- --:-- --:-- ---- ---
02 04/30 09:15PM 09:45PM D11.1
10:10 AM
Timer List
No Date Start End Ch Mode Edit
Edit
Erase
01 DVD 04/15 09:00PM 10:00PM CH8
--- --/-- --:-- --:-- ---- ---04
--- --/-- --:-- --:-- ---- ---05
--- --/-- --:-- --:-- ---- ---06
03 --- --/-- --:-- --:-- ---- ---
02 DVD 04/30 09:15PM 09:45PM CH11
10:10 AM
No Rec To Date Start End Source Mode Edit
Timer – Standard
No.01
: PM PM
:
09 00 10 00 Ch 8 SP
Date Start End Ch Mode
04/15
01 DVD 04/15 09:00PM 10:00PM CH8
--- --/-- --:-- --:-- ---- ---04
--- --/-- --:-- --:-- ---- ---05
--- --/-- --:-- --:-- ---- ---06
03 --- --/-- --:-- --:-- ---- ---
02 DVD 04/30 09:15PM 09:45PM CH11
10:10 AM
No Media Date Start End Source Mode Edit
Timer List
Do you want to erase ‘‘No.01’’?
OK
Cancel
+
RW
+
R
-
RW
VR
-
RW
Video
-
R
VR
-
R
Video
11 22 33
44 55 66
77 88
00
99
INPUT
x STOP
REC MODE
z REC
LINE2 DVLINE1 Digital Channel
LINE2 DVLINE1 Analog Channel
,continued
56
3 Press REC MODE repeatedly to select the
recording mode.
The display changes on the TV screen as
follows:
For details about the recording mode, see
page 47.
4 Select the line input audio.
Set “Line Audio Input” of “Audio” setup to
“Stereo” or “Main/Sub” in the “Setup”
display (page 83).
5 Insert the source tape into the connected
equipment and set to playback pause.
6 Press z REC on this recorder and the
pause or play button on the connected
equipment at the same time.
Recording starts.
To stop recording, press x STOP on this
recorder.
Notes
•A video game image may not be recorded clearly.
•The recorder does not record programs with Copy-
Never signals. Such recordings stop after a few
seconds.
•During recording or recording pause, you cannot
change the recording mode.
•You cannot change the channel or input source during
recording.
HQ SPHSP LSP
SLP LPEP ESP
57
Editing
Editing
Before Editing
This recorder offers various edit options for
various disc types. Before you edit, check the disc
type in the front panel display, and select the
option available for your disc (page 12).
Notes
•You may lose the edited contents if you remove the disc
or a timer recording starts while editing.
•You cannot edit recordings on DVD-RWs (Video
mode), DVD+R, or DVD-Rs (Video mode) recorded
on other DVD equipment.
Edit options for DVD+RWs/DVD-RWs
(Video mode)/DVD+Rs/DVD-Rs
(Video mode)
You can perform simple edits. Since Video mode
titles are actual recordings on the disc, you cannot
undo any edits you make. The edit functions
available for Video mode titles are:
–Renaming a title (page 61).
–Erasing a title (page 58).
–Setting protection against erasure (DVD+RWs
only) (page 58).
–Erasing a section of a title (A-B Erase)
(DVD+RWs only) (page 59).
–Dividing a title (DVD+RWs only) (page 60).
Notes
•Once the disc is finalized, you cannot edit or record on
the disc (except for DVD+RWs).
• If a message appears and indicates that the disc’s
control information is full, erase unnecessary titles.
Edit options for DVD-RWs (VR mode)/
DVD-Rs (VR mode)
You can enjoy advanced edit functions. First you
have two options for a DVD-RW (VR mode) and
DVD-R (VR mode): editing either the original
recording (called the “original”), or the playback
information created from the original (called a
“Playlist”). Since each is different in nature and
offers different merits, read the following and
select the one that better suits your needs.
To edit original titles
Edits made to the original titles are final. If you
plan to retain an unaltered original recording,
create and edit a Playlist (see below). The edit
functions available for original titles are:
–Renaming a title (page 61).
–Erasing a title (page 58).
–Erasing a chapter (page 59).
–Setting protection against erasure (page 58).
–Erasing a section of a title (A-B Erase) (page 59).
–Dividing a title (page 60).
To create and edit Playlist titles
A Playlist is a group of Playlist titles created from
the original title for editing purposes. When you
create a Playlist, only the control information
necessary for playback, such as the playback
order, is stored on the disc. Since the original titles
are left unaltered, Playlist titles can be re-edited.
If you erase an original title used in a Playlist, that
Playlist is also erased.
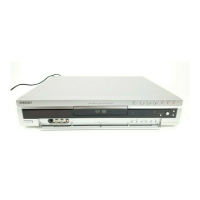
Example: You have recorded the final few
matches of a soccer tournament on a DVD-RW
(VR mode). You want to create a digest with the
goal scenes and other highlights, but you also want
to keep the original recording.
-
RWVideo
+
RW
+
R
-
RVideo
-
RWVR
-
RVR
,continued
58
In this case, you can compile highlight scenes as a
Playlist title. You can even rearrange the scene
order within the Playlist title. See “Editing a
Playlist” on page 64.
The advanced edit functions available for Playlist
titles are:
–Renaming a title (page 61).
–Erasing a title (page 58).
–Erasing a chapter (page 59).
–Erasing a section of a title (A-B Erase) (page 59).
–Editing a Playlist scene (page 64).
–Dividing a title (page 60).
–Combining titles (page 65).
z Hint
You can switch the Title List to show original or Playlist.
While the Title List menu is turned on, press ORIGINAL/
PLAYLIST repeatedly.
Notes
•You cannot protect Playlist titles.
• If a message appears and indicates that the disc’s
control information is full, erase unnecessary titles.
•You cannot create or edit Playlist titles on a finalized
disc. When you want to edit or record on the DVD-RW
(VR mode) again, unfinalize the disc (page 69).
Editing a Title
This section explains the basic edit functions. Note
that editing is irreversible. To edit a DVD-RW
(VR mode) or DVD-R (VR mode) without
changing the original recordings, create a Playlist
title (page 62).
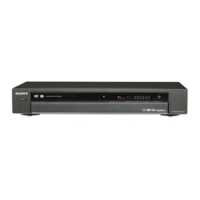
1 Press TITLE LIST.
When editing a DVD-RW (VR mode) or
DVD-R (VR mode), press ORIGINAL/
PLAYLIST to switch to the “Title List
(Original),” if necessary.
2 Select a title, and press ENTER.
The sub-menu appears.
-
RWVR
-
RW
Video
+
RW
+
R
-
R
Video
-
RVR
11 22 33
44 55 66
77 88
00
99
M/m/</,,
ENTER
TITLE LIST
H PLAY
x STOP
X PAUSE
ORIGINAL/
PLAYLIST
./>
O RETURN
Title List (Original)
10:10 AM
>
>
T
No. Title Length Edit
01 01:29:03
02 00:31:23
03 >01:59:00
04 >00:58:56
1/4
D11.1
D22.2
Ch 23
Ch 66
D11.1
May/02/2007
08:00 PM