1-14
59
Editing
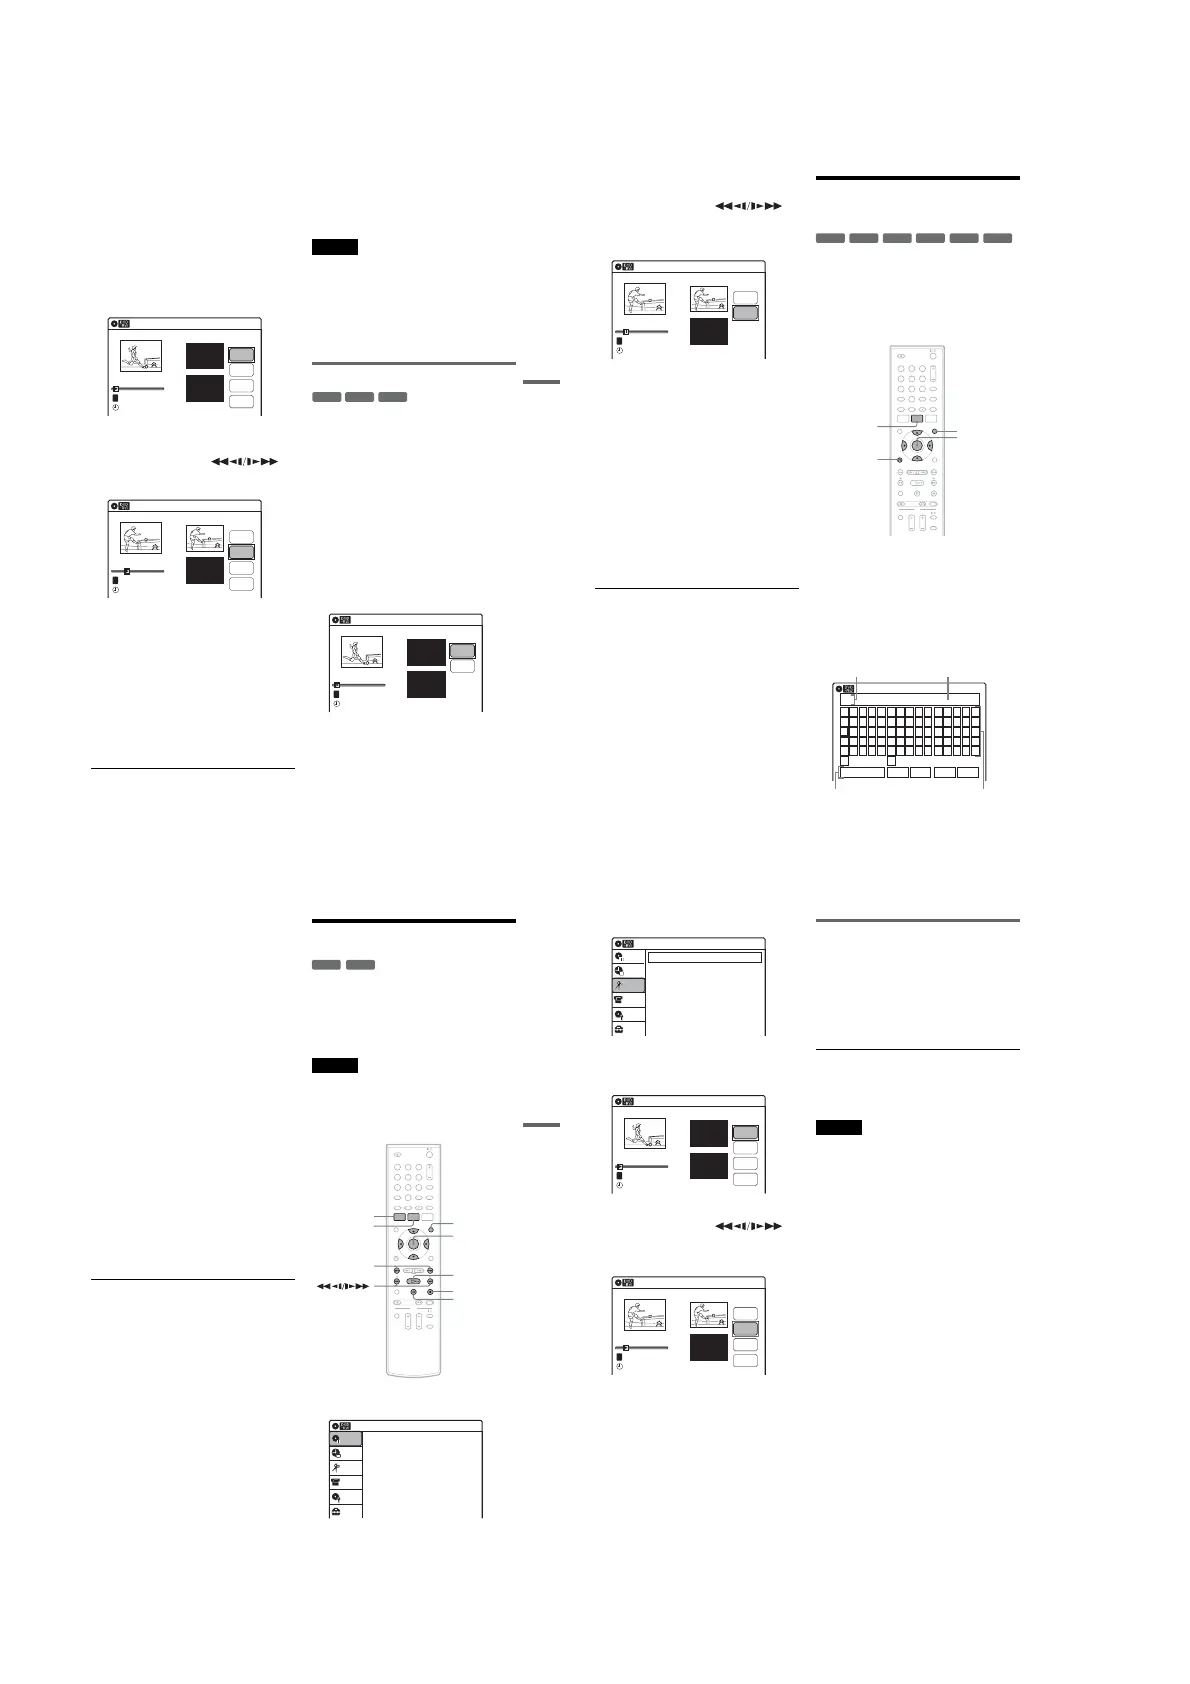
1 Press TITLE LIST.
When editing a DVD-RW (VR mode) or
DVD-R (VR mode), press ORIGINAL/
PLAYLIST to switch to the “Title List
(Original),” if necessary.
2 Select a title, and press ENTER.
The sub-menu appears.
3 Select “A-B Erase,” and press ENTER.
The display for setting point A and B appears.
“Start” is selected.
4 Press ENTER at the start point of the
section to be erased (point A).
You can use H PLAY, ,
./>, x STOP, and X PAUSE to find
the point. “End” is selected.
5 Press ENTER at the end point of the section
(point B).
“Erase” is selected.
To reset the start or end point, select “Start” or
“End” and repeat from step 4 or 5.
6 Press ENTER.
The display asks for confirmation.
7 Select “OK,” and press ENTER.
The scene is erased.
To continue, repeat from step 4.
To finish, select “Finish,” and press ENTER.
z Hints
•A chapter mark is inserted after the scene was erased.
The chapter mark divides the title into separate chapters
on either side of the mark.
•You can also erase a section of a Playlist title (page 63).
Notes
•Images or sound may be momentarily interrupted at the
point where you erase a section of a title.
•Sections shorter than five seconds may not be erased.
•The start and end points of a title may be different from
what you have set.
•The total playing time of the title does not change even
if a scene was erased.
•If you erase an original title used in a Playlist, that
Playlist is also erased.
Dividing a title into two (Divide Title)
You can divide a title into two. Note that dividing
original titles cannot be undone.
1 Press TITLE LIST.
When editing a DVD-RW (VR mode) or
DVD-R (VR mode), press ORIGINAL/
PLAYLIST to switch to the “Title List
(Original),” if necessary.
2 Select a title, and press ENTER.
The sub-menu appears.
3 Select “Divide Title,” and press ENTER.
The display for setting the dividing point
appears.
“Point” is selected.
A-B Erase
10:10 AM
Title No.01
End 00:00:00
Start 00:00:00
Start
End
Erase
Finish
00:00:07
T
Title No.01
May/02/2007 08:00 PM
A-B Erase
10:10 AM
Title No.01
End 00:00:00
Start 00:00:10
Start
End
Erase
Finish
00:00:10
T
Title No.01
May/02/2007 08:00 PM
-
RWVR
+
RW
-
RVR
Divide Title (Original)
10:10 AM
Title No.01
T
Poin t
Divide
00:00:07
Title No. 01
Start 00:00:00
End 00:00:00
May/02/2007 08:00 PM
,continued
60
4 Press ENTER at the point where you want to
divide the title.
You can use H PLAY, ,
./>, x STOP, and X PAUSE to find
the point.
“Divide” is selected.
5 Press ENTER.
The display asks for confirmation.
To reset the dividing point, select “No” and
press ENTER, then repeat from step 4.
6 Select “Yes,” and press ENTER.
The display asks whether to rename the title.
To use the same name as before, select “No”
and press ENTER to finish.
7 Select “Yes,” and press ENTER.
The “Title Name” display appears.
8 Follow steps 4 to 6 of “Changing the Name
of a Title” (page 60) to complete
renaming.
The divided title appears in the Title List with
the new name.
z Hints
•You can also divide a Playlist title (page 63).
• If the dividing point is set too close to the beginning of
the title, the title cannot be divided.
Changing the Name of a
Title
You can enter a title name of up to 32 characters.
Since the displayed number of characters is
limited, their appearance in menus such as Title
List may be different. When the display for
entering characters appears, follow the steps
below.
1 Press TITLE LIST.
When editing a DVD-RW (VR mode) or
DVD-R (VR mode), press ORIGINAL/
PLAYLIST to switch to the “Title List
(Original),” if necessary.
2 Select a title, and press ENTER.
The sub-menu appears.
3 Select “Title Name,” and press ENTER.
The “Title Name” display appears.
10:10 AM
Title No.01
T
00:00:10
Divide Title (Original)
Title No. 01
End 00:00:10
Start 00:00:00
Poin t
Divide
May/02/2007 08:00 PM
+
R
-
RWVR
-
RWVideo
+
RW
-
RVR
-
RVideo
11 22 33
44 55 66
77 88
00
99
M/m/</,,
ENTER
O RETURN
TITLE LIST
ORIGINAL/
PLAYLIST
Title Name
K
_
A B C D E
F G H I J
K L M N O
P Q R S T
U V W X Y
Z
a b c d e
f g h i j
k l m n o
p q r s t
u v w x y
z
1 2 3 4 5
6 7 8 9 0
- _ + = .
~
!
@ # $
%
^
& ( )
Backspace Space Delete Clear Finish
10:10 AM
Input row
Character paletteSetting buttons
Cursor
61
Editing
4 Select the character you want to enter
using M/m/</,, and press ENTER.
The selected character appears in the input
row.
You can only enter characters and symbols
that are displayed.
•To change the cursor position, select the
input row using M, and press </,.
•To erase a character, select either of the
following setting buttons and press ENTER.
“Backspace”: Erases the character to the left
of the cursor.
“Delete”: Erases the character at the cursor
position.
“Clear”: Erases all the characters in the input
row.
•To insert a space, move the cursor to the
desired position, select “Space,” and press
ENTER.
•To insert a character, move the cursor to the
desired position, select the character, and
press ENTER.
5 Repeat step 4 to enter the remaining
characters.
To return to the Title List without renaming
the title, press O RETURN.
6 Select “Finish,” and press ENTER.
z Hint
You can also rename a disc (page 67). Follow steps 4 to
6 above when the “Disc Name” display appears.
Creating a Playlist
Playlist titles allow you to edit without changing
the original recordings (see “Edit options for
DVD-RWs (VR mode)/DVD-Rs (VR mode)” on
page 56). You can create a Playlist title by
combining up to 99 sections (scenes) from original
titles.
Notes
•If you erase an original title used in a Playlist, that
Playlist is also erased.
•You cannot create or edit Playlist titles on a finalized
disc. When you want to edit or record on the DVD-RW
(VR mode) again, unfinalize the disc (page 69).
1 Press SYSTEM MENU while the recorder is
in stop mode.
-
RWVR
-
RVR
11 22 33
44 55 66
77 88
00
99
M/m/</,,
ENTER
SYSTEM
MENU
H PLAY
TITLE LIST
x STOP
X PAUSE
ORIGINAL/
PLAYLIST
./>
Press ENTER :
Title Menu for DVD Title List.
10:10 AM
Title List (Original)
Setup
Disc Setting
Edit
Title List
Timer
DV/D8 Dubbing
,continued
62
2 Select “Edit,” and press ENTER.
3 Select “Create Playlist,” and press ENTER.
The display for creating a Playlist appears.
“Start” is selected.
4 Press ENTER at the start point.
You can use H PLAY, ,
./>, x STOP, and X PAUSE to find
the point.
“End” is selected.
5 Press ENTER at the end point.
“Make” is selected.
To reset the start or end point, select “Start” or
“End” and repeat step 4 or 5.
6 Press ENTER.
The selected section is captured as a scene. To
continue, repeat from step 4.
7 When you finish capturing scenes, select
“Finish” and press ENTER.
Playing a Playlist title
1 Press TITLE LIST.
2 Press ORIGINAL/PLAYLIST to switch to the
“Playlist” Title List.
3 Select a Playlist title, and press ENTER.
The sub-menu appears.
4 Select “Play,” and press ENTER.
z Hint
When a Playlist title is created, the start and end points
will become chapter marks, and each scene will become
a chapter.
Notes
•The picture may pause when an edited scene is played.
•The start and end points in a title may be different from
what you have set.
10:10 AM
Create Playlist
Edit Playlist
Edit
Setup
Disc Setting
Edit
Title List
Timer
DV/D8 Dubbing
Create Playlist
10:10 AM
Scene No.01
End 00:00:00
Start 00:00:00
T
Start
End
Make
Finish
00:00:07
---/--/---- --:--
Playlist No. 01
10:10 AM
Scene No.01
T
Finish
00:00:10
Create Playlist
Playlist No. 01
End 00:00:00
Start 00:00:10
Start
End
Make
---/--/---- --:--
 Loading...