SELP1650 (E 3.5-5.6/PZ 16-50 OSS) (E PZ 16-50mm F3.5-5.6 OSS)
2-4
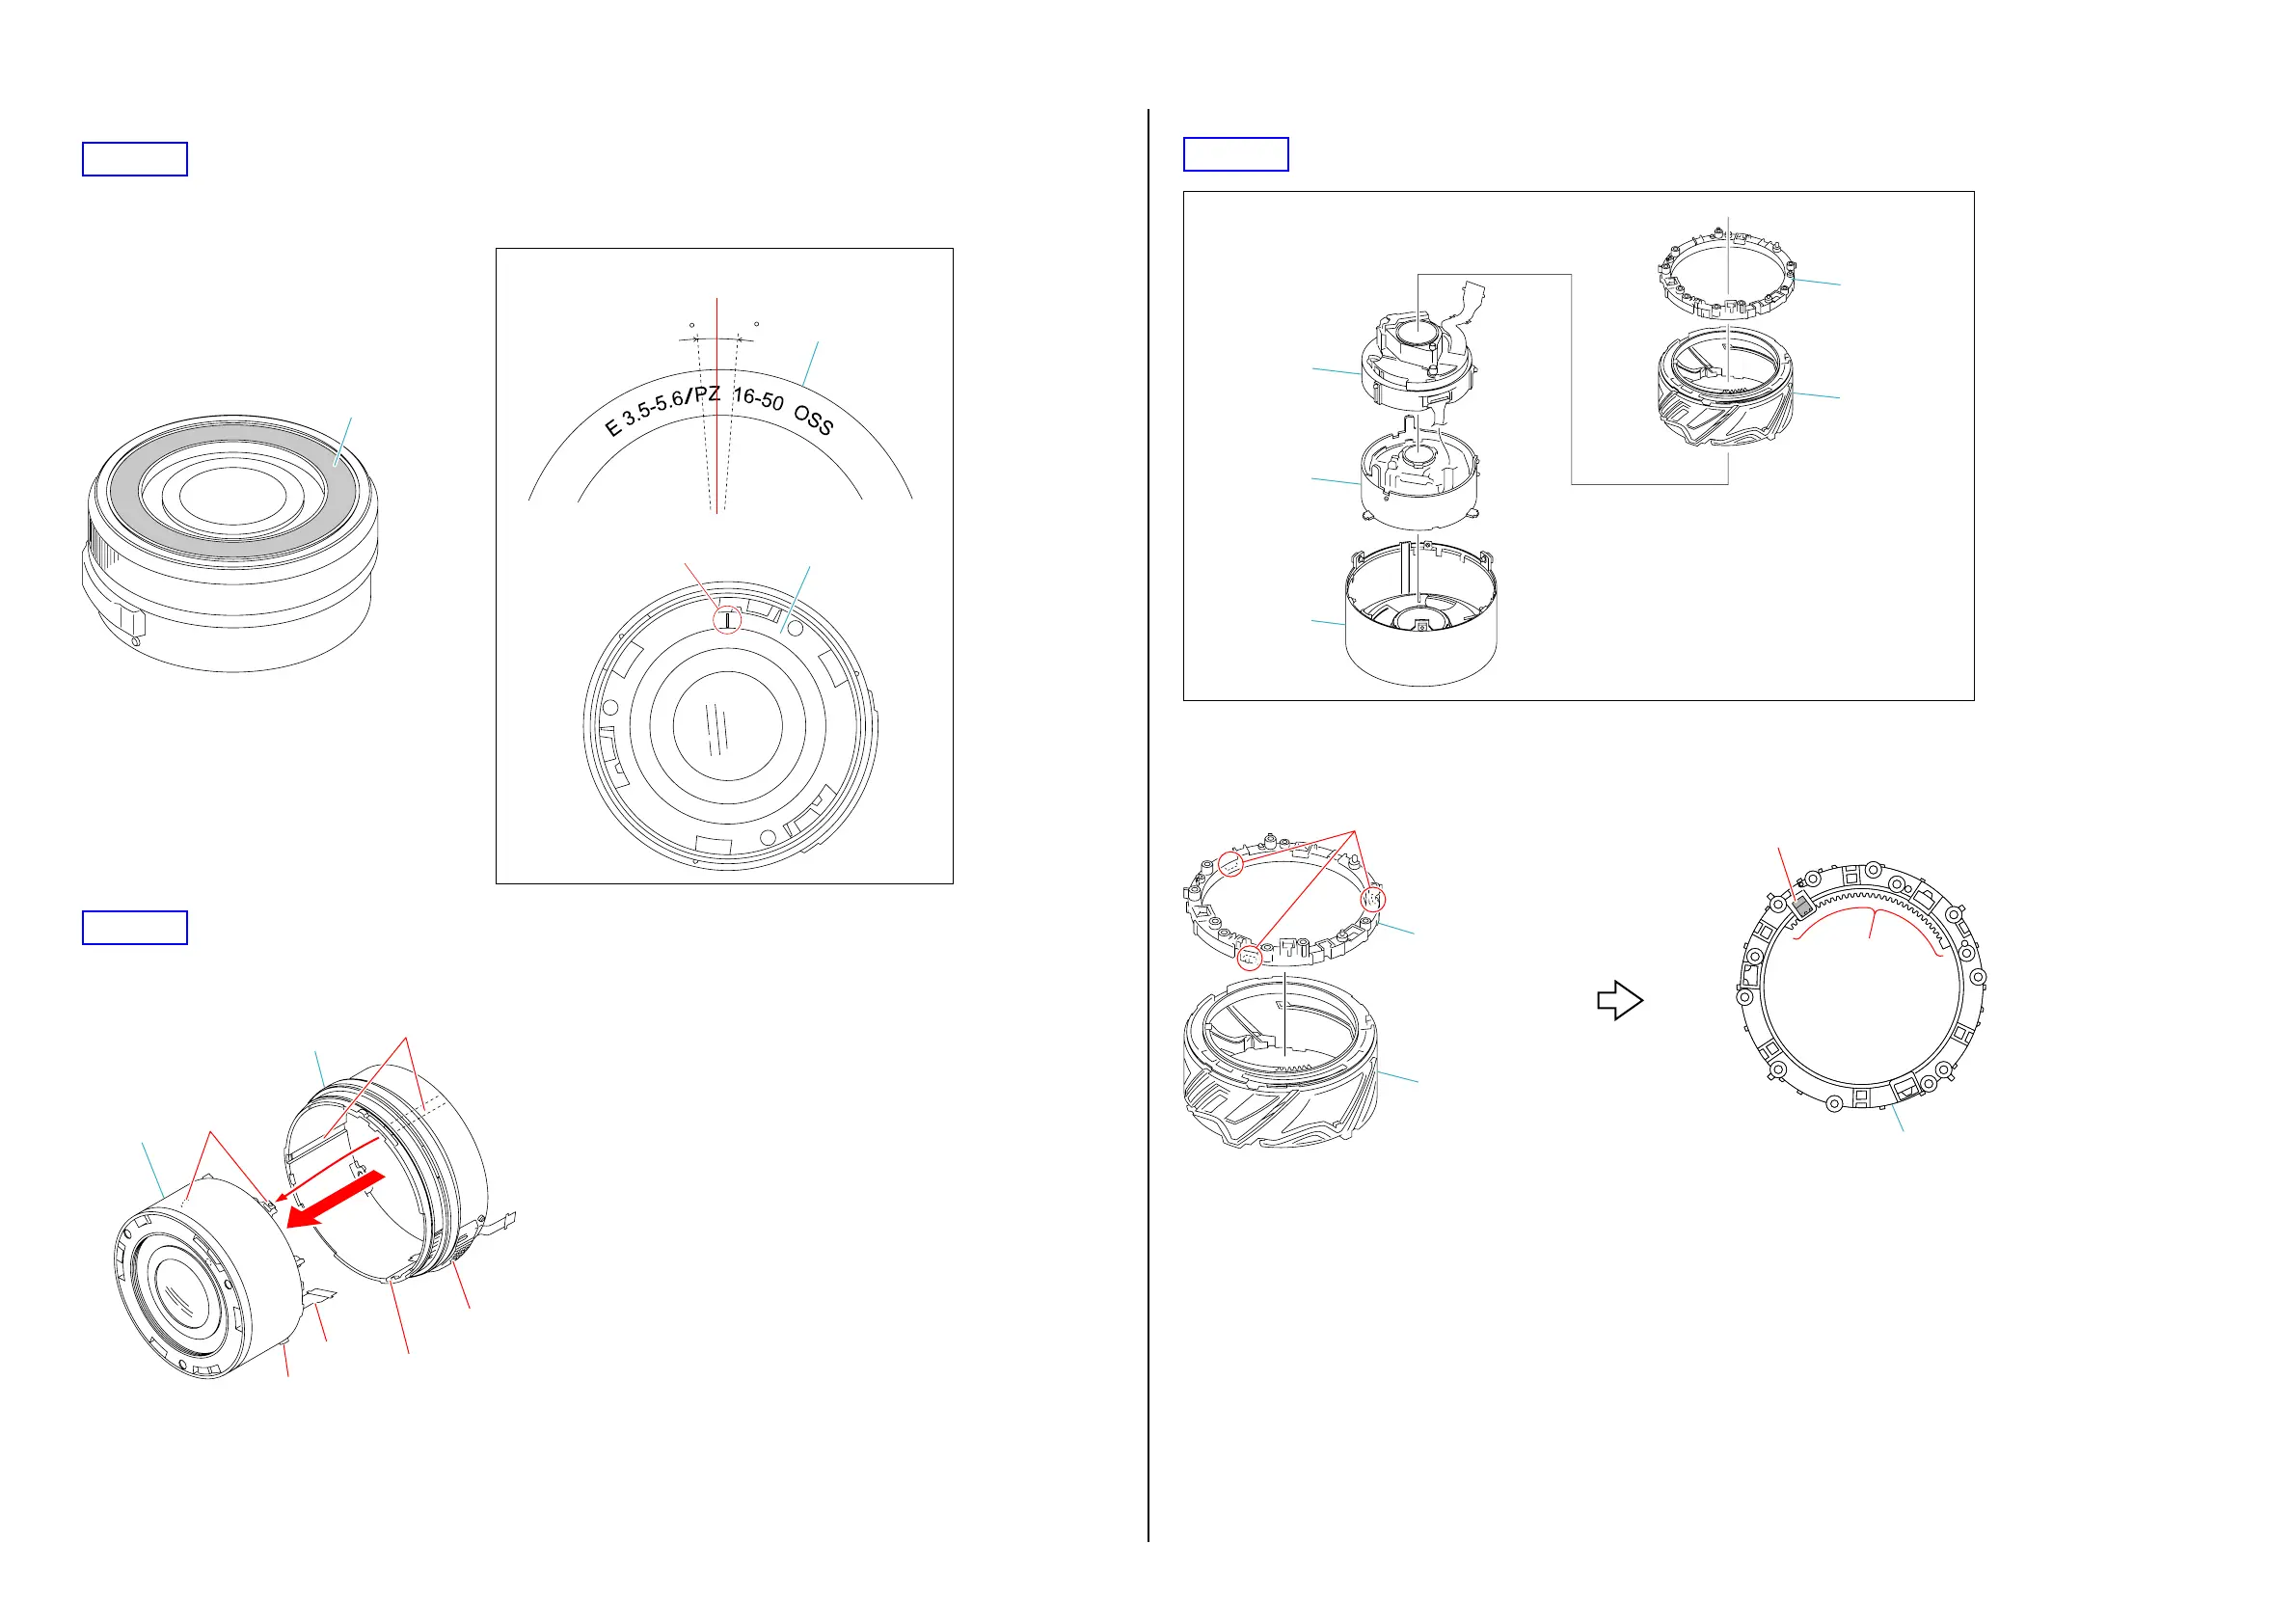
HELP03
Affix the front plate, aligning the reference (standard position) for affixing of the front plate with the reference (standard position) for affixing of the
1st moving frame.
3
1st Front Plate
Standard Position
3
Standard Position
1st Front Plate
1st Moving Frame
HELP04
Align the Switch Assy of the Outer Barrel Assy with the flexible board, and then install the Outer Barrel Assy to the Optical Unit from the mounting
side while inserting the three projections of the 1st Lens Assy into the inner grooves of the Outer Barrel Assy.
Outer Barrel Assy
Flexible board
Grooves
Groove
Projections
Projection
Optical Unit
Switch Assy
Ver. 1.2 2013.04
HELP05
Fixed Ring
1st Lens Assy
2nd Lens Assy
3rd Lens Assy
Optical Unit
Zoom Cam Tube
1. Attach the Fixed Ring to the Zoom Cam Tube and turn the Fixed Ring until the hole for the zoom reset PI and the gear come to the positions shown
below.
Note: Confirm that the bayonets of the Fixed Ring are engaged.
Bayonets
Fixed Ring
Fixed Ring
Gear
Hole for the zoom reset PI
Zoom Cam Tube
 Loading...