5-13
3-7.CAPSTAN MOTOR
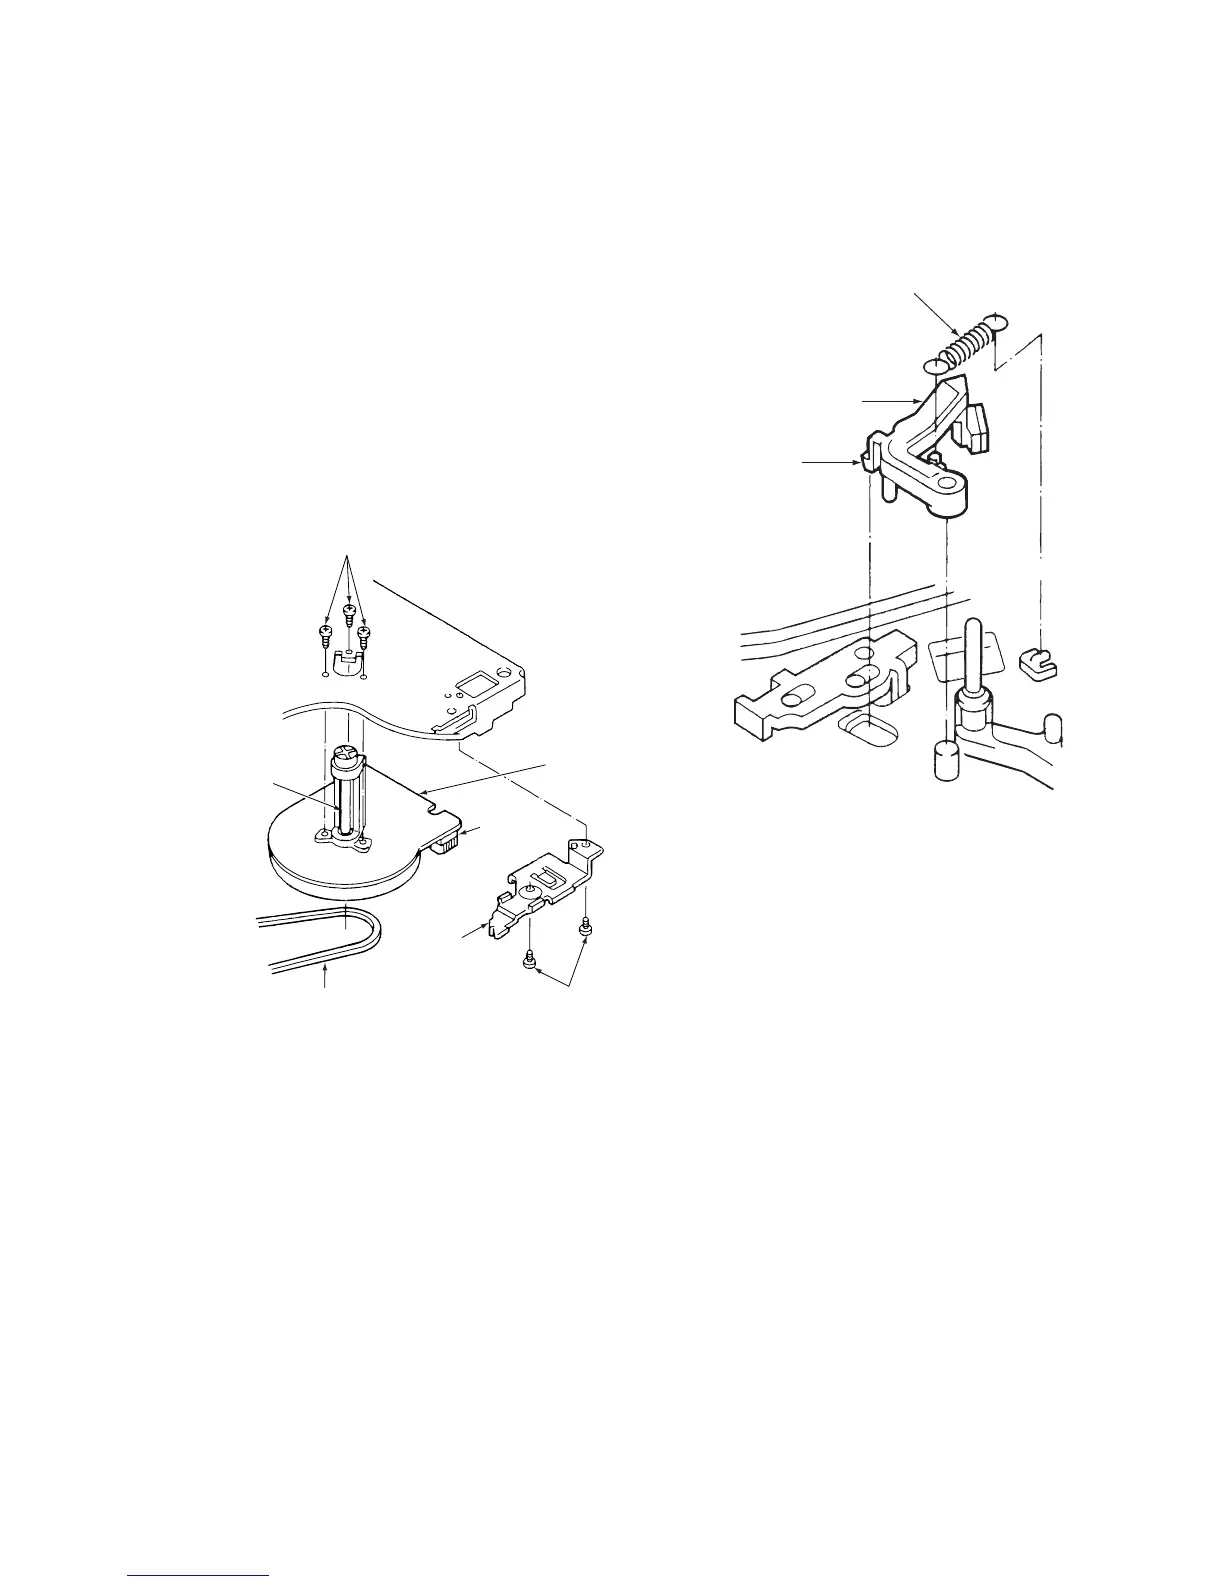
3-7-1. CAPSTAN MOTOR (See Fig.3-7-1)
1) Refer to section 3-2. then remove the mechanism unit.
2) Remove the two screws 2, then remove the harness
mounting 1.
3) Remove the reel belt 3.
4) Remove the three screws 5 and the capstan motor 6.
ASSEMBLY NOTES:
1. Check that connector 4 is inserted in the CP-1 PWB
assembly.
2. When fitting the thre screws 5, use the torque gauge
screwdriver (J-6082-047-A). Give the screws a tighten-
ing torque of 3.5 kg/cm.
3. After assembly, clean the capstan shaft with a soft cloth
or chamois.
5 Screws
6 Capstan
motor
4
Connector
1 Harness
mounting
2 Screws3 Reel belt
Capstan shaft
Fig. 3-7-1
3-7-2. CAPSTAN BRAKE ASSEMBLY
(See Fig. 3-7-2)
1) Remove the spring 1.
2) Remove the clamp 2, then remove the capstan brake
assembly 3.
1 Spring
3 Capstan brake
assembly
2 Clamp
Fig. 3-7-2



 To Next Page