5-29
E
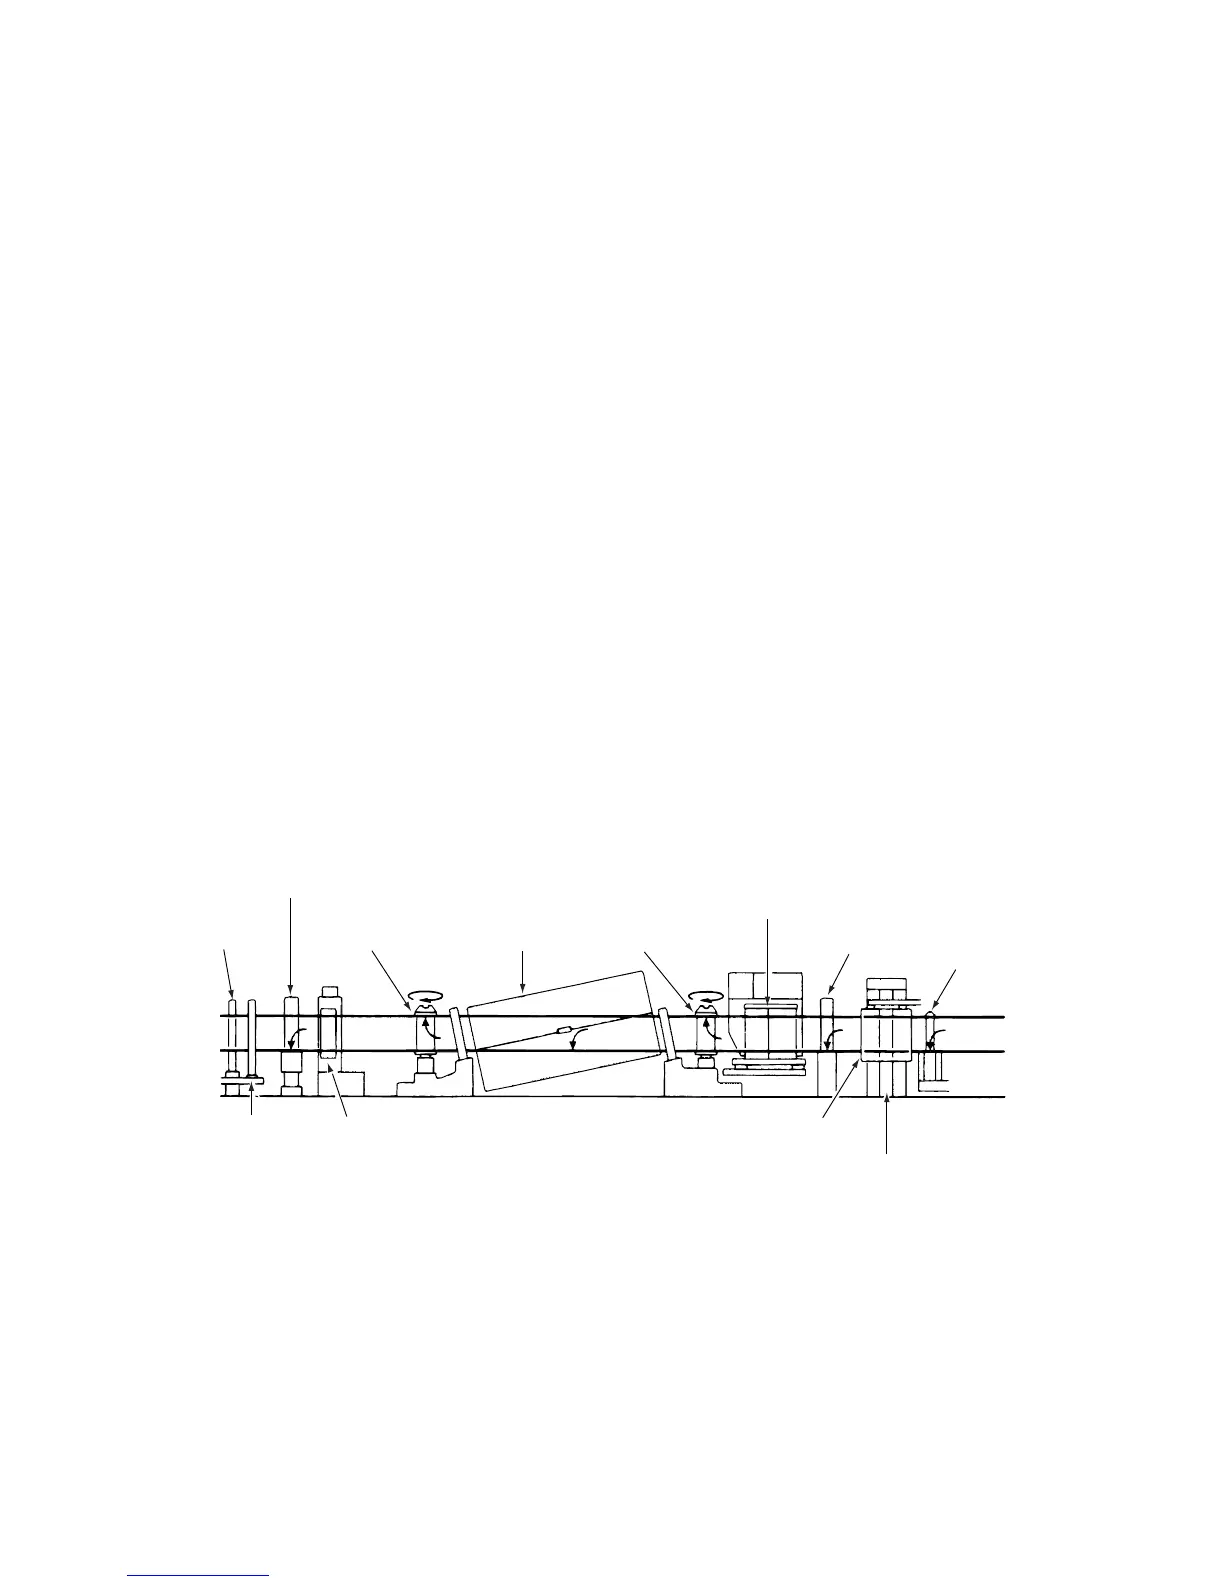
Fig. 4-3-7
4-3-5. CHECKING AFTER ADJUSTMENT
1) Play the alignment tape (NTSC: KRV-52NE, PAL: KRV-
52PL) and check that the envelope waveform is
activated immediately and that there are no fluctuations
in the envelope waveform or the audio output wave-
form.
2) Load a cassette tape (NTSC:T-120, PAL: E-180) and
use it to record and replay. Check that the envelope
waveform is activated immediately and that there are
no fluctuations in the envelope waveform or the audio
output waveform. (When recording on the tape, input
1kHz to the audio input terminal. Use a scratch-free
cassette tape (NTSC: T-120, PAL: E-180).) Check that
at the tracking centre, the front half down and back half
down are not more than 20% of the value at the point
where the envelope waveform amplitude is at its
maximum.
3) Check that the envelope waveform is activated immedi-
ately when you switch from PLAY to R-SEARCH or
from R-SEARCH to PLAY. Check that there is no slack
in the tape next to the pinch roller.
4) Check that the envelope waveform is activated immedi-
ately when you switch to PLAY from FF, REW, F-
SEARCH, R-SEARCH or STOP mode. Check that there
is no slack in the tape next to the pinch roller.
5) Check that the tape is not curling or riding up on the
upper or lower flanges of the tape guides in PLAY, FF,
REW, F-SEARCH or R-SEARCH modes.
6) Check that in PLAY mode. the tape runs as shown in
Fig. 4-3-7.
7) Load a tape (NTSC:T-160, PAL: E-240) and play it
back. carry out the checks described in steps 3) to 5)
above.
No. 0 tape
guide
S tape guide
S guide
roller
Cylinder
(drum) T guide roller
Audio R/P head assembly
(ACE head)
T tape guide
Loading guide
post
BT post
Full erase
head
Pinch roller
Capstan shaft


 To Next Page