2-6
FWD-50PX2
2-5. Flash Down-loading Method
Preparation
1. Connect this unit with PC using the RS-232C cable.
2. Disconnect the AC power cord of this unit.
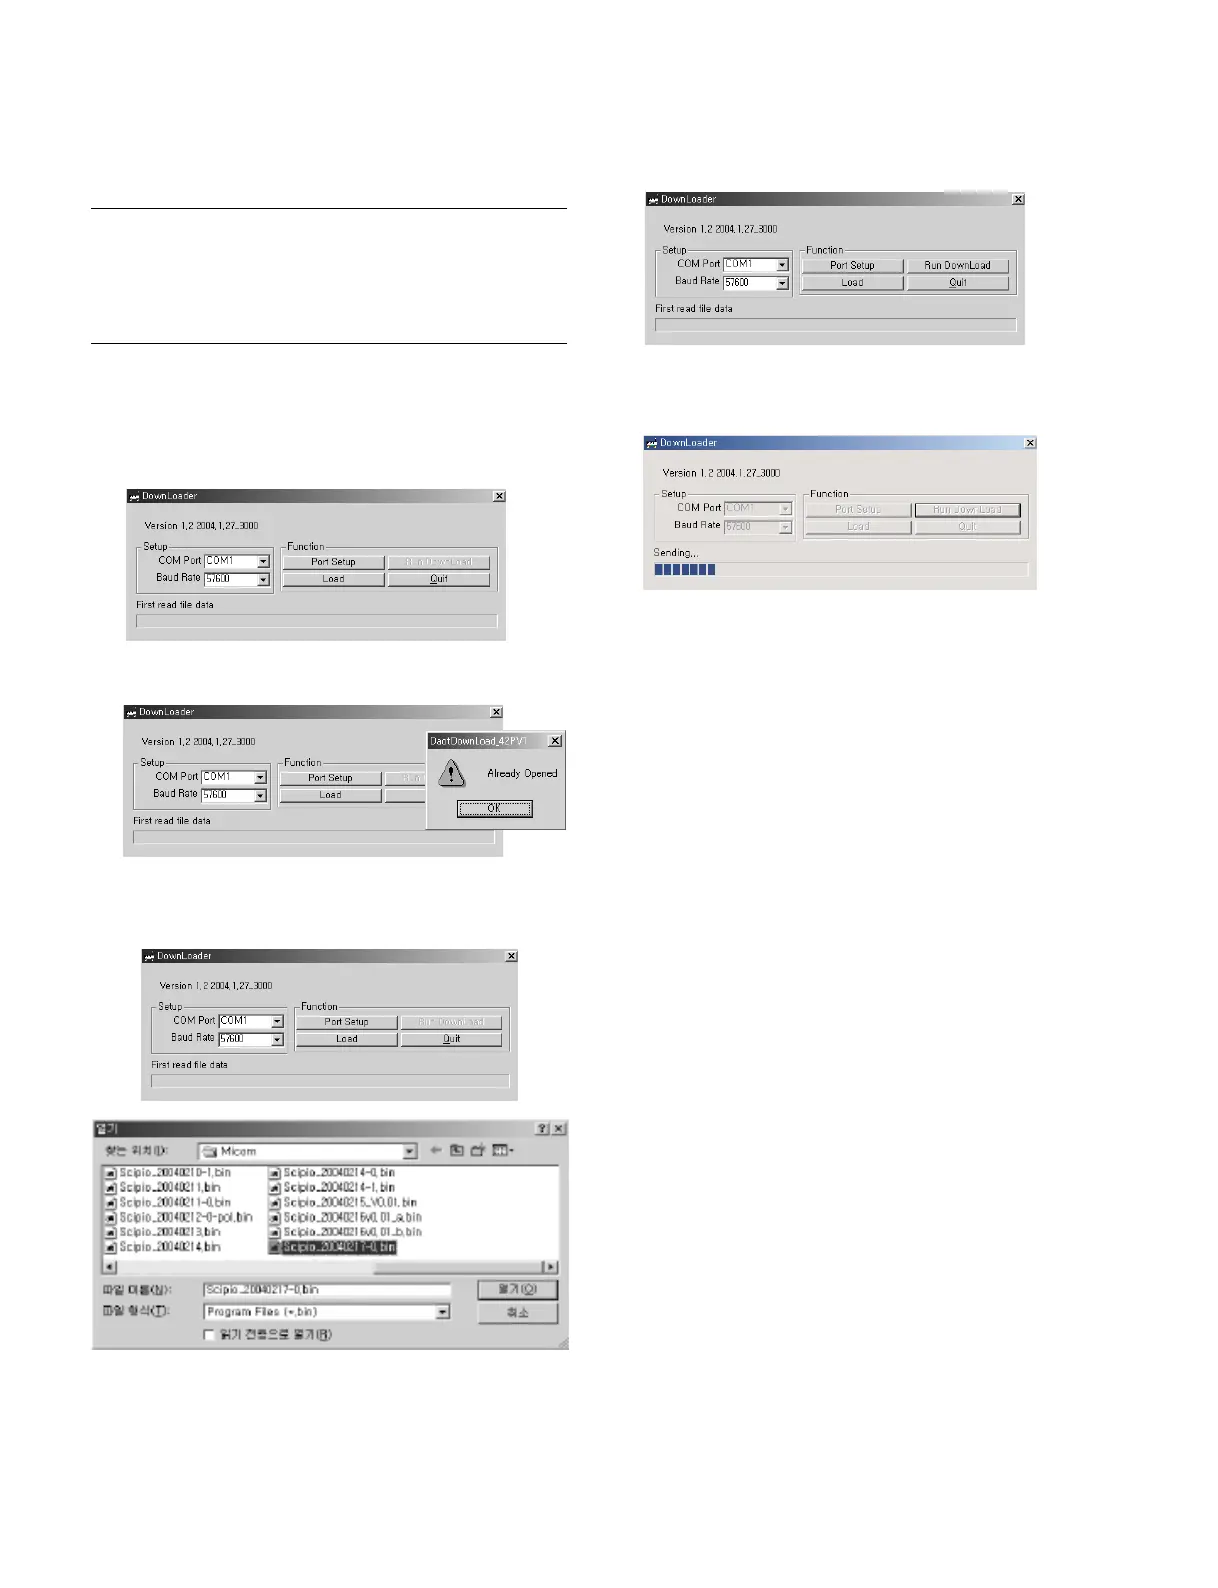
Download
1. Start the file, “FWD50PX2_Down.exe”.
2. Select “COM1” as COM Port and “57600” as baud
rate as below picture.
3. Click the [Port|Setup], then click the [OK] button.
4. Click the [Load] button, then select the file from the
designated folder.
5. Click the [Run|DownLoad] button.
Download is started. (Down Load Time : about 5
minutes)
If down load is finished, the monitor will be re-booted
automatically.
m
. Do not remove AC cord from PC and monitor while
down load operation is being proceeded.
. After processing micom update with ISP program,
please execute following in order for the unit to
maintain “Shipping default condition”.
* Execute EXCEPT WB in INITIALIZATION.
* Execute COPY WB DATA in WB DEFAULT
DATA.
* Execute INIT GOODS in FOR TEST.
2-6. DEVICEINFO Section
1. Connect PC to PDP using the serial cable.
2. Set the port.
(1) Select the model. (FWD-50PX2)
(2) Select the port. (COM1, COM2, COM3 or COM4)
n
The initial setting is COM1.
3. Click the [Read] button in “Model Name”.
(Data reading)
If the data reading is completed successfully, the
setting in the port that has been selected in step 2 can
be performed. If not, return to step 2 and select another
port. Then, perform the data reading again.
4. Data writing
Modify: Model name, serial number, operating time
Write: Model name, serial number, operating time
 Loading...