EQUINOX INTEGRATION GUIDE
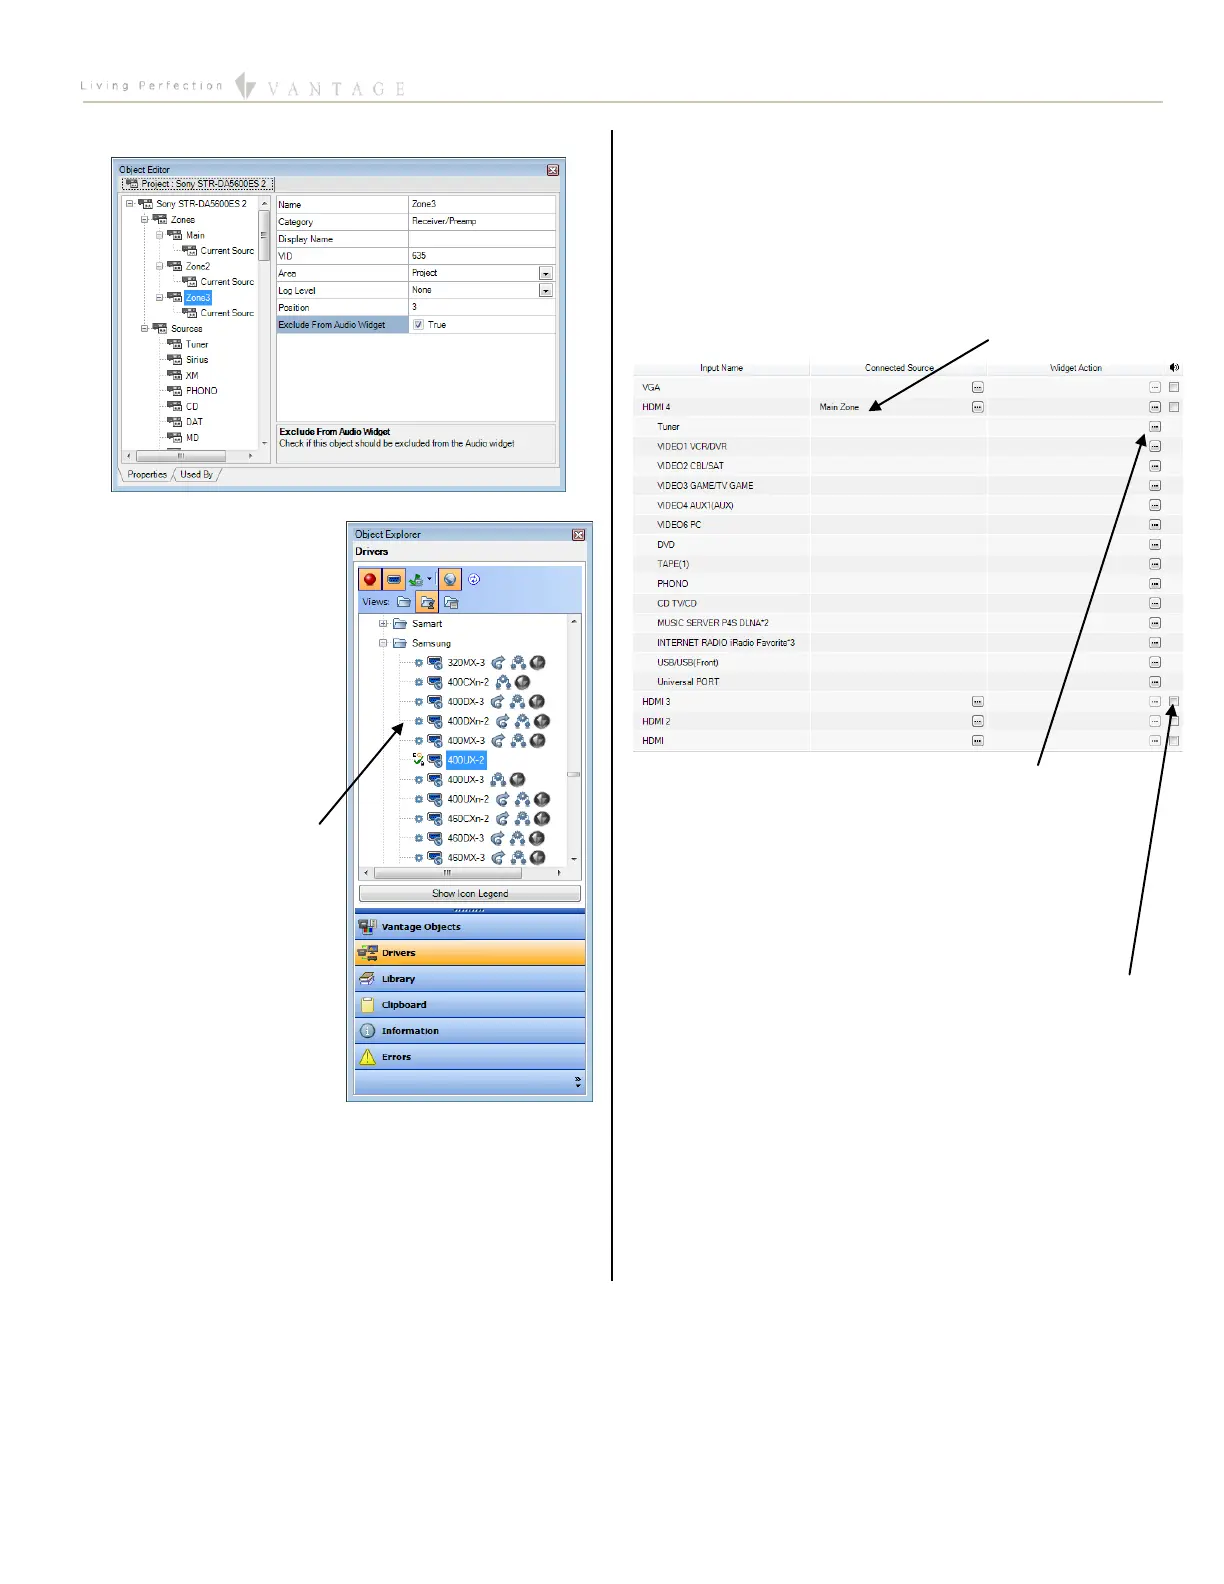
6. Exclude From Audio Widget box.
Give every zone that will be used a user-friendly Display
Name and assign it to an
Area.
Give every source that will
be used a user-friendly
Display Name, assign it to
an area, and assign it a
Source Device (for sources
that are not onboard the
Sony).
7. Add a Display – In the
Object Explorer, select
Drivers, find an Equinox
Certified TV/Display (such
as the Samsung 400UX),
and drag or double click it
to add to the project.
8. Name the Display – give
the display a user-friendly
Name. If an alternative or
shorter Display Name is desired, assign that as well.
9. Configure the Display –
a. In the Object Editor, assign the Port to either a
serial connection (RS-232) or to a TCP Client Port
if no serial connection is available.
b. Assign the display to an area.
c. Click on the Input Configuration tab which is
located at the bottom of the Object Editor.
d. Next, determine what type of cable will connect
the output of the Sony Zone that is assigned to
that area and the input of the display and assign
that zone to that output in the Connected
Source column.
e. A task may be specified in the Widget Action
column which will activate whenever the source
in the corresponding row is selected in the video
widget. An example of the use of this feature
would be for changing the Listening Mode so
that it is better suited for a particular source.
f. Finally, if a particular zone will use its
TV/display’s speakers instead of speakers
coming from the Sony STR, then the box in the
rightmost column should be checked. When it is
checked, the EQ73 will control the volume of
the TV instead of the volume of the Sony Zone.
TIP: The Name (or the Display Name, if given) will appear in
the audio and video widgets.