14
STR-DG710
KEY CHECK MODE
* Button check
* Procedure:
While depressing the [SPEAKERS $OFF/A/B%] and the [2CH] but-
tons simultaneously, press the
?/1 button to turn on the main
power.
Either the message “REST 14” appears.
Every pressing of any button other than the
?/1 counts down
the buttons. The buttons which are already counted once are not
counted again. When all buttons are pressed “REST 00” appears.
SWAP ALL MODE
* The signal will be swap to all channel so that all speaker will
have sound output.
* Procedure:
1. While depressing the [SPEAKERS $OFF/A/B%] and the [A.F.D.]
buttons simultaneously, press the power ?/1 button to turn on
the main power.
2. “SWAP” appears. (No change while displayed.)
SHIPMENT MODE
All preset contents are reset to the default setting.
* Procedure:
1. While depressing the [SPEAKERS $OFF/A/B%] and the [MUSIC]
buttons simultaneously, press the power ?/1 button to turn on
the main power.
2. “CLEARED” appears and switch off the set.
DCAC FACTORY TEST MODE
DCAC Factory Test mode have two stages:
1. DCAC DSP Data Line Checking
2. DCAC board Checking
Factory Test System Setup
1. When power off:
Press the three buttons [MEMORY/ENTER] + [MOVIE] +
?/1 .
“DCAC[]FTM” appears.
Afterward, press the [TUNING MODE] to start DCAC factory
test mode.
SECTION 3
TEST MODE
AM CHANNEL STEP 9 kHz/10 kHz SELECTION
MODE
* Either the 9 kHz step or 10 kHz step can be selected for the AM
channel step.
* Procedure:
Turn the [INPUT SELECTOR] control to set AM and press the
?/1 button to turn off the main power.
While depressing the [TUNING MODE] button, press the ?/1
button to turn on the main power.
Either the message “9k STEP” or “10k STEP” appears for a
moment and select the desired step.
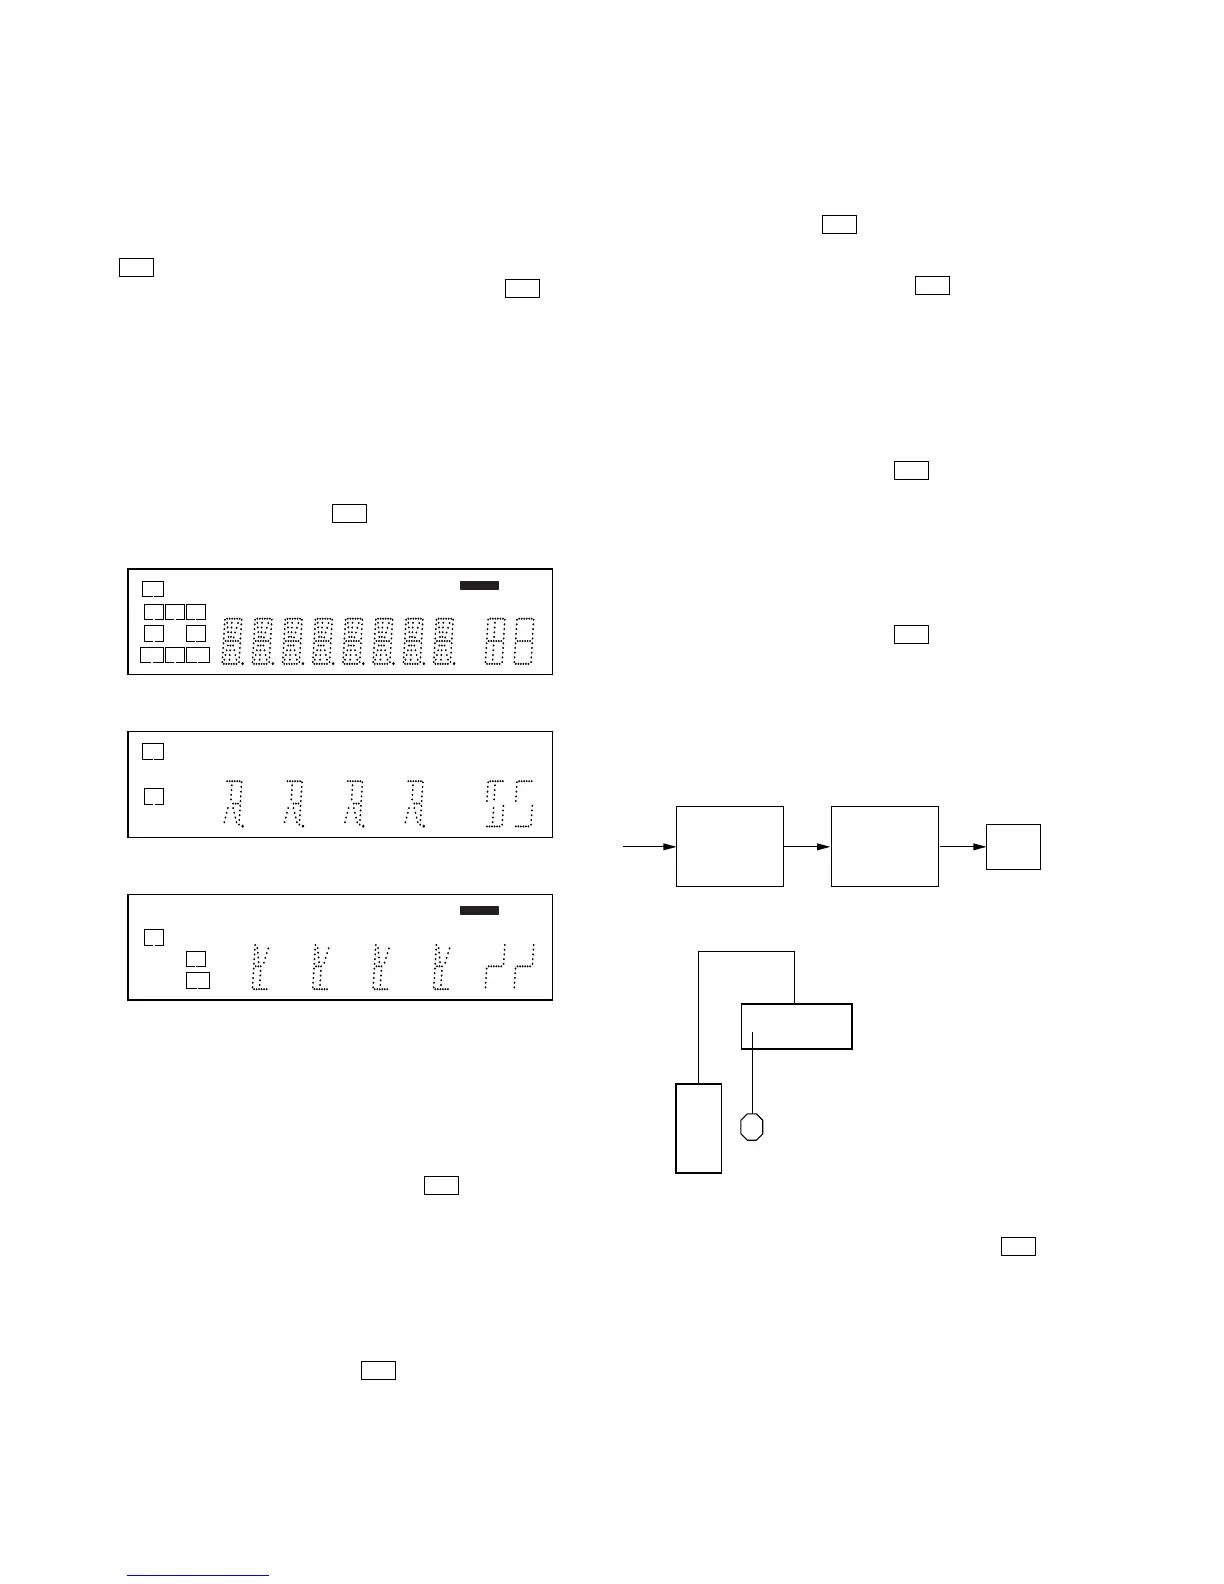
VACUUM FLUORESCENT DISPLAY TEST MODE
* All fluorescent segments are tested.
When this test is activated, all segments light on at the same
time, then each segment lights on one after another.
* Procedure:
While depressing the [TUNING MODE] and the [DISPLAY] but-
tons simultaneously, press the ?/1 button to turn on the main
power.
1. ALL segments light on.
2. Turn the [INPUT SELECTOR] control, confirm display.
3. Turn the [INPUT SELECTOR] control, confirm display.
4. Turn the [INPUT SELECTOR] control, all segments light off.
SOUND FIELD CLEAR MODE
* The preset sound field is cleared when this mode is activated.
Use this mode before returning the product to clients upon
completion of repair.
* Procedure:
While depressing the [2CH] button, press the ?/1 button to turn
on the main power.
The message “S.F. CLR.” appears for a moment and initializa-
tion is performed.
SOFTWARE VERSION DISPLAY MODE
* The software version is displayed.
* Procedure:
While depressing the [SPEAKERS $OFF/A/B%] and the [DISPLAY]
buttons simultaneously, press the ?/1 button to turn on the
main power.
The model name, destination and the software version are dis-
played for a moment.
L
SW
CR
SL S SR
SBL SB SBR
LFE
SP A
NEO:6COAXHDMI
DEX DTS -ESxIIPL RDS STCAT96/24
MONOD.RANGESAT
D
D
D
D
PL OPT
D
D
dB
Hzk
ft.m
MHz
MEMORY
SP B
LFE
NEO:6COAX
x RDS
MONOD.RANGE
k
m
MHz
SP B
SW
C
SL SR
SBL SB SBR
D DTS STCAT
D
D
PL
D
D
dB
Hz
ft.
MEMORY
DSP Data Line
Check
Start Pass Pass
Auto Cal Mic
Check
END