1-10
BVM-D9H1U/D9H5U/D9H1E/D9H5E/D9H1A/D9H5A
14
(E)
Chapter 1 Overview
6 Input option slots (three slots)
The monitor may be fitted with optional input adaptors
up to three.
The BKM-129X is installed to the monitor at the
factory.
Notes
• The BKM-142HD uses two input option slots.
• Each adaptor can also be installed into SLOT 1.
Install any adaptor to SLOT 1.
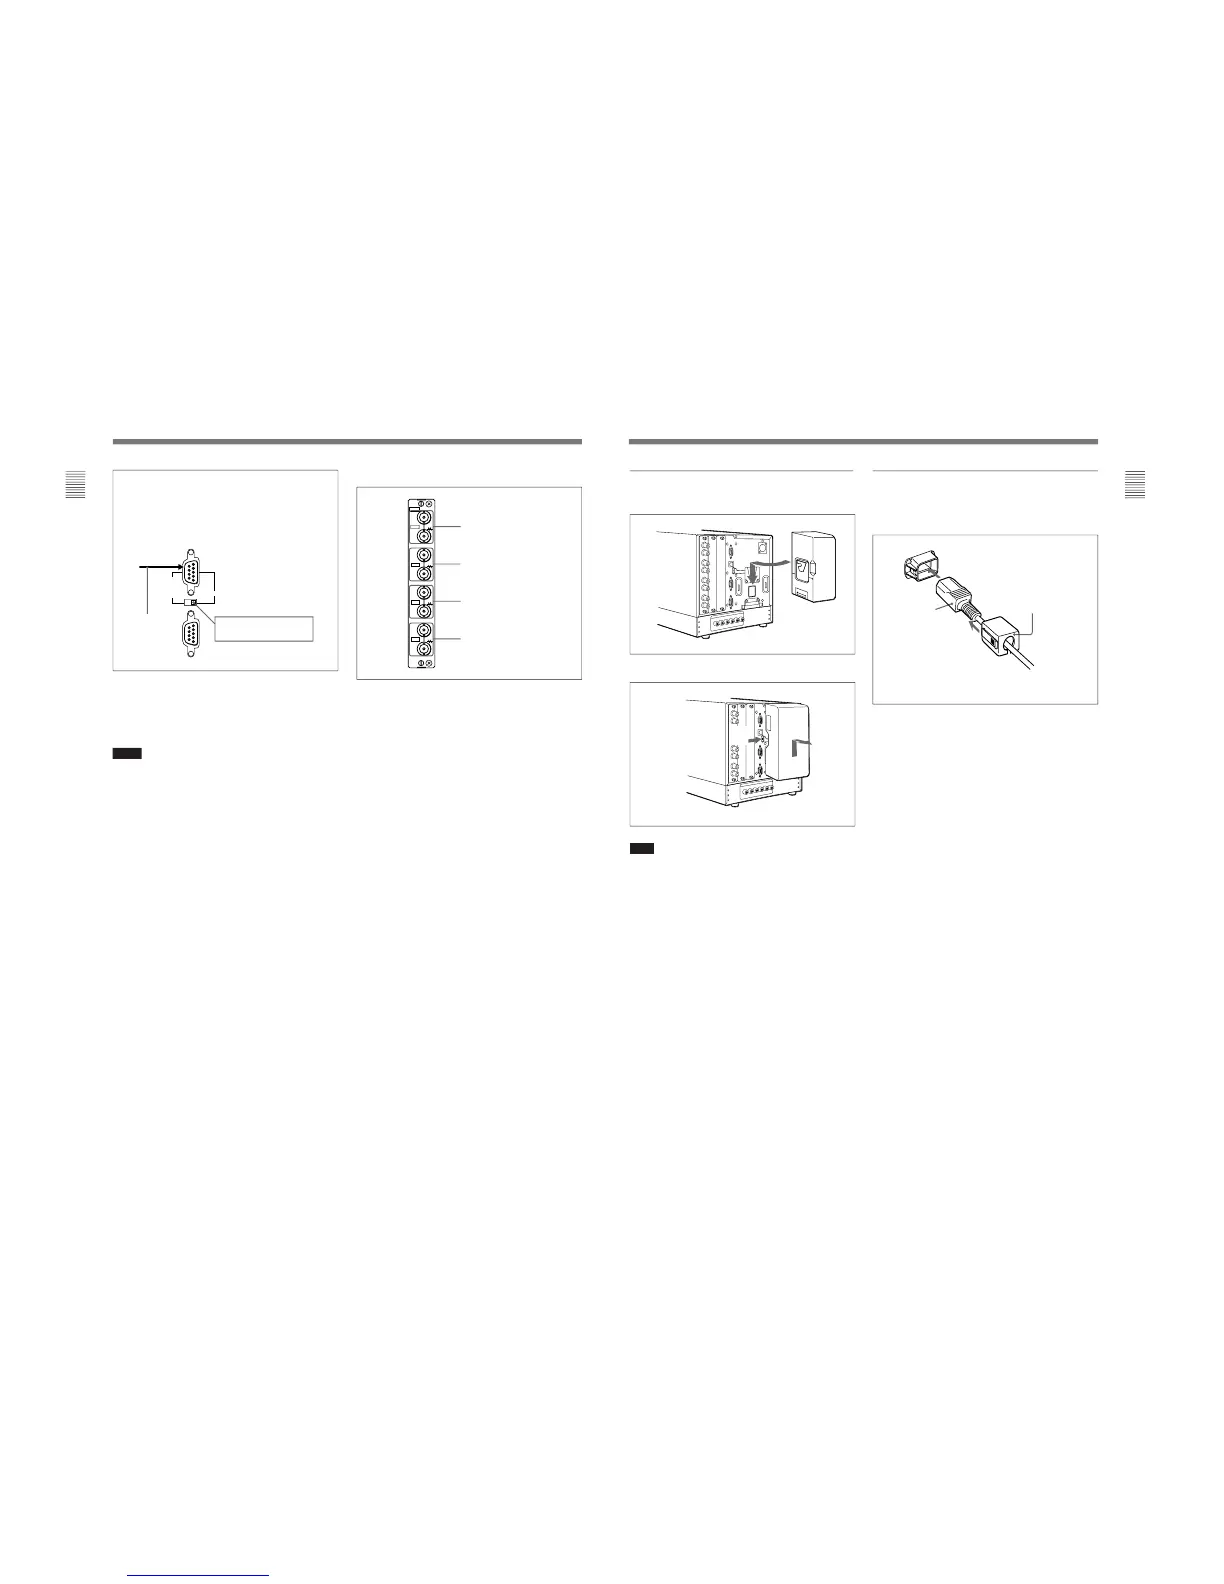
Location and Function of Parts
For connecting the BKM-10R Monitor
Control Unit
Connect the monitor and control unit using a cable
with D-sub 9-pin plugs such as an RCC-5G (not
supplied) as follows:
BVM-D9H1U/D9H1E/D9H1A:
Set to CTRL UNIT.
Cable with D-sub
9-pin plugs
(not supplied)
Y/G connectors (BNC)
P
B
/B connectors (BNC)
P
R
/R connectors (BNC)
SYNC connectors (BNC)
129X
IN
OUT
IN
OUT
IN
OUT
IN
OUT
ANALOG
Y/G
P
B
/B
P
R
/R
SYNC
7 Analog input/output connectors (BKM-129X)
RGB signals or component signals (Y/P
B/PR) can be
fed in the IN connectors. The type of signal applied to
each connector is set with the INPUT CONFIG menu.
The OUT connectors are used for loop-through output
of the input signal.
For information about the INPUT CONFIG menu, see “ [C]
Setting the Input Configuration — INPUT CONFIG Menu”
on page 35(E).
8 AUDIO IN/OUT (input/output) jacks (BVM-
D9H5U/D9H5E/D9H5A only)
Connects to the audio output jacks of the VCR or
microphone amplifier. The monitor is equipped with
three input and output jacks. You can obtain the loop-
through output from the OUT jacks.
15
(E)
Chapter 1 Overview
Connecting the AC power cord
Attach the AC adaptor to the monitor, and then
connect the supplied AC power cord.
Attach the AC plug holder to the AC power cord, and
connect it to the AC IN connector so that the cord does not
come loose.
AC plug holder (supplied)
AC power cord
(supplied)
Attaching the AC adaptor or battery
Attaching
Removing the AC adaptor or battery
Note
Use the supplied AC adaptor for the BVM-D9H1U/
D9H1E/D9H1A/D9H5U/D9H5E/D9H5A models
only. It is dangerous to use the AC adaptor for models
other than these.
21