EasyManua.ls Logo

Sony Trinitron PVM-1453MD User Manual

Sony Trinitron PVM-1453MD
102 pages
To Next Page IconTo Next Page
Page #1 background imageLoading...
Page #1 background image
PVM· 1353MD/1453MD
SERVICE MANUAL
CJ
/
/
__ ,
US Model
Canadian Model
PVM-1353MD
Chassis No. SCC-H31 B-A
AEPModel
PVM-1453MO
Chassis No. SCC-H29C-A
SPECIFICATIONS (PVM-1353MD)
Video signal
Color system
Resolution
Aperture correction
Frequency response
Synchronization
NTSC. PAL
600 TV lines
0 dB-+6.0 dB
LINE 9.0 MHz (-3 dB)
RGB 10.0 MHz (-3 dB)
AFC time constant 1.0 msec.
Picture performance
Overscan
Normal scan
Underscan
Linearity
Convergence
20% overscan of CRT effective
screen area
7% overscan of CRT effective screen
area
5% underscan of CRT effective
screen area
Horizontal: Less than 4% (typical)
Vertical: Less than 4% (typical)
Central area
0.6 mm (typical)
Peripheral area
0.8 mm (typical)
Raster size stability
H 1.0%, V 1.5%
High voltage regulation
CRT
Color temperature
Inputs
Y/CIN
VIDEO IN
3.5'k
SMPTE-C phosphor
6500K/5600K/USER (3200K
-
10000K, factory setting is 6500K)
4-pin mini DIN connector
See the pin assignmem on the
page 2.
BNC connector I Vp-p ±6 dB, sync
negative
AUDIO IN phono jack, -5 dBu, more than 47k
ohms
R/R-Y IN, G/Y IN, B/B-Y IN
R, G, B channels
Sync on green
BNC connector
0.7 Vp-p ±6 dB
1.0 Vp-p Sync negative, 75 ohms
terminated
- Continued on next page:-
TRINITRON® COLOR VIDEO MONITOR
MICROFILM
SONY:

Table of Contents

Question and Answer IconNeed help?

Do you have a question about the Sony Trinitron PVM-1453MD and is the answer not in the manual?

Sony Trinitron PVM-1453MD Specifications

General IconGeneral
Screen Size14 inches
Display TypeCRT
Aspect Ratio4:3
Input ConnectorsBNC, Composite, S-Video
Power Consumption65W

Summary

Pin Assignments and General Information

Connector Pin Assignments

Details pin configurations for key interface connectors.

Safety Check-out Procedures

Performing Safety Checks

Outlines essential safety checks before releasing the unit.

AC Leakage Test Procedure

Details methods for measuring AC leakage current.

Location and Function of Parts and Controls

Front Panel Controls Overview

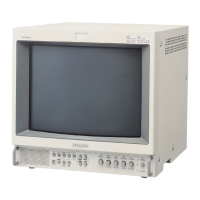
Identifies and describes all front panel buttons and controls.

Rear Panel Connectors Overview

Identifies and describes all rear panel input/output connectors.

Using On-Screen Menus

Menu Configuration Flowchart

Visual guide to navigating the monitor's on-screen menus.

Power Sources and Cover Installation

AC Power Connection Procedure

Instructions for connecting the AC power cord securely.

SECTION 3 SET-UP ADJUSTMENTS

Service Mode Preparations and Operations

Guide to entering, navigating, and performing adjustments in service mode.

SECTION 5 CIRCUIT ADJUSTMENTS

A Board Adjustment Procedures

Detailed instructions for adjusting various circuits on the A Board.

Set-up Adjustments: Preparations and Initial Alignment

Signal Preparation and Model Data

Covers signal levels, model data writing, and initial setup checks.

Landing Adjustment Procedure

Steps for adjusting the picture tube landing position.

Set-up Adjustments: Picture Alignment

Convergence Adjustment Procedure

Guide for aligning R, G, B dots for proper convergence.

Set-up Adjustments: Deflection Yoke and Color

SECTION 4 SAFETY RELATED ADJUSTMENT

Voltage Confirmations for Safety

Verifies B+ voltage and hold-down circuit voltage for safe operation.

SECTION 5 CIRCUIT ADJUSTMENTS (Continued)

A Board Adjustment Details

Details component layouts and specific adjustment points on the A Board.

Deflection System Adjustment

Horizontal Oscillation Frequency Adjustment

Adjusting the horizontal frequency for correct scan lines.
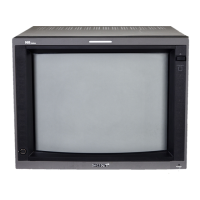
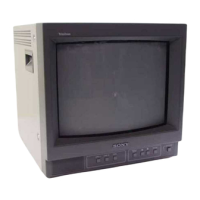
Horizontal Deflection Section Adjustment

Horizontal Deflection Section Adjustment (Continued)

Signal System Adjustment

Signal System Adjustment (Continued)

Signal System and G Board Adjustments

SECTION 6 DIAGRAMS

BLOCK DIAGRAMS (2)

CIRCUIT BOARDS LOCATION AND DIAGRAMS

Related product manuals