This document is a service manual for the Sony WM-9 Walkman, a portable stereo cassette player. It provides detailed information for maintenance, repair, and adjustment of the device.
Function Description
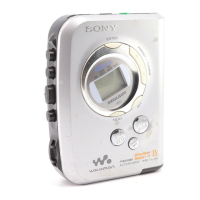
The Sony WM-9 is a 4-track, 2-channel stereo cassette player designed for portable audio playback. It supports standard compact cassettes and offers features typical of Walkman devices, such as headphone output for personal listening. The device is designed for ease of use and portability, allowing users to enjoy their music on the go.
Important Technical Specifications
Tape Track: 4-track, 2-channel stereo
Fast Winding Time: Approximately 2 minutes, 30 seconds with a Sony cassette C-60.
Frequency Response:
- 40 - 15,000 Hz (with the TAPE selector set to METAL)
- 40 - 10,000 Hz (with the TAPE selector set to NORM)
Power Output:
- 35 mW x 2 (min.)
- 25 mW x 2 (at 10% harmonic distortion) at DC operation.
Power Requirements: 6 V DC, four IEC designation R6 batteries (size AA).
Battery Life (continuous playback hours):
- Approximately 5 hours with supplied Sony SUM-3 (NS) New Super batteries.
- Approximately 10 hours with Sony Everready AM3 alkaline batteries.
- For maximum performance, the manual recommends the use of alkaline batteries.
Dimensions: Approximately 91 x 142 x 36.5 mm (W/H/D) or 3 5/8 x 5 5/8 x 1 1/2 inches. This includes projecting parts and controls.
Weight: Approximately 370 g (13.1 oz) including batteries, but not including other accessories.
Usage Features
The WM-9 is designed for straightforward operation. Users can insert a cassette tape and connect headphones for stereo audio playback. The device includes a "TAPE selector" to optimize playback for different tape types (METAL or NORM), ensuring better frequency response depending on the cassette used. The compact size and battery operation emphasize its portability, making it suitable for listening to music anywhere. The manual implies standard controls for playback, fast forward, and rewind, typical of cassette players of its era.
Maintenance Features
The service manual provides comprehensive instructions for maintaining and repairing the WM-9. Key maintenance features and procedures include:
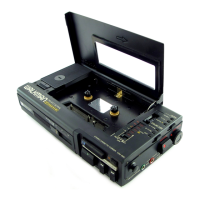
Disassembly: Detailed steps are provided for disassembling the cabinet (B) and battery case lid, as well as the main cabinet (A). This involves removing specific screws (PTT2.6 x 6, PTT2.6 x 3, P2.6 x 8) and carefully detaching components like the battery case lid and the cabinet itself, which involves releasing a spring mechanism.
Adjustments:
- Mechanical Adjustments:
- Head Height Adjustment: This involves preparing an adjustment cassette (C-120 with hatched portions) and using a screwdriver to adjust the playback head height to eliminate the dull and tape twist at portions.
- Pinch Roller Pressure Measurement: A spring gauge is used to measure the pinch roller pressure, which should be between 250-350 g (8.82-12.34 oz).
- Flywheel Thrust Play Adjustment: This involves turning a screw counterclockwise until the screw tip leaves the flywheel shaft, then gradually turning it clockwise until the motor current suddenly increases, and finally turning it counterclockwise about ¼ turn from the position obtained.
- Tape Tension Measurement: Specifications are provided for forward and back tension (1-4 g-cm) and torque (10-45 g-cm for forward, 10-30 g-cm for back).
- Electrical Adjustments:
- Tape Speed Adjustment: Setting involves VOX control (mechanical mid) and playback mode. A digital frequency counter is used to measure the frequency difference between the beginning and end of the tape, which should be within ±25 (50Hz).
- Playback Head Azimuth Adjustment: This procedure involves connecting a test tape (P-4-A200, 3kHz, 0dB) and headphones. An adjustment screw is used to achieve maximum output levels and ensure the L-CH and R-CH peaks are within ±1.5 dB. A phase check is performed using a test tape (P-4-L300, 315Hz, -10dB) and an oscilloscope to ensure correct phase alignment.
- Muting Level Adjustment: Setting involves a power supply voltage of -4.0 V DC and playback mode. A test tape (P-4-L300, 315Hz, 0dB) and headphones are used. The procedure involves confirming the signal output at headphones and, if necessary, connecting a resistor (R301 or R302) on the conductor side for lower level channel.
- Playback Level Adjustment: Setting involves VOX control (maximum) and playback mode. A test tape (P-4-L300, 315Hz, -10dB) and headphones are used. The procedure involves confirming the output level at headphones and, if necessary, connecting a resistor (R103 or R203) on the conductor side for lower level channel. The level difference between channels should be less than 3 dB.
Diagrams and Parts Lists:
- Diagrams: The manual includes detailed diagrams such as the Main Board diagram, Schematic Diagram, and Exploded Views and Parts List. These diagrams are crucial for identifying components, understanding circuit layouts, and reassembling the device correctly.
- Parts List: Comprehensive lists of general section parts, accessory & packing material, mechanism section parts, and electrical parts are provided with part numbers and descriptions. This allows technicians to order specific replacement parts.
- Semiconductor Lead Layouts: Diagrams for common semiconductors like 2SB1013, CX-887, and SLP-161B are included to aid in correct component placement and soldering.
Notes for Technicians:
- Color Coding: Color code of sleeving over the end of the jacket (WHT, RED) is specified.
- Parts Identification: Symbols are used to indicate parts extracted from the component side, parts extracted from the conductor side, and parts mounted on the conductor side.
- Signal Paths: Different line styles are used to denote signal path, L-CH signal path, and R-CH signal path in the diagrams.
- Capacitors and Resistors: Notes specify that all capacitors are in µF unless otherwise noted, pF, µµF, or F. All resistors are in ohms unless otherwise noted.
- Voltage Readings: Voltages are DC with respect to ground unless otherwise noted, taken under no-signal conditions with a VOM (50 kΩ/V). Voltage variations may result due to normal production tolerances.
- Current Measurement: Total current is measured with no cassette installed.
- Interchangeability: Notes on standardization, parts with part numbers (e.g., 1-XXXX-XXX-XX or X-XXXX-XXX-XX) may be different from those used in the set. If there are two or more same circuits in a set, the parts for one circuit are indicated and typical circuit parts may be indicated and capacitors and resistors in other same circuits may be omitted.
Overall, the service manual provides a thorough guide for anyone involved in the repair or maintenance of the Sony WM-9 Walkman, ensuring that the device can be kept in optimal working condition.