Seaich Corporation, LLC. All rights reserved. www.seaich.com
|
Spacerails, LLC. www.spacerails.com Page 13
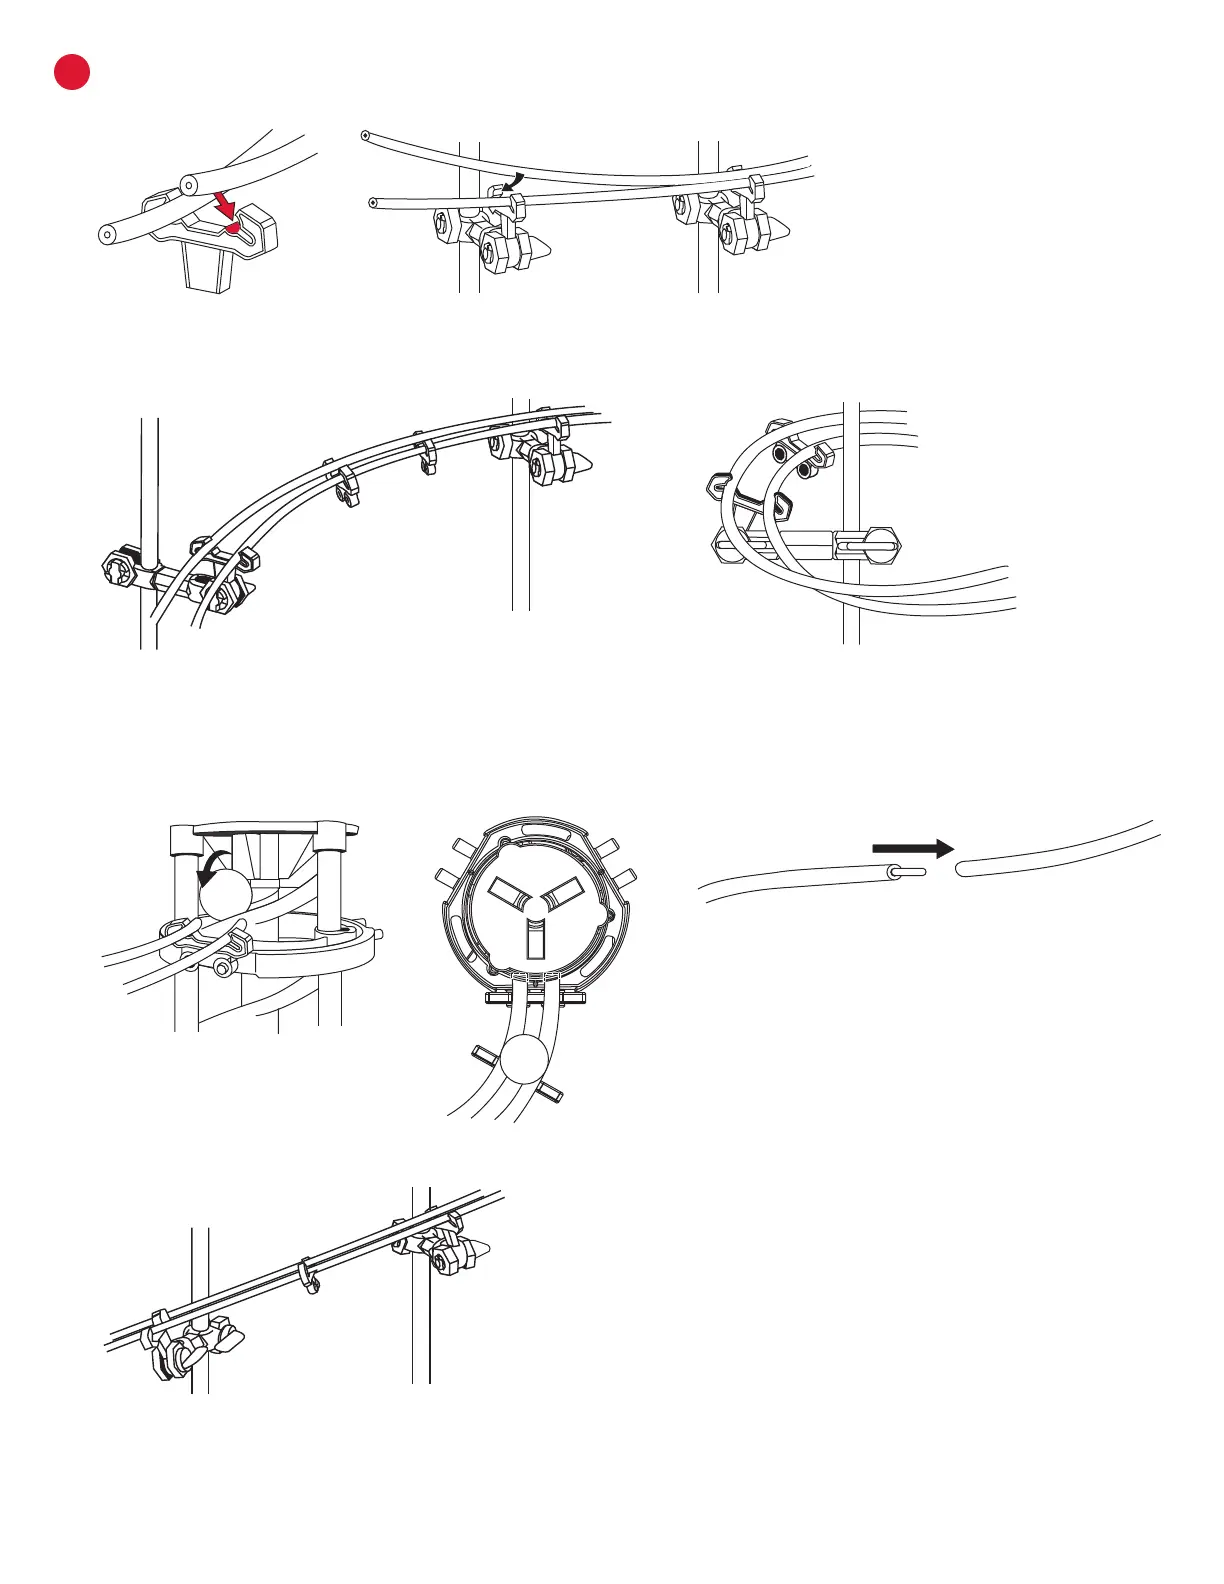
B INSTALLING RAILS
Connecting rails to arms: To install the rails, press them into the arm as
shown. You should hear a click when the rail is locked in place.
When building a curved Rail Clips and Arm Clips
can be adjusted to create a banked curve. Plenty
of Rail Clips are included so that they can be
applied liberally.
Attach Rail Clips every 8-10 cm along rail
to maintain stability and keep rails parallel.
Keeping rails uniform maintains speed and
avoids throwing the Marble o course.
Rails should extend into the elevator
enough to catch the Marble.
Rail Couplings are provided but not needed. If
more length is needed for a rail, insert the coupling
into the end of both rails being joined.
Keep incline as smooth as possible to avoid
losing speed or contact with rails.