Seaich Corporation, LLC. All rights reserved. www.seaich.com
|
Spacerails, LLC. www.spacerails.com Page 17
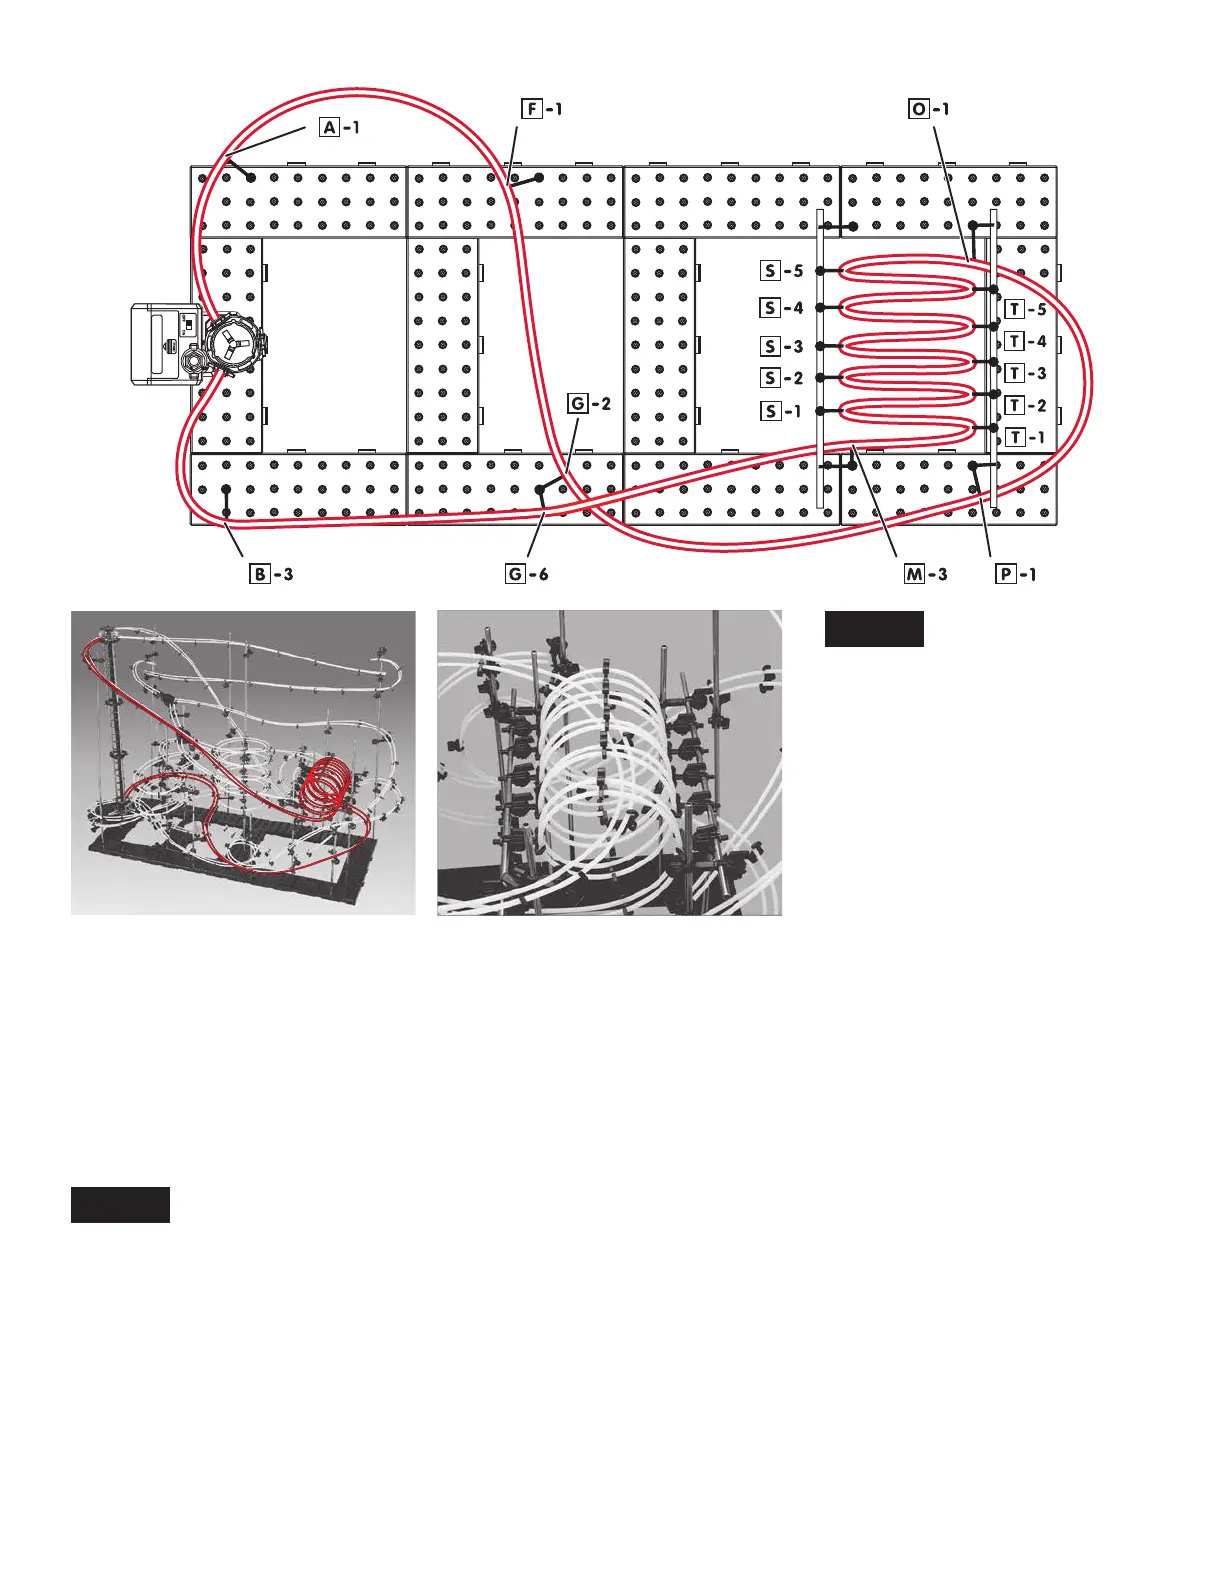
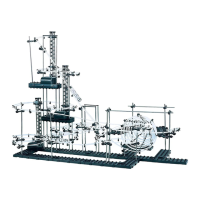
Rail Section 4:
Step1: Starting at the top Elevator Ring facing the front
of the base connect rail J (435 cm) to inner side of Rail
Clip. Keeping rail tight connect to arm B-3 then arm
G-6 and M-3. Loop rail up to arm T-1 and down through
S-1. Create a nested loop where each successive loop is
slightly smaller than the one before it by looping through
arms T-2, S-2, T-3, S-3, T-4, S-4, T-5, S-5.
Step2: Create a banked rail through arm O-1 and arm
P-1. Continue rail through arm G-2, arm F-1, and arm A-1.
Finish at Rail Clip on Elevator Ring 1 facing the back of the
base.
Step3: Repeat Step 1 and Step 2 for the outer rail. Attach
Rail Clips to keep rails consistently spaced, supported,
and create a banked corner as needed.
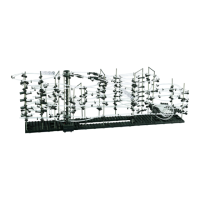
NOTE:
This image shows a close up
of the horizontal loops and
how rail Section 6 will pass
through them.
NOTE:
Start with a loop of about 13 cm on the front and work
down to about 9 cm on the back loop. These numbers
are intended to be a guide only. Test your loops with
the Marble. Adjust until you get good consistent speed
throughout this section.