10 11
Operating Instructions
Double check all assemblies for tightness and read operating
instructions carefully prior to use.
PREPARATION BEFORE LIFTING
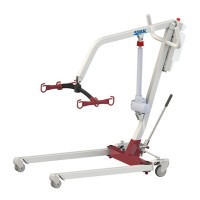
• Twist the RED EMERGENCY STOP BUTTON clockwise.
• Verify the Lifting and Lowering Functions by pressing either the UP or
DOWN button on the hand control once.
• Position the base of the lift around or under the object.
• Widen the base and disengage the caster brakes.
Do not attempt to transfer a patient without prior approval of the person’s
nurse. Also, do not transfer without having studied the instructions and
performed several practices in operating the product. Together (with the
patients doctor, nurse, or medical attendant) select a sling that is both
practical and comfortable. The sling selected should be one that serves the
needs of the patient, while providing the patient with optimal safety. Never
interfere with the lift, unless instructed by the attendant. Have a doctor, nurse,
or medical attendant (experienced in the use of the lift) present during the rst
few times the lift is used to transfer a new user.
i
i
For optimum performance the lift should be transported and stored in
following condition range:
• -25°C to +5°C (-13°F to 41°F), and
• +5°C to +35°C (41°F to 95°F) at a non-condensing relative humidity 0% to 90%
• +35°C to +70°C at a water vapour pressure up to 5 kPa
For optimum performance the lift should be operated in following condition
range:
• at a temperature range of +5°C to +40°C (+41°F to +104°F)
• at a non-condensing relative humidity range of 15 % to 90 %, but not requiring a
water vapour partial pressure greater than 5 kPa
• 70 kPa to 106 kPa atmospheric pressure
The lift will not have any potential electromagnetic or other interference with
other devices.
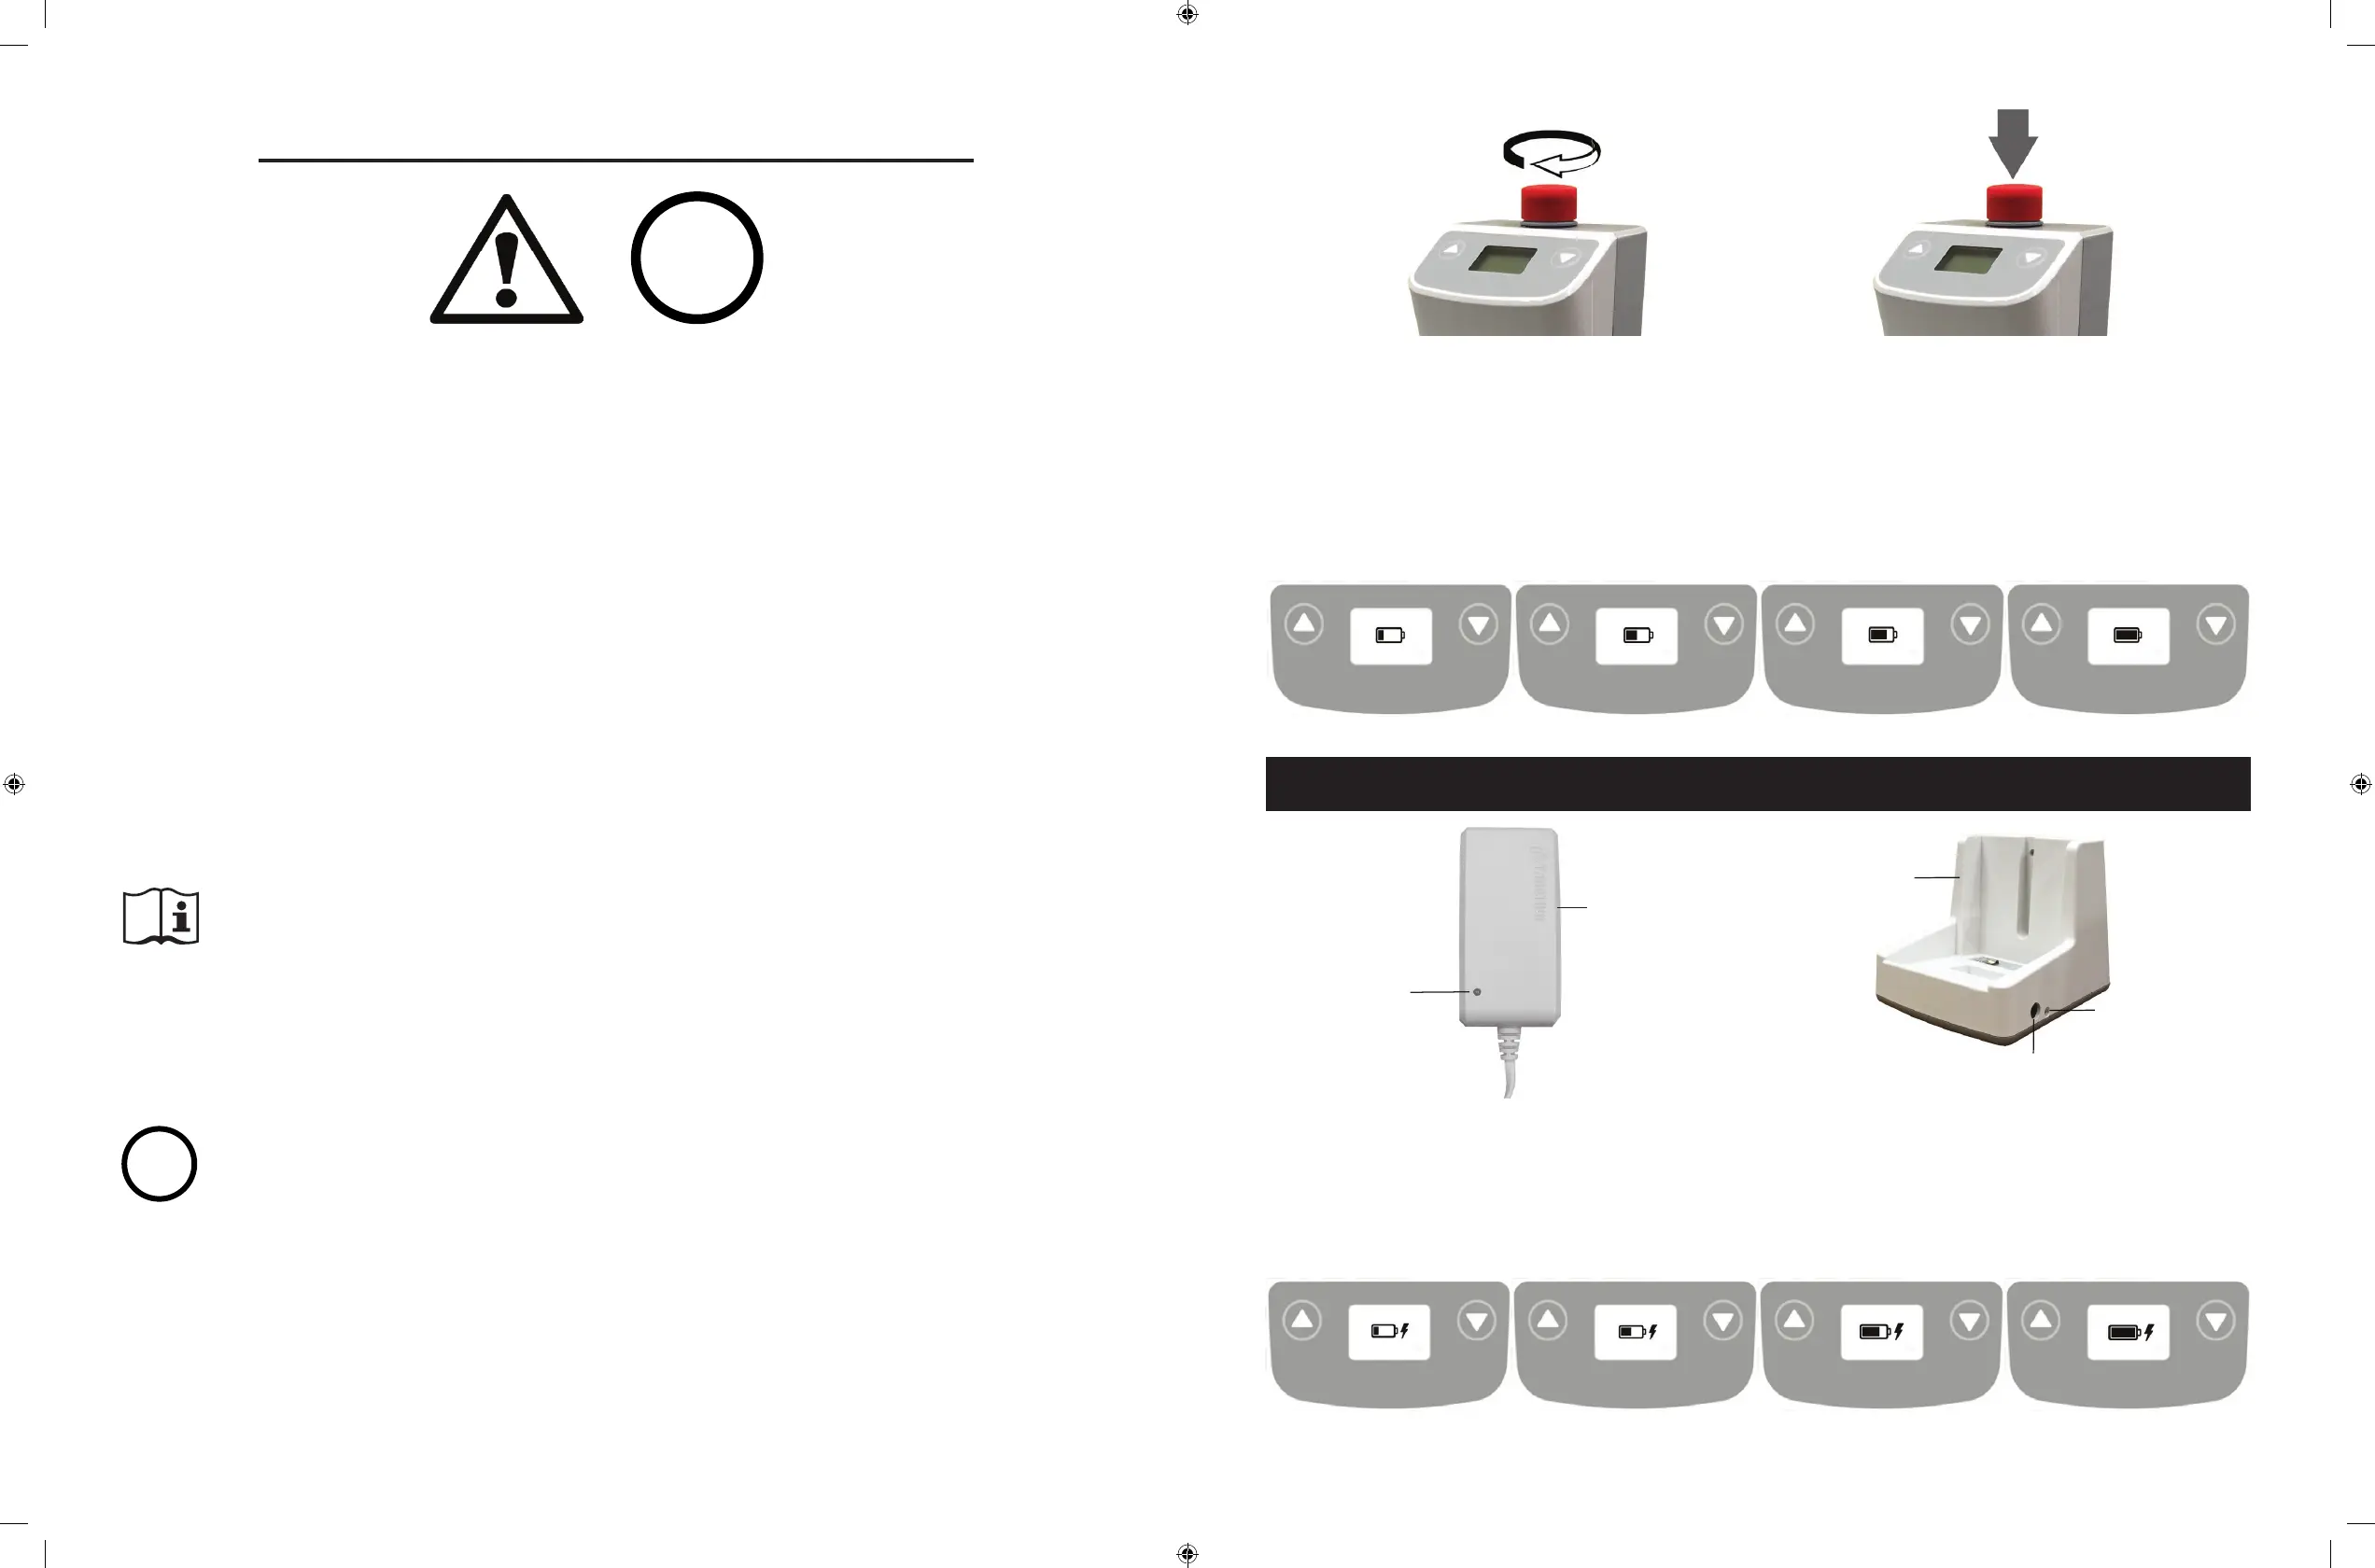
DC Charger
(included)
LED Indicator
* Amber = charging
* Green = charging completed
Charger Plug-in
LED Indicator
* Green = power connected
* Blank = power disconnected
Charging Cradle
(Optional)
LCD Display Panel Signs - Charging
During charging, the LCD Display Panel will show one of the four signs below.
• The DC Charger must be connected.
• The emergency stop button must be released.
• The battery will not be charged if the emergency button is pressed in.
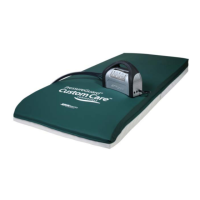
LCD Display Panel Signs
When the emergency stop button is released, the LCD Display Panel will show one of the four
signs below.
• The sign will display for 5 seconds.
• Then the lift will go into standby mode and the sign disappears.
• The lift is ready for use.
Charging: DC Charger or Charging Cradle
Release Pressed in
 Loading...