Configuratio
The Servo Trigger has a couple of configuration options. If you look at the
back of the PCB, you’ll notice two solder jumpers that can be used to
change Servo Trigger’s response.
Configuration Jumpers, SJ1 and SJ2.
When it first powers up, the servo trigger reads these jumpers, and
configures itself accordingly.
Modes
The Servo Trigger has two different servo control modes, selected with
solder jumper 1 (SJ1). They can be used to tailor the response of the board
for different applications.
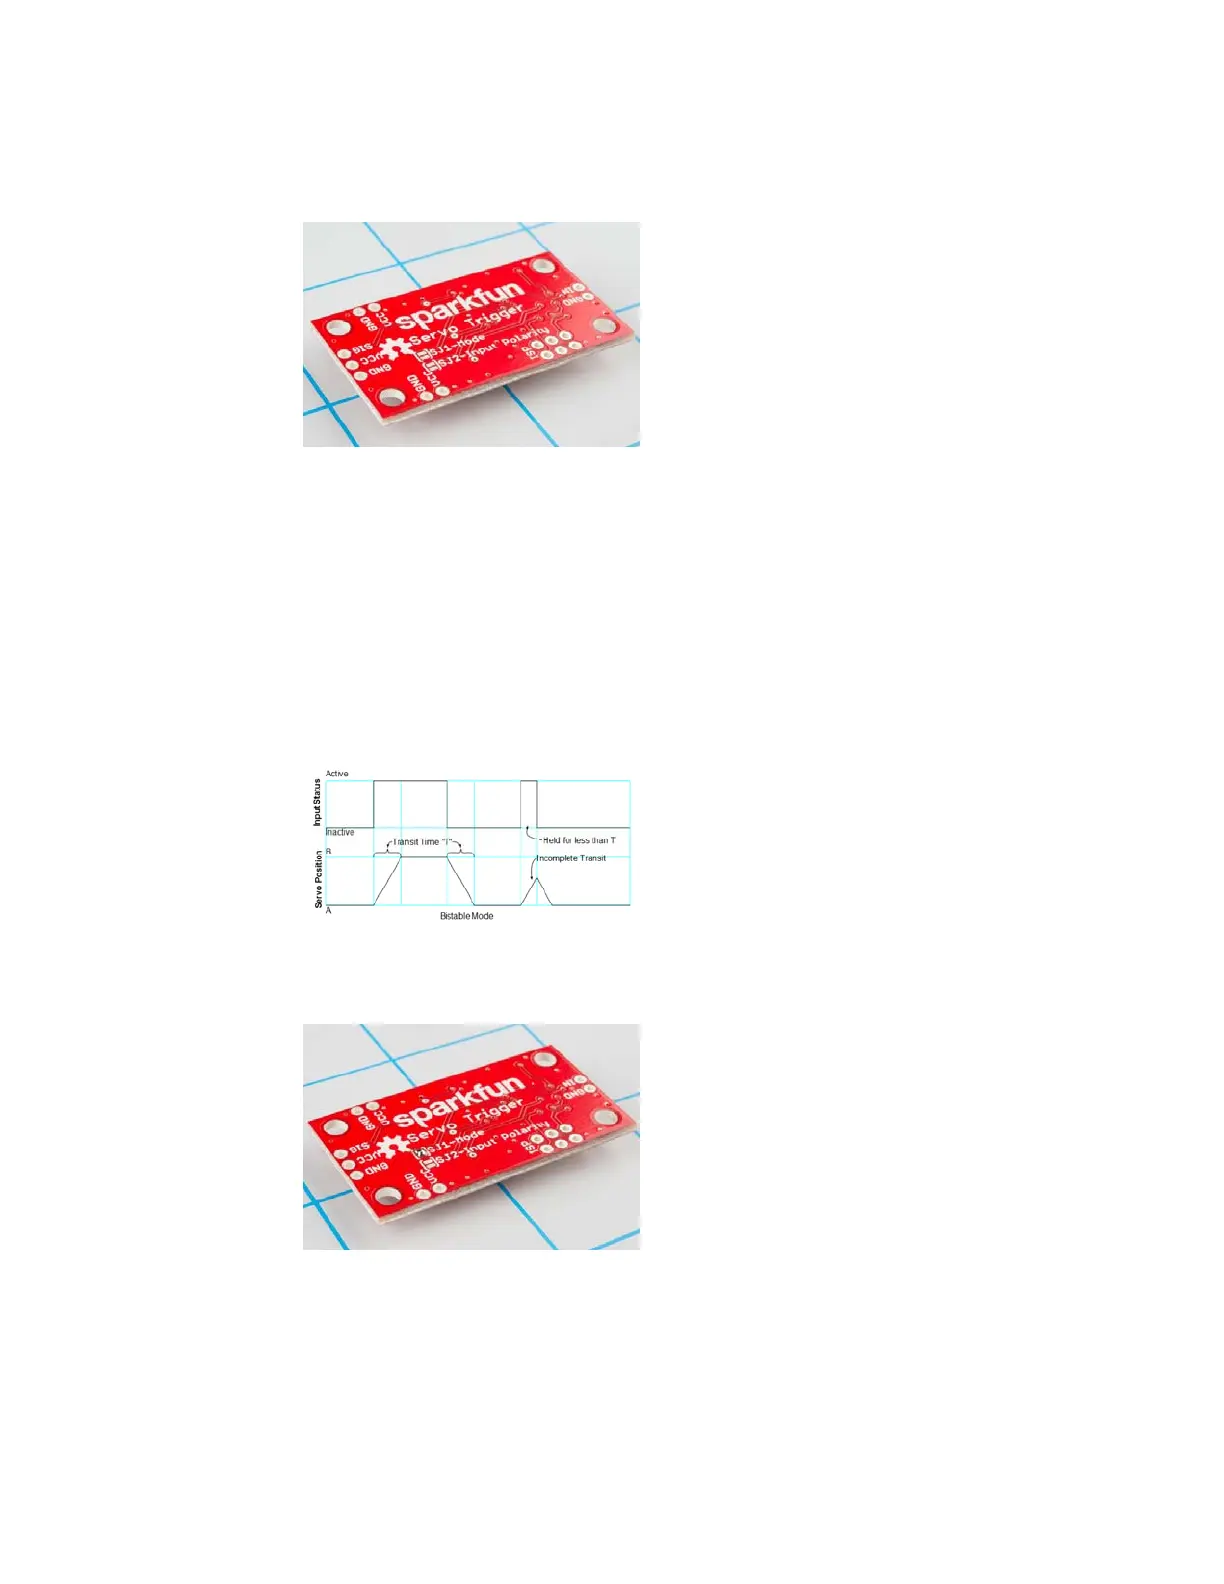
The default mode implements bistable control – the servo will sit at position
A or position B, depending on the input actuation. While the switch stays in
a state, the servo stays in the corresponding position – it is stable in two
different states.
Jumper Cleared - Bistable Control
This behavior can be changed by flowing solder between the pads of the
jumper.
With the solder jumper closed, the mode changes to one-shot or
monostable. When the input is actuated, the servo will move from A to B,
then back to A – the servo is stable in the A position, and only passes
through the B position momentarily. Regardless of when the input is
cleared, the servo will make a complete transit.
Page 8 of 1