29
C
A
B
5
Once the threads are disengaged, press the negative pressure release
button (5) while sliding the air can down.
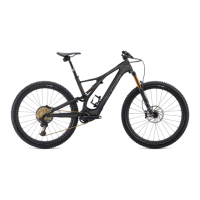
Install the first clip-on volume spacer (A) onto the shaft boss in the
head of the shock (B) a few millimeters above the boss eyelet flange
(C).
The first clip-on volume spacer must always go into the head of
the shock above the boss eyelet flange.
E
D
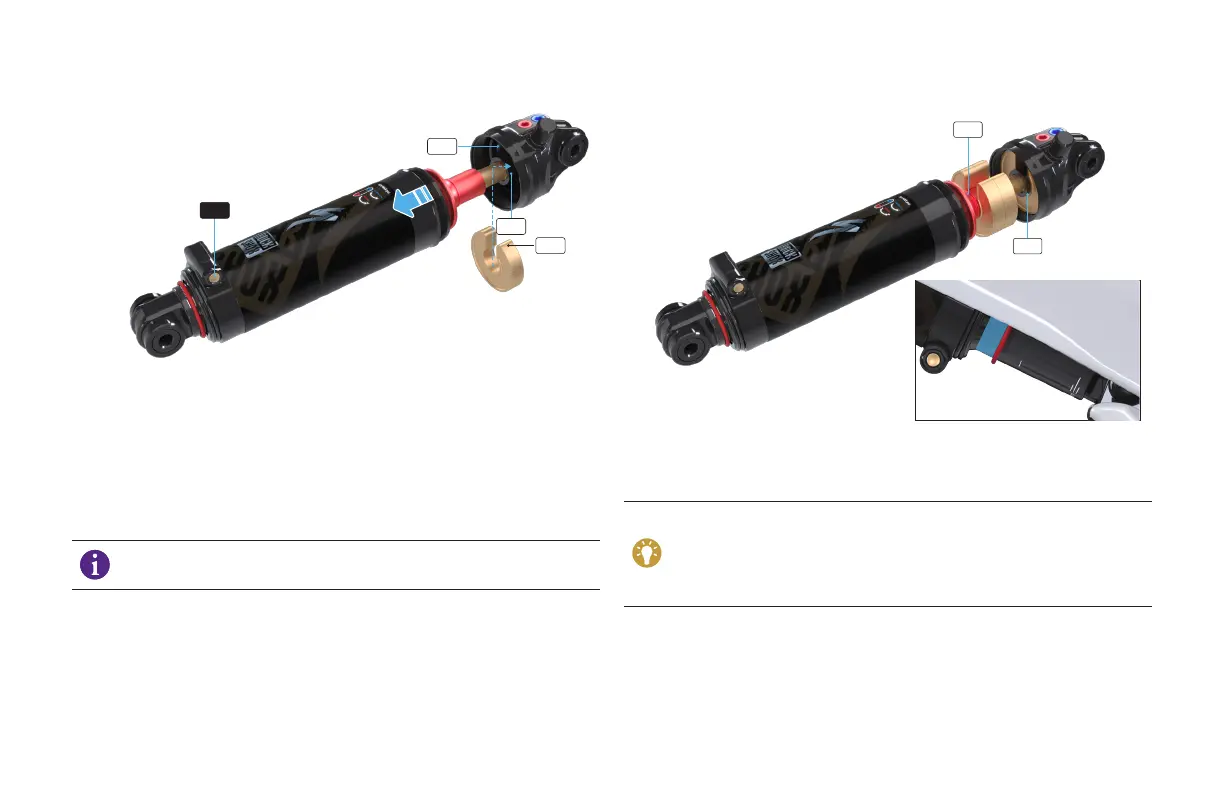
Up to two additional volume spacers can be added to the bottom-out
spacer (D). The more spacers you add, the more resistance you create
to bottoming out to help compensate for the reduction in air pressure.
Installing the spacers requires
pulling the bottom-out spacer down
and exposing the damper shaft (E). Slide each volume spacer over
the damper shaft then down onto the outer bore of the bottom-out
spacer. Once all spacers are installed, make sure the bottom-out
spacer can return flush with the boss of the eyelet.
Reinstall the shock on the bicycle and follow the Max pressure setup
instructions.
Pressurize the shock using 20-30% less pressure than the Max
pressure setting. You should have 8-10 mm of shock sag (shaded blue)
which can be fine-tuned by adding/removing pressure.
 Loading...