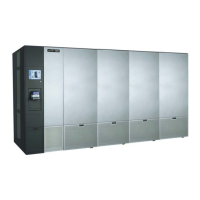
Keep this guide near the library for quick reference to the most common
library operations. Refer to the Spectra T200, T380, and T680 User Guide on the
library’s Product CD and at support.spectralogic.com/documentation for
detailed information about configuring, using, and maintaining the library.
Power On To power on the library, press and hold the front panel power
button until the button’s LED illuminates (about 2–3 seconds). Wait while the
library completes its power-on sequence, which takes about five minutes
depending on the library configuration. During the power-on sequence the
library initializes all components.
Power Off To power off the library, press and hold the front panel power
button until the button’s LED starts flashing (about 6 seconds). The power-off
sequence takes approximately one minute while the library allows applications
to shut down gracefully.
Note:If the library is experiencing problems, do not power it off unless
specifically directed to do so by SpectraGuard Technical Support.
Log Into the Library: After the power-on sequence completes, the login
screen displays.
1.Using the stylus, touch (to select) the User box and enter the user type.
Superuser – Controls all aspects of library use and configuration.
Administrator – Configures and uses the library.
Operator – Performs day-to-day operations.
2.Touch the Password box and enter the password. If you have:
established a password—use the stylus to type it with the keyboard and
select Login.
not established a password—leave the password field blank, and select
Login.
3.Wait for the initialization process to complete.
4.Close the keyboard by touching its icon with the stylus.
Log Out of the Library From the Security screen, select Switch User to
log out and re-display the login screen.
The library’s user interface lets you set configuration options, view library and
drive information and metrics, manage media, and monitor library operations.
Toolbars Selecting a toolbar along the left side of each screen
expands it to display the available options within that menu. The options in
General toolbar access the most frequently used library screens and controls:
General Status—Displays the current status for all of the major library
components for the selected library partition.
Inventory—Displays controls for viewing the library’s media inventory and
for moving media from one location in the library to another.
Import/Export—Displays controls for importing and exporting media.
Metrics—Displays metrics for tape drive performance, power consumption,
and storage density for the media types in the library.
Media Lifecycle Management—Displays options for generating and
viewing Media Lifecycle Management reports.
Status Bar The status bar is located at the bottom each screen.
Refresh Button—Refreshes (updates) the information currently displayed on
the user interface.
Messages & Feature Icons—Indicate the status of library components, as
described in the Icon table to the right. Additional icons provide access to the
remote support and BlueScale Vision features, if applicable.
Last Refreshed—Shows the time of the last screen refresh.
Current BlueScale Software Version—Shows the version of the BlueScale
software currently running on the library.
IP Address or Library Name—Shows the library’s IP address (on the touch
screen) or the library’s name (when using the BlueScale web interface).
Icon Meaning (Touch the icon to view system messages)
System OK. All system components are functioning correctly.
Information.
An informational message about a component is
available.
Check messages to determine the component.
Attention. A system component requires attention. Check
messages to determine the component.
Error. A system component has experienced an error
condition. Check messages to determine the component.
HHM Notification – A component has reached its
maintenance threshold. Click the icon to view the Hardware
Health Monitoring notification and generate an AutoSupport
ticket.
Keyboard Options Entering information into a library screen requires a
keyboard. You can use any of these keyboard options:
Soft Keyboard—When using the touch screen, touch the keyboard icon in the
lower right corner of the screen to activate the on-screen keyboard.
BlueScale Web Interface—You can connect the library to an Ethernet
network and access the user interface through the BlueScale web interface
using a standard web browser.
External Keyboard—You can connect a keyboard and mouse directly into the
LCM, located on the back of the library.
I
MPORTANT: When accessing the library remotely through a web browser,
do not use the keyboard Enter key when entering information in any of the
text fields. Various web browsers handle the Enter key differently, causing
inconsistent behavior in the BlueScale interface.
Always use the onscreen buttons in BlueScale screens instead of using your
keyboard.