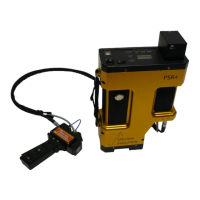
The SPECTRAL EVOLUTION PSR Series Spectroradiometer is a portable field instrument designed for spectral radiance measurements, operating in the UV-VIS-NIR range. It collects and stores spectral data, producing output calibrated to units of spectral radiance (W/cm²/nm/sr). The instrument is powered by a Li-Ion battery pack and can be operated standalone or with a host PC via USB or Bluetooth.
Function Description:
The PSR Series spectroradiometer uses a crossed Czerny-Turner configuration with ruled gratings as the dispersive elements. Energy enters the spectrometer and is collimated before being reflected off the gratings and refocused onto the PDA detectors. Depending on the model, it incorporates either a 512-element silicon PDA covering 350–1000 nm or two InGaAs arrays (256-element for 1000–1900 nm and 256-element for 1900–2500 nm). The PSR+3500 model extends this range to 2500 nm with finer spectral resolution. All electronics control system operation and provide onboard storage for self-contained field operation. A microprocessor performs mathematical functions on the scan data, such as dark subtraction and automatic integration setting, and includes a built-in shutter for dark measurements.
Important Technical Specifications (PSR+3500):
- Spectral Range: 350–2500 nm
- Spectral Resolution (nominal): 3.0 nm (350–1000 nm), 8nm @ 1500nm, 6nm @ 2100nm
- Sampling Interval: Data output in 1nm increments; 2151 channels reported
- Detectors: 512 element Si PDA (350-1000nm), 256 element InGaAs (970-1900nm), 256 element InGaAs (1900-2500nm)
- Noise Equivalence Radiance (4° Lens): <0.7x10⁻⁹ W/cm²/nm/sr@400nm, <0.8x10⁻⁹ W/cm²/nm/sr@1400nm, <1.0x10⁻⁹ W/cm²/nm/sr@2100nm
- A/D Converter: 16 bit
- Wavelength Accuracy: 5 nm
- Wavelength Reproducibility: 1 nm
- Integration Time: 8.4 ms minimum
- Power: Supplied (2) Li-Ion battery packs, 7.4V nominal
- Size: 8.5" x 11.5" x 3.25"
- Weight: < 8 lbs
- Communications Interface: USB and Bluetooth virtual COM ports
- Memory: 4" lens provided (other options available)
- Onboard Storage: 500 spectra
- Tripod Mount: Two ¼-20 mounting holes
- Operating Temperature: -10–40°C
- Operating Humidity: 15–90 % non-condensing
- Storage Temperature: -20–70°C
- Storage Humidity: 15–90 % non-condensing
- Serial Communications: Baud Rate: 115200 bps, Parity: none, Data Length: 8, Stop bit: 1, Flow Control: none
- ESD Protection: +/- 15 KEV human body model, +/- 8KEV contact discharge
- Laser: Class 3R, 3 mW, 635 nm diode laser, conforms to IEC 60825-1, Ed 1.2.
Usage Features:
- Control Panel: The instrument features a control panel with a power switch, three membrane push-button switches (Scan, Menu, Edit), and an LCD display for standalone operation.
- Indicators: Power LED, Laser LED, and Connect LED (illuminated when no Bluetooth link is established).
- LCD Display: An eight (8) character, two (2) row display shows selected scan and status messages. Row 1 displays scan types and status, while Row 2 displays parameter menu options.
- Scan Types: Reference, Target, and Dark Scans.
- Menu Options: Memory Scan#, Dark Scan Mode, Scan Timer, Optic, Laser Scanning.
- Parameter Modification: Parameters can be modified using the EDIT button.
- Battery Pack: Two Li-Ion battery packs are supplied, providing more than 3 hours of operation. The instrument automatically powers off when the battery voltage falls too low.
- Foreoptic Accessories: The PSR Series supports various foreoptic accessories, including lenses and fiber optic cables. The instrument is factory-calibrated for radiance using a NIST-traceable source. Calibration coefficients are stored in flash memory.
- Laser Sighting: A sighting laser aids in aligning the instrument to the target to be measured. The laser can be activated by pressing the Laser Scan switch.
- Standalone Operation: The instrument can perform dark measurements and reference measurements. For optimal performance, a 15-minute warm-up period is recommended.
- Operation with a Host PC: The spectroradiometer interacts with DARWin SP software running on a host PC using USB or Bluetooth communications. This allows for controlling the instrument remotely and collecting/displaying scan data in real-time.
- Handheld Contact Probe (Appendix E):
- Connects via a supplied power/triggering cable and a fiber optic cable.
- Features a scan trigger button for initiating scans.
- Includes an internal light bulb for illumination.
- Desktop Reflectance Probe (Appendix F):
- Connects via a power/triggering cable and a fiber optic cable.
- Includes an internal light bulb for illumination.
- Designed for flat sample measurements.
- Reference Plate (Appendix G): A 2"x2" White Reference Plate made of polytetrafluoroethylene (PTFE) is supplied for reflectance scans, offering high diffuse reflectance.
Maintenance Features:
- Battery Charging: An external battery charger is provided. It operates from 110/240 volt AC line supply. The charger's RED LED illuminates during charging, and the GREEN LED illuminates when charging is complete.
- Changing Foreoptic Accessories:
- Remove the battery from the instrument.
- Unscrew the lens foreoptic counterclockwise.
- Install the fiber adapter, ensuring proper alignment of the fiber alignment plug with the optical slit.
- Screw the knurled thumbscrew of the threaded Fiber Adapter.
- Insert the keyed end of the fiber optic cable into the Fiber Adapter and secure it with the thumbscrew.
- Changing the Light Bulb (Handheld Contact Probe):
- Ensure the probe is off and cool.
- Remove the 5 #2-56 screws from the lid.
- Undo the two #4-40 screws on the bulb housing and remove the assembly.
- Loosen the bulb clamping screws and pull the bulb straight out.
- When installing a new bulb, wear powder-free latex gloves to avoid touching the bulb or reflector. Align the bulb pins with the sockets and lightly press the bulb into the receptacle.
- Tighten the bulb clamp screws and re-install the bulb housing and probe cover.
- Changing the Light Bulb (Desktop Reflectance Probe):
- Ensure the probe is off and cool.
- Remove the 4 #4-40 screws from the lid.
- Undo the four #4-40 screws on the light bulb housing and remove the assembly.
- Loosen the bulb clamping screws and pull the bulb straight out.
- When installing a new bulb, wear powder-free latex gloves to avoid touching the bulb or reflector. Align the bulb pins with the sockets and lightly press the bulb into the receptacle.
- Tighten the bulb clamp screws and re-install the bulb housing and probe cover.
- Reference Plate Maintenance: The PTFE reference plate can be cleaned by sanding with 220-240 grit waterproof emery cloth under running water, followed by rinsing and blowing nitrogen or clean compressed air over the surface.
- Heat Sink: The instrument contains a heat sink built into the instrument base plate that requires unobstructed air flow for proper operation.
- No User Serviceable Components: The unit should be returned to the manufacturer in case of malfunction.