Spectrum DSP M2 User Manual V1.1
Introduction:
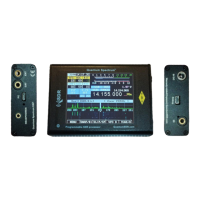
The Quantum SDR project was formed to develop an affordable wide-band spectrum scope with waterfall that
can be easily connected to any radio receiver or transceiver, incorporating the latest SDR technologies, including
machine learning and artificial intelligence, dramatically improving access to the Spectrum for any radio system.
The team's aim is to continue enhancing the Spectrum software, and to develop a variety of new models,
following the feedback we receive from users. You can contact us at info@QuantumSDR.com or through our
Facebook group, QuantumSDR.
Thank you for your support.
The Spectrum DSP M2 incorporates the GUI (graphics user interface) originally developed by the Universal
HAM SDR (Software Defined Radio) project and extended by Quantum SDR. It is reproduced here with their
permission and our thanks.
Configuration: Touch interface and Transceiver/Receiver association
The Spectrum DSP arrives configured for the transceiver requested during ordering. There are two items that
you may want to configure, one is the touch interface so that so that clicks and swipes align with the on-screen
areas and buttons.
To realign the touch screen interface, reboot the Spectrum, and immediately that a small blue square shows,
press the stylus on the screen and keep pressed. The TOUCH LINE TO RESET SETTINGS message should be
displayed, move the stylus through that line. The touch calibration procedure should then start, else reboot and
try again. Follow the on-screen instructions, finalizing by drawing through the green square, or if you want to
repeat the calibration, through the red square.
If you press too soon after booting, the unit will perform a FACTORY RESET, following which you can reboot and
calibrate the touch screen if needed.
Once set-up, click MENU and make a long-press on EXIT/* to save the new settings.
The other setting is to associate the transceiver or radio with which the Spectrum must connect via the CAT
connection. This can be set by clicking the MENU button, then when the menu is displayed, make a short down-
swipe in the middle-right of the LCD until Configuration Menu is reached, then another down-swipe on the right-
side of the screen to open that menu. You can then select the associated transceiver and Spectrum mode, such
as BiSync, slave or master.
NOTE YouTube instruction video
The LCD requires a light yet firm touch. Long-presses are activate when the stylus stays in contact over 0.6
seconds.
There is a video in our YouTube page where you can see how this is performed:
https://youtu.be/A_YlSJJQLGM?si=aTvMzkuZGbk8A-Cz
What radios can the Spectrum be used with?
The Spectrum DSP can connect to any radio system that has either an IQ port, IQ point on it's PCB (such as the
Electaft KX2, uSDX (tr)usdx and newer QRP Labs radios), or a connection to the IF stage output (model M3 or
higher).
If you need support connecting your radio, please contact us.
P 2