EasyManua.ls Logo

Speed Queen DR3 - User Manual

Speed Queen DR3
8 pages
Print Icon
To Next Page IconTo Next Page
Loading...
Quick Start
Manual
DR3 Models
Question and Answer IconNeed help?

Do you have a question about the Speed Queen DR3 and is the answer not in the manual?

Summary

Installation Guide

Positioning and Connections

Steps for positioning, leveling, and connecting exhaust for the dryer.

Gas and Electric Connections

Instructions for connecting gas supply (gas models) and electrical cord (electric models).

Final Checks and Start-up

Wipe interior, plug in, and start dryer to check heating function.

Dryer Cycle Information

Time Dry Cycle

Operates dryer for up to 75 minutes, suitable for various fabric weights.

Automatic Regular;Delicate Cycle

For sturdy or delicate items; heat type set via Fabric Selector.

Automatic Perm Press;Knits Cycle

For permanent press items and synthetics; heat type set via Fabric Selector.

Sanitize Cycle

High heat, 75-minute cycle for sanitizing medium-sized loads.

Operating Your Dryer

Preparation and Loading

Prepare laundry, clean lint filter, load dryer half full, and close door.

Cycle and Selector Settings

Set the cycle and temperature or fabric selector before starting.

Starting and Completion

Press start button to begin cycle and remove laundry when finished.

Product Registration and Resources

Warranty Registration

Register product at speedqueen.com for full limited warranty benefits.

Download Documentation and Videos

Access installation and operating videos at Speedqueendoc.net or scan QR code.

Request Printed Documents

Order printed manuals, user guides, and warranty bonds online or via email.

Overview

This document provides a quick start manual for the Speed Queen DR3 dryer models, offering essential information for installation, operation, and maintenance.

Function Description

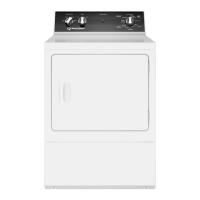
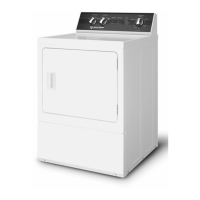
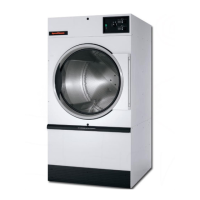
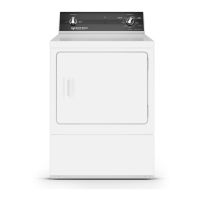
The Speed Queen DR3 dryer is designed to efficiently dry laundry, offering a range of cycles and temperature settings to accommodate various fabric types and drying needs. It is engineered for commercial-grade performance, emphasizing durability and reliability. The dryer operates by tumbling clothes in a heated drum, removing moisture through an exhaust system. It can be configured for either gas or electric operation, depending on the model.

Usage Features

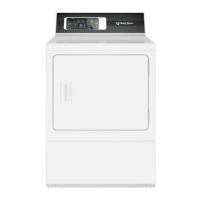
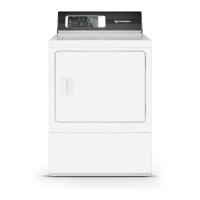
The DR3 dryer offers a user-friendly interface with a clear control panel for selecting cycles and settings.

  • Cycle Selection: The dryer features several distinct drying cycles:

    • Time Dry Cycle: This cycle allows users to set a specific drying duration, up to 75 minutes. It is recommended for cottons and heavyweight items (50-75 minutes) and lightweight items (20-40 minutes), providing flexibility for different load sizes and fabric densities.
    • Automatic Regular/Delicate Cycle: This cycle is suitable for sturdy items like play or work clothes, as well as delicate items. The heat level is determined by the chosen Fabric Selector option. It includes three settings: Max Dry, More Dry, and Less Dry, allowing for precise drying based on fabric type and desired dryness level.
    • Automatic Perm Press/Knits Cycle: Designed for permanent press items and synthetics, this cycle also uses the Fabric Selector to determine heat. It offers More Dry, Less Dry, and Cool Down (on select models) settings, helping to prevent wrinkles and protect synthetic fabrics.
    • Sanitize Cycle: This is a high-heat, 75-minute cycle specifically designed to sanitize medium-sized loads. It is effective against certain bacteria (Staphylococcus aureus, Pseudomonas aeruginosa, Klebsiella pneumoniae). For this cycle, users must set the Cycle Selection to Time Dry, Max Dry, and the Fabric Selector to Perm Press/Regular, then allow the cycle to complete without interruption. Users are advised to follow the item manufacturer's fabric care instructions when using this cycle.
  • Fabric Selector: This control allows users to choose the appropriate heat level for their laundry, with options such as "No Heat," "Delicate," "Perm Press," and "Regular." This ensures that clothes are dried at a temperature suitable for their material, preventing damage and optimizing drying performance.

  • Operating Steps: The manual outlines a straightforward process for using the dryer:

    1. Prepare Laundry: Gather and sort clothes for drying.
    2. Clean Lint Filter: Before each use, the lint filter should be cleaned by wiping out lint from the screen area. If a lint filter guard is in place, it should be removed first. This step is crucial for maintaining drying efficiency and preventing fire hazards.
    3. Load Dryer: Load the dryer drum approximately half full with laundry to allow for proper tumbling and airflow, ensuring even drying.
    4. Close Door: Securely close the dryer door.
    5. Set Cycle: Select the desired drying cycle using the cycle selection knob.
    6. Set Temperature/Fabric Selector: Choose the appropriate temperature or fabric setting based on the type of laundry.
    7. Press Start Button: Initiate the drying cycle by pressing the start button.
    8. Remove Laundry: Once the cycle has ended, promptly remove laundry from the dryer to minimize wrinkles.

Maintenance Features

The Speed Queen DR3 dryer is designed with ease of maintenance in mind, particularly concerning the lint filter.

  • Lint Filter Cleaning: The most critical maintenance task is regularly cleaning the lint filter. The manual emphasizes wiping lint out of the screen area before each use. This not only ensures optimal drying performance by maintaining proper airflow but also significantly reduces the risk of fire. The lint filter is easily accessible, making this a quick and simple task.

  • Installation Considerations for Longevity: While not a direct maintenance feature, proper installation contributes significantly to the dryer's long-term performance and reduces the need for frequent repairs. Key installation aspects include:

    • Positioning and Leveling: Ensuring the dryer is level and positioned with adequate rear clearance (minimum 2 inches for utility connections, 6 inches for rear venting) helps prevent strain on components and ensures efficient operation.
    • Exhaust System: The dryer must be exhausted to the outdoors using a 4-inch (102 mm) rigid duct. Maintaining a maximum straight duct length of 65 feet (19.8 m) and deducting 10 feet (3 m) for each elbow is vital for efficient moisture removal and preventing lint buildup. Sufficient make-up air (at least 40 in² or 25806 mm² per unit) is also necessary.
    • Gas Supply (Gas Models): Proper connection of the gas supply pipe according to local codes and ordinances, with secure but not overtightened connections, is essential. Checking for gas leaks with a non-corrosive leak detection fluid after connection is a critical safety and maintenance step.
    • Electrical Connection (Electric Models): Connecting the electrical cord with a three-wire or four-wire plug as per installation instructions ensures safe and correct power supply.
    • Initial Cleaning: Wiping out the inside of the dryer before first use helps remove any manufacturing residue.
    • Heating Check: Starting the dryer and checking that it is heating after installation confirms proper functionality.
  • Documentation and Support: Speed Queen provides comprehensive support for maintenance and troubleshooting. Users can download full documentation and view installation and operating videos at speedqueendoc.net. For those who prefer printed documents, an order form is available online or requests can be made via email. This accessibility to information empowers users to perform basic maintenance and understand their appliance better.

The Speed Queen DR3 dryer is built for reliability and ease of use, with features designed to provide efficient drying and straightforward maintenance, ensuring a long lifespan for the appliance.

Speed Queen DR3 Specifications

General IconGeneral
BrandSpeed Queen
ModelDR3
Capacity7.0 cu. ft.
Heat SourceElectric
Fuel TypeElectric
Number of Temperature Settings3
ColorWhite

Related product manuals