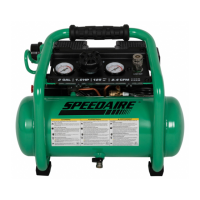
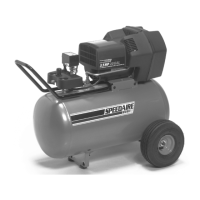
The device is a portable electric quiet oil-free air compressor, Model 787U77, manufactured for Dayton Electric Mfg. Co. It is designed for various air inflation accessories, air brushes, brad nailers, and staplers, as well as finish nailers. The compressor features a compact design and light weight for easy portability, and its oil-free pump is maintenance-free. The body is finished with a SPEEDAIRE Green powder coat, and the tank is made of steel.
Function Description:
The air compressor operates by compressing air and discharging it into a steel tank. The electric motor powers the pump, which uses a piston moving up and down in a cylinder to compress the air. The compressed air is stored in the air tank (J).
A key component is the ON/OFF Switch (D), which manually turns the compressor on and off. When in the ON position, it allows the compressor to start or shut down automatically based on air demand. It is crucial to set this switch to OFF when the compressor is not in use and before unplugging.
The Air Pressure Regulator (E) is used to adjust the pressure of the air delivered to the tool. Turning the knob clockwise increases pressure, while turning it counter-clockwise decreases it.
Two gauges are present: the Tank Pressure Gauge (F) measures the stored air pressure level in the tank and is not adjustable by the operator, and the Outlet Pressure Gauge (G) measures the regulated outlet pressure.
For connecting air hoses, the Quick Coupler (H) is used in conjunction with a quick connector.
A Safety Valve (C) is incorporated to prevent system failure by releasing pressure if it exceeds a preset level and the ON/OFF switch fails to shut down the motor. It can pop open automatically or be activated manually by pulling its ring.
The Drain Valve (I) is essential for removing moisture from the air tank after the unit is shut off, preventing corrosion.
The Power Cord (K) connects the compressor to a nominal 120-volt circuit and requires proper grounding.
Important Technical Specifications:
- Grainger Item No.: 787U77
- Air Tank Type: Hot Dog
- Tank Size: 2 gallons
- Motor Ratings: HP 1.0, 120V AC, 60 Hz, 7.5 Amps (Full Load)
- CFM Ratings:
- Free Air CFM @ 90 PSI: 2.4
- Free Air CFM @ Max. Pressure: 1.7
- Pressure Ratings:
- Max. Pressure: 125 PSI
- dBA @ 3 Feet: 65
- Lube Requirements: Oil-Free, UL 1450 Standard
- Motor Type: Quiet Induction Motor
- Motor RPM: 1700
- Avg. Pump Life: 1000 hours
- Dimensions:
- Length: 16.4 inches (417 mm)
- Width: 14.6 inches (371 mm)
- Height: 13.8 inches (351 mm)
- Weight: 41.5 lb.
- Electrical Requirements: 120 VAC, 60 Hz, 7.5 Amps
Usage Features:
- Positioning: The compressor should be placed near an electrical outlet, at least 12 inches (31 cm) from any wall or obstruction, in a clean, dry, well-ventilated area to ensure sufficient airflow and cooling. It must be on a hard, level surface for proper drainage.
- Air Hose Connection: An air hose (not provided) connects to the quick coupler using a quick connector (not provided). Plumber's tape should be applied to all threads to prevent air leakage.
- Air Filter Attachment: The threaded end of the air filter is inserted into the threaded port of the pump head and tightened clockwise by hand. No thread tape should be applied to the air filter assembly's threads.
- Break-in Procedure (First Use Only):
- Set the ON/OFF switch to OFF.
- Open the tank drain valve counter-clockwise to prevent pressure build-up.
- Turn the air pressure regulator clockwise until it stops.
- Plug in the power cord to a dedicated 15A circuit.
- Set the ON/OFF switch to ON and run the compressor for 30 minutes.
- After 30 minutes, turn off the ON/OFF switch.
- Close the tank drain valve.
- Set the ON/OFF switch to ON again; the compressor will fill to "cut-out" pressure and then stop, ready for use.
- Starting the Compressor:
- Close the tank drain valve.
- Plug in the power cord.
- Set the ON/OFF switch to ON and allow pressure to build until the motor stops.
- Turn the air pressure regulator knob clockwise to the desired pressure.
- Shutting Down the Compressor:
- Set the ON/OFF switch to OFF.
- Unplug the power cord.
- Reduce tank pressure via the outlet hose or by pulling and holding open the safety valve ring.
- Once pressure is removed, tip the compressor so the drain valve is at the bottom and open it counter-clockwise to drain moisture.
- Safety Precautions: Always wear ANSI Z87.1 approved safety glasses when using the compressor. Do not operate near flammable gases or vapors. Do not use for breathing air supply. Do not weld or repair the tank. Ensure proper grounding. Keep children away.
Maintenance Features:
- Drain the Tank (Daily): To prevent corrosion, condensation must be drained at the end of every workday. Wear protective goggles, relieve air pressure, and open the drain valve at the bottom of the tank.
- Check the Safety Valve (Daily): Pull the ring on the safety valve daily to ensure proper operation and clear any obstructions.
- Test for Leaks (Monthly): Check all connections for tightness. Spray soapy water around suspected leak areas; if bubbles appear, repair or replace the faulty component. Do not overtighten connections.
- Storage (Prior to Storing): Before long-term storage, use an air blow gun to clean dust and debris from the compressor. Disconnect and coil the power cord. Pull the safety valve ring to release all pressure, and drain all moisture from the tank. Cover the unit to protect it from moisture and dust.
- Troubleshooting: The manual provides a comprehensive troubleshooting guide for common issues such as low pressure, air leaks, motor not running, and safety valve opening, along with possible causes and corrective actions. For example, if the motor does not run, it could be due to tank pressure exceeding the ON/OFF switch limit, a blown fuse, a stuck check valve, incorrect wire gauge/extension cord length, loose electrical connections, or a defective motor/capacitor/safety valve. Corrective actions range from resetting circuit breakers to replacing components or contacting customer service.
The manufacturer emphasizes reading and saving the instructions, observing all safety information, and retaining the manual for future reference. Failure to comply with instructions could result in personal injury and/or property damage. The product is covered by a one-year limited warranty against defects in workmanship or materials under normal use.