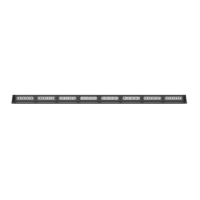
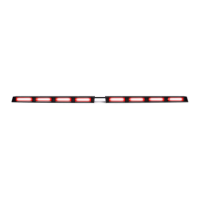
The ZX-180 is an under side-view mirror light manufactured by SpeedTech Lights, Inc. It is designed to be installed beneath the side-view mirrors of various vehicles, providing emergency warning illumination.
Function Description
The ZX-180 is an LED-based warning light intended to alert pedestrians and other vehicle operators to the presence of emergency personnel or vehicles. It features multiple flash patterns and can be synchronized with other units for coordinated warning signals. The device supports both master and slave configurations for synchronization and alternating synchronization. For 2 or 3 color units, it also offers a color change function.
Important Technical Specifications
- Voltage: 12 VDC
- Amps: 0.8
- Optic: Reflective
- LED Count: 7 Single Color / 13 Double Color / 19 Triple Color
- Cable Length: 10 inches
- Flash Patterns: 15
- Dimensions: Approximately 2.5 inches in width, 2.5 inches in depth, and 1.1 inches in height.
Wiring Diagram and Modes
The ZX-180 utilizes a multi-wire system for control:
- Red* (Main Power): Activates Mode 1.
- Yellow* (Main Power): Activates Mode 2 (Overrides Mode 1).
- White* (Main Power): Activates Mode 3 (Overrides Mode 1 and 2).
- Green: Controls Color Change (for 2 or 3 Color Units Only). Touching this cable to +12VDC cycles through color modes.
- Blue: Controls Flash Pattern and Sync.
- Black*: Negative.
- *Note: All cables except Negative and Blue cable contact +12 VDC.
Each mode (Mode 1, Mode 2, Mode 3) can be set to have a unique flash pattern. The device is equipped with non-volatile memory, which recalls the last flash pattern when the product is turned on.
Flash Pattern List
The ZX-180 offers 15 distinct flash patterns:
- Slow Single Flash
- Fast Single Flash
- Slow and Fast Single Flash
- Slow Double Flash
- Fast Double Flash
- Slow and Fast Double Flash
- Slow Triple Flash
- Fast Triple Flash
- Slow and Fast Triple Flash
- Burst Pattern 1
- Burst Pattern 2
- Brake Pop
- Steady Burn High
- Steady Burn Low
- Puddle Light
Color Modes (for 2 or 3 Color Units Only)
The available color modes, cycled via the Green wire, include:
- Color 1
- Color 3
- Color 2
- Color 1 and 3
- Color 1 and 2
- Color 2 and 3
- Color 1, Color 2, and Color 3
Usage Features
- Synchronization: Units can be synchronized by setting them as either Master or Slave. To set as Master, hold the Blue cable to Negative for 3 seconds until all LEDs steady burn. This also resets the flash pattern to default. To set as Slave, hold the Blue cable to Negative for 3 seconds until all LEDs turn off. This also resets the flash pattern to default. Once set, connect all Blue cables to each other to activate synchronization.
- Alternating Synchronization: To achieve alternating sync, program one set of units as Master and another set as Slave. Follow the same Master/Slave setting procedure as above. Once set, connect all Blue cables to each other to activate alternating synchronization.
- Vehicle Specific Brackets: The ZX-180 is designed for installation on various vehicle models, with specific mounting kits available (sold separately). These kits include wedges of different angles (0°, 5°, 10°) to ensure proper orientation. Examples of supported vehicles include Dodge Ram, Ford Explorer, Chevy Tahoe/Suburban/Yukon, Chevy Silverado, GMC Sierra, Dodge Charger, Chevy Caprice, Ford F-150, Ford Taurus, and Dodge Durango.
- Bracket Identification: For Q-X019 bracket models, driver-side brackets are marked with a "D" and "UMD-X019", while passenger-side brackets are marked with "UMP-X019".
- Mounting Instructions:
- Place the mounting bracket against the mirror and drill mounting and cable exit holes. The bracket should be oriented so the unit faces perpendicular to the vehicle and parallel to the ground.
- Secure the mount with included hardware. It is recommended to remove the mirror from the vehicle for easier mounting.
- Run the cables through and mount the unit to the mirror. Set the flash pattern before final mounting.
- Run the cables through the door, connect to a power source, and re-secure the mirror to the vehicle.
- Extension Cable (Sold Separately): If extending main cables, add the desired length of cable to the unit's main cables. Solder and heat shrink the connections. Avoid cross-connecting wires. Do not expose connectors, cables, or solder points to heat, moisture, or debris.
Maintenance Features
- Cleaning: Use water (H2O) with a soft cloth to clean the light bar and lenses.
- Avoid Car Washes: Never take the light bar through a car wash (pressure washer, automatic car wash, brushes, or chemical washes) as this can scratch or damage the equipment.
- Lens Replacement: Yellowing of clear lenses may occur over time. Replacement lenses can be purchased by contacting STL Customer Service.
- Daily Inspection: Inspect and test the product daily to ensure it operates properly and is mounted correctly.
- Wiring Protection: Use grommets, cable ties, and looms to anchor and protect all wiring. Fuses should be properly sized and located as close to the power take-off points as possible.
- Troubleshooting: If issues arise, contact STL's Customer Service for troubleshooting or warranty claims.
Safety Precautions
- Professional Installation: Equipment is intended for strict use by authorized personnel. Installers must have a good understanding of automotive electronic systems.
- Eye Safety: Never stare directly into the LEDs to prevent momentary blindness or eye damage.
- Power Disconnection: Never cut wires or work on the unit while it is connected to a power source.
- Airbag Safety: Do not install the product or route wires through or in the deployment area of airbags. This can cause serious personal injury by damaging or dislodging airbags, or turning the unit into a projectile. Consult the vehicle's owner's manual for airbag deployment areas.
- Drilling Safety: If drilling is required, ensure no vehicle components are damaged. Deburr all drilled holes and remove metal remnants. Install grommets in all wire passage holes.
- Electrical Connections: Ensure a secure and good electrical connection to the battery's Negative (-) post. Do not use Circuit Breaks. Protect and use caution around live electrical connections to prevent severe personal injury or vehicle damage, including fire.
- Electromagnetic Interference (EMI): Mount light bars a minimum of 12" - 34" from radio antennas. Do not power equipment from the same circuit or share the same grounding circuit with radio communication equipment. Test all vehicle equipment together after installation to ensure no interference.
- Control Box Placement: If using a control box or remote device, install it in a location that allows safe operation without losing eye contact with the roadway.
- Driving Safety: Never activate or control equipment in hazardous driving conditions.
- Wire Type: Use SXL type wire in the engine compartment where higher heat resistance is required (according to SAE J-1128). All wires should comply with manufacturer recommendations for minimum size and be protected from hot surfaces and moving parts.
- Instruction Manual: Store the manual in a safe place for future reference. It can also be found on the SpeedTech Lights website.
Failure to follow these safety precautions, warnings, notices, and instructions could result in damage to the product or vehicle, void the warranty, and/or cause serious injury to the user and passengers.