Page 13
Titmus V4 / Titmus V2
N O
P
R
S
T
U
V
Operation of the Vision Screener (continued)
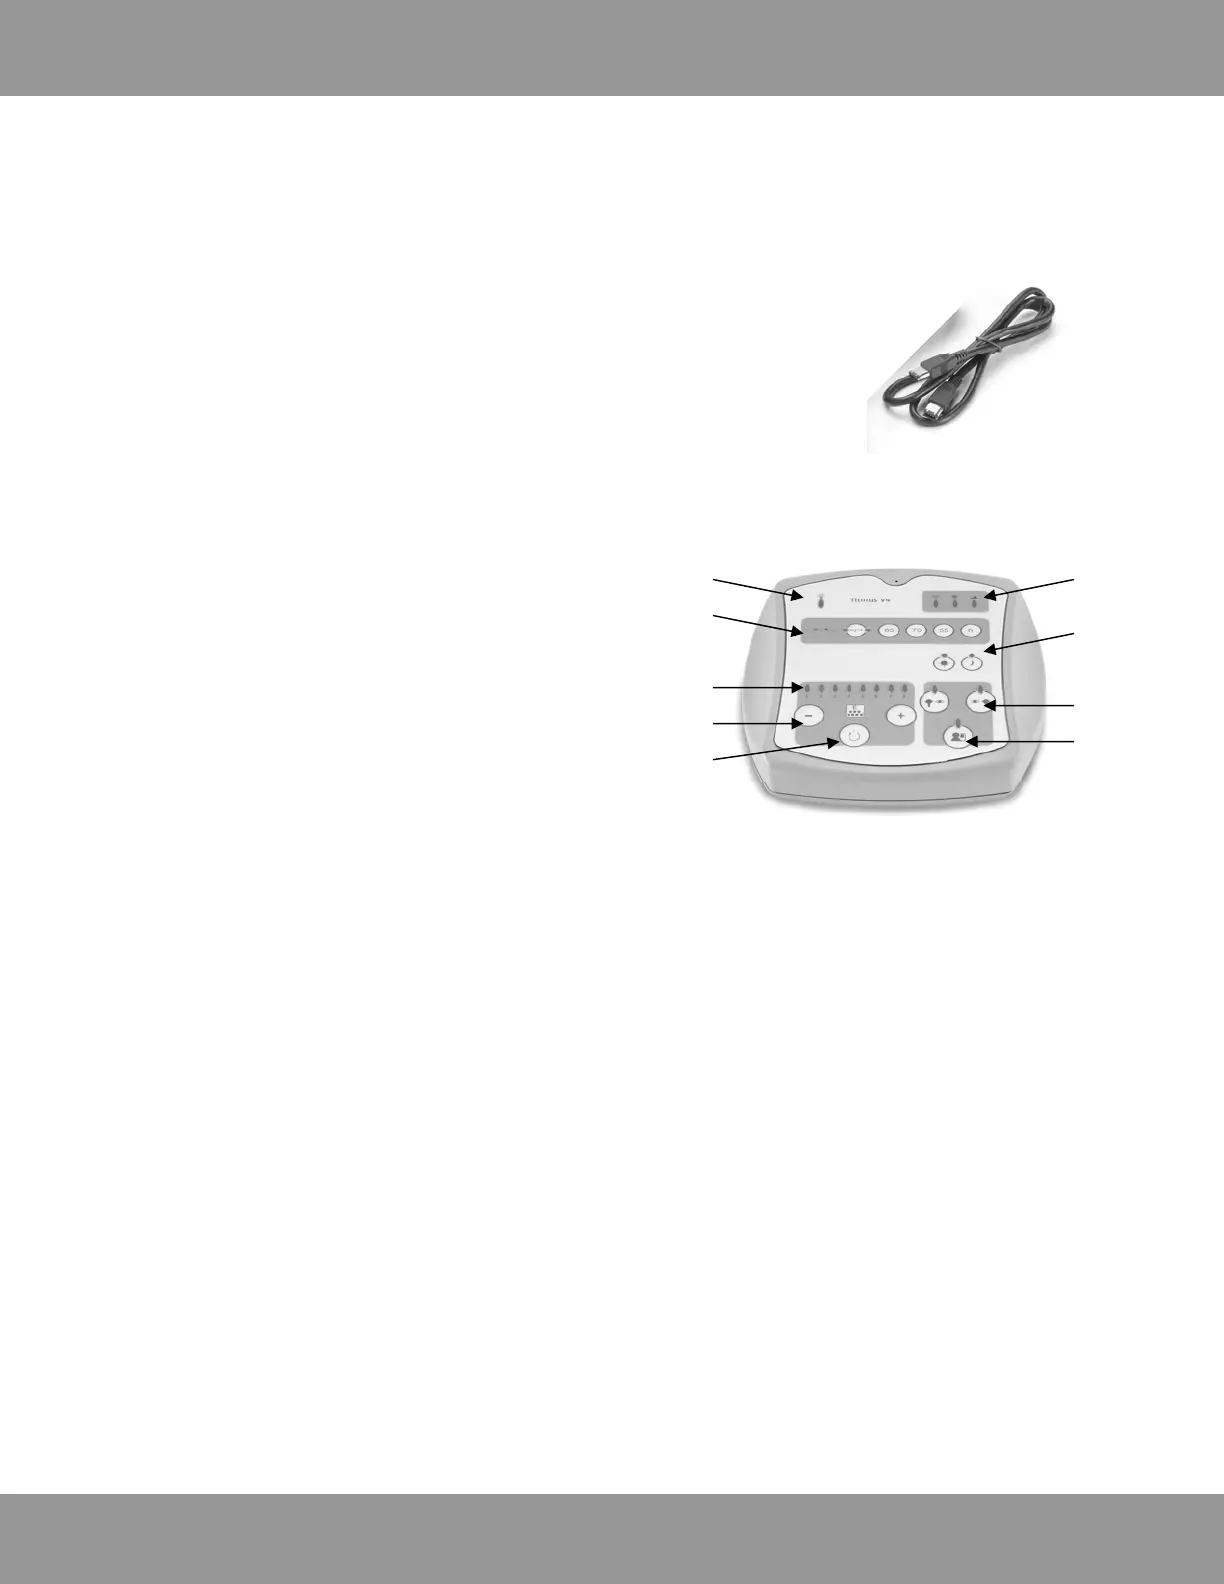
Operating the Titmus V4 using the Control Panel
Connect the panel to the vision screener using the cord shown.
Control Panel Operating switches
N
Light source condition
Normally in a steady state.
Note: On start-up, this indicator flashes for approximately 1 minute then
becomes steady – this indicates that minimum illumination level is reached in
order to start testing.
If this indicator keeps flashing continuously, light module needs to be replaced.
O
Test distance - near, intermediate or far
Indicates the test distance,
Book: NEAR at 14”
Computer: Intermediate (based on the lens used,
between 19”-40”)
Mountain: FAR at 20 feet
P
Peripheral vision screening (horizontal only)
Use the button with arrows to select left or right eye to be
tested.
Use the buttons with numbers - 85, 70, 55 and N to
operate the lights at 85°,70°,55° and Nasal (45°) for
peripheral vision testing.
Q
Day or night illumination condition
Press button with the image of the sun for daylight vision
testing. This is the default illumination level.
Press button with the image of the moon for night vision
testing.
R
Test Slide position
Number indicates the Test Number. Refer to your Slide Information Brochure for tests at each position.
S
Test Slide advance/reverse
Select “+” to advance to next test, “-” to go back to previous test.
T
Reset control panel
This will reset the instrument and all buttons on the control panel to the initial start-up condition of the
instrument. Test Slide drum will reset to Test No. 1.
U
Occlude each eye, light ON indicates eye being tested
These buttons activate Occlude Shutters that occlude each eye (clicking sound).
Indicator light ON indicates that the eye is being tested.
If indicator light is OFF, eye is occluded.
Left button is for Left Eye, Right button is for the Right Eye.
V
Head position indicator/sensor deactivate
Indicates if the head of patient is correctly positioned. If no indication, head is not correctly positioned.
Note: To override the head sensor, press the button, light on indicator will start flashing. This indicates that the
head sensor has been deactivated. Use ONLY if patient tends to move head causing the test slide illumination to
go ON/OFF. Override may be used with younger children who tend to squirm when testing.
 Loading...