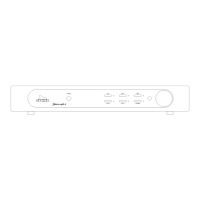
SPHINX Project Ten
7
Connecting the inputs
The amp has one balanced and five unbalanced
inputs.
Balanced
Use the BALANCED LINE 2 to connect the
balanced outputs of other signal sources (tuner, CD
player, etc.).
You select this input by pressing the
CINCH/BALANCED switch the rear panel (20.).
The unbalanced LINE 2 input will be disconnected.
Unbalanced
The unbalanced line inputs are:
CD for a CD player,
TUNER for a tuner,
TAPE IN for a recorder,
LINE 1 and
LINE 2 for any unbalanced
line signal.
Connecting a recorder
Connect the input of the recorder to the TAPE OUT
output (26.)
Any input signal selected with buttons 5., 6., 7. or 8.
and which you will hear via the loudspeakers is also
sent to this output.
Connect the output of the recorder to the TAPE IN
input (25.)
Connecting a turntable
There is no specific RIAA phono-input. When using
a turntable you should pre-amplify the signal with a
separate phono pre-amp (or pre-pre-amp).
The turntable may be connected in two ways.
Balanced
Connect the balanced output of a phono pre-amp to
BALANCED LINE 2 (18. + 19.).
Unbalanced
Connect the unbalanced output of a phono pre-amp
to one of the cinch inputs LINE 1 or LINE 2.
You may connect the phono pre-amp balanced and
unbalanced simultaneously! Or you may use two
different pre-amps.
Connecting a CD player
The CD player may be connected in two ways.
Balanced
Connect the balanced output of a CD player to
BALANCED LINE 2 (18. + 19.).
Unbalanced
Connect the unbalanced output of a CD player to
the CD input (24.).
You may connect the CD player balanced and
unbalanced simultaneously! Or you may use two
different CD players.
Connecting a tuner
Connect the unbalanced output of a tuner to the
TUNER input (23.).
If applicable you may connect the tuner's balanced
outputs to BALANCED LINE 2 (if not in use by
another component)!
Connecting other signal sources
LINE 1 and LINE 2 are available for any other signal
sources.
Connecting the optical cables
The Project Ten has a CONTROL OUT optical
connector so it can remotely switch another Sphinx
component to stand-by.
When the CONTROL IN of a component is
connected to the CONTROL OUT of the Project Ten
with an optical cable you do not have to use that
component's ON/OFF switch. As soon as the
Project Ten is selected to stand-by the other
component is also selected to stand-by.
Ensure proper connection of the optical cables
(from CONTROL OUT to CONTROL IN), otherwise
the LED next to the STANDBY button on the front
panel may remain green although the stand-by
mode is activated.