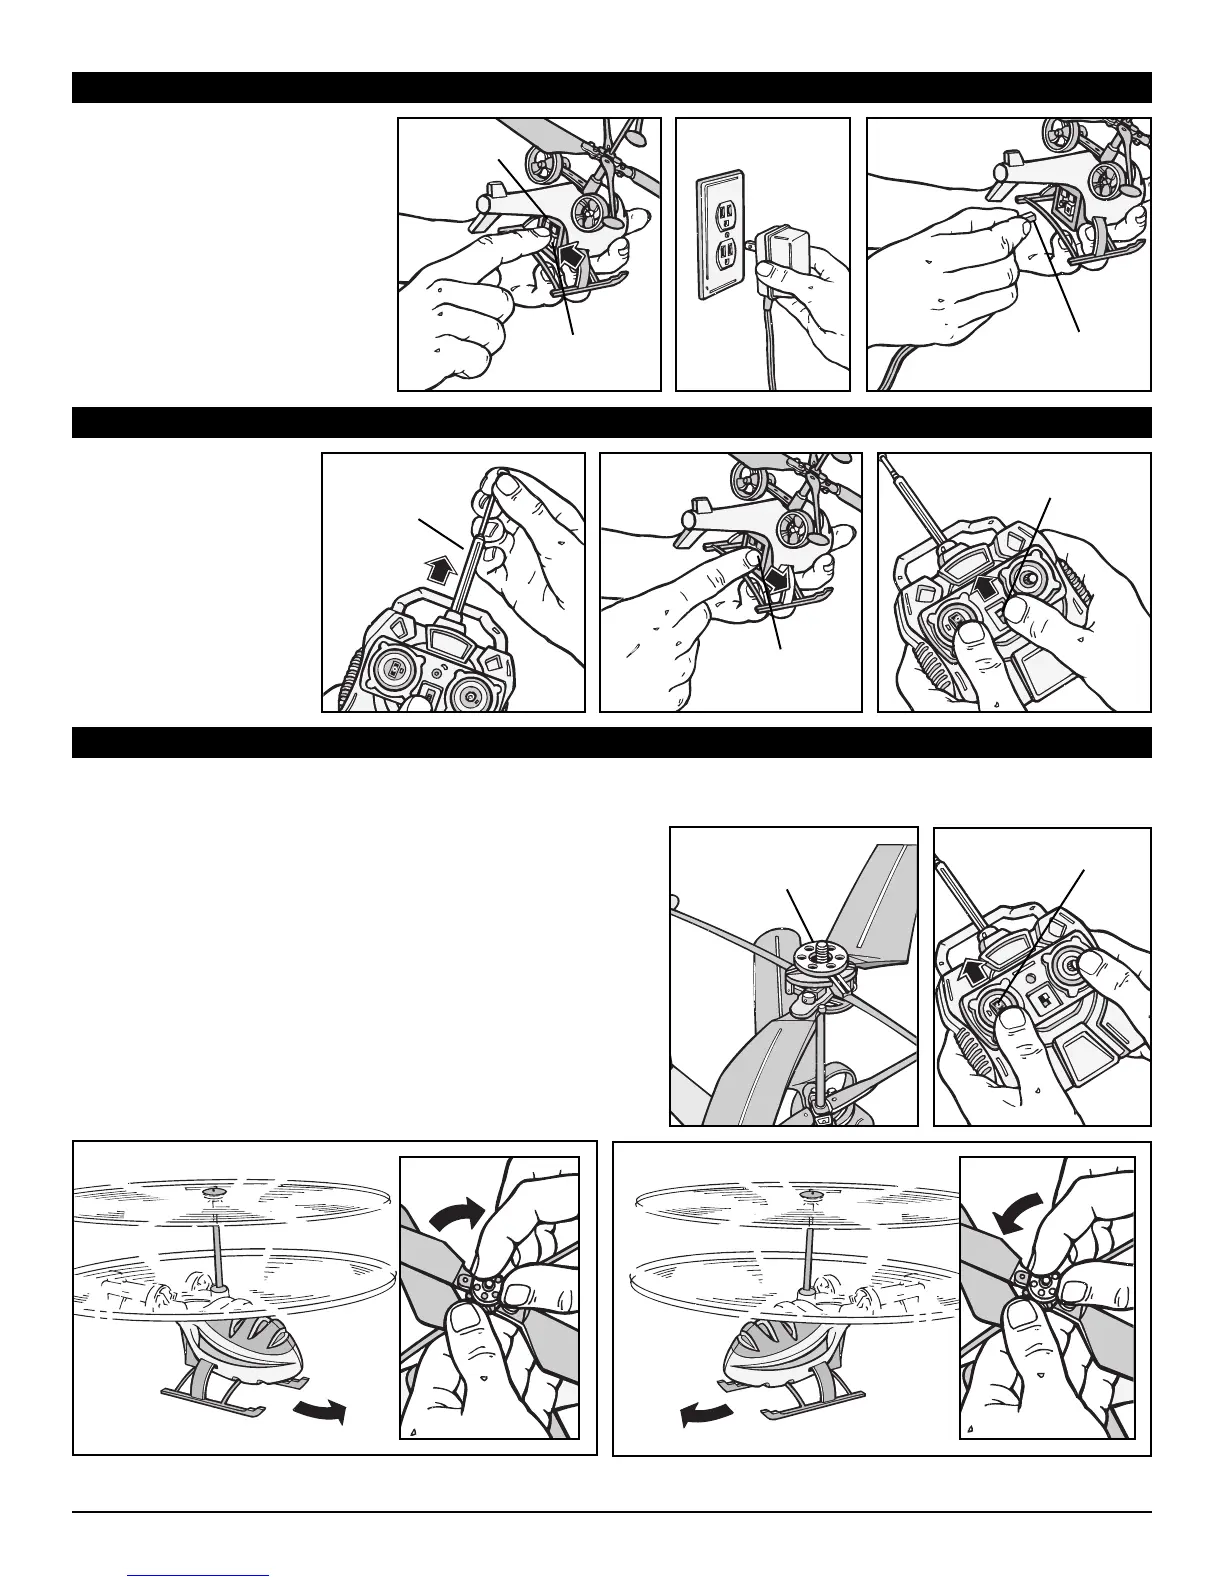
FLIGHT PREPARATION
IMPORTANT: HELICOPTER ROTORS MUST BE TRIMMED CORRECTLY BEFORE FLYING!
1. Extend the controller
antenna fully.
2. Turn the Helix
TM
helicopter
“ON/OFF” switch to the
“ON” position.
3. Push the controller switch
to the “ON” position.
Practice! Flying a helicopter is a skill that takes time to acquire!
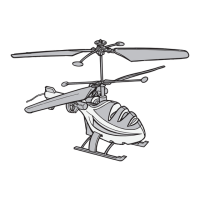
• In order to fly your Helix
TM
properly, you must first correctly trim the rotors. The trim wheel is located at the top of the rotors.
• Turn the helicopter and controller on. Increase the throttle slowly until the Helix
TM
takes off. (You want to fly the helicopter low)
1
32
1
34
1. Location of adjustable trim wheel above rotors.
2. Slowly push on the throttle until the Helix
TM
takes off from the ground.
3. If the helicopter is spinning counter clockwise, turn the wheel a little
bit clockwise.
4. If the helicopter is spinning clockwise, turn the wheel a little bit
clockwise.
When properly trimmed, the helicopter will not spin, it may drift on
take-off but the body should not spin independent of the directional
control. It may take a few tries to find the right trim.
Once y
ou have your Helix
TM
tr
immed correctly, you are ready to fly.
F
or the first flight, pick a pretty wide open space indoors.
2
Antenna
“ON/OFF”
Switch
“ON/OFF”
Switch
Trim
Wheel
Throttle
CHARGING
YOUR HELIX
TM
HELICOPTER
1. Make sure that your Helix
TM
helicopter’s “ON/OFF” switch is in
the “OFF” position.
2. Plug the charger into a wall outlet.
3. Connect the “charge cable” to the
Helix
TM
charging port. Make sure
cable plug aligns with charging
port. When charging, a red LED
light on the helicopter will flash and
when the charging is completed,
the light will turn “OFF”.
1
32
Charge
Cable
“ON/OFF”
Switch
Charge
Light