SPINNER
®
ELITE OWNER’S MANUAL
www.spinning.com 800.847.SPIN (7746)
19
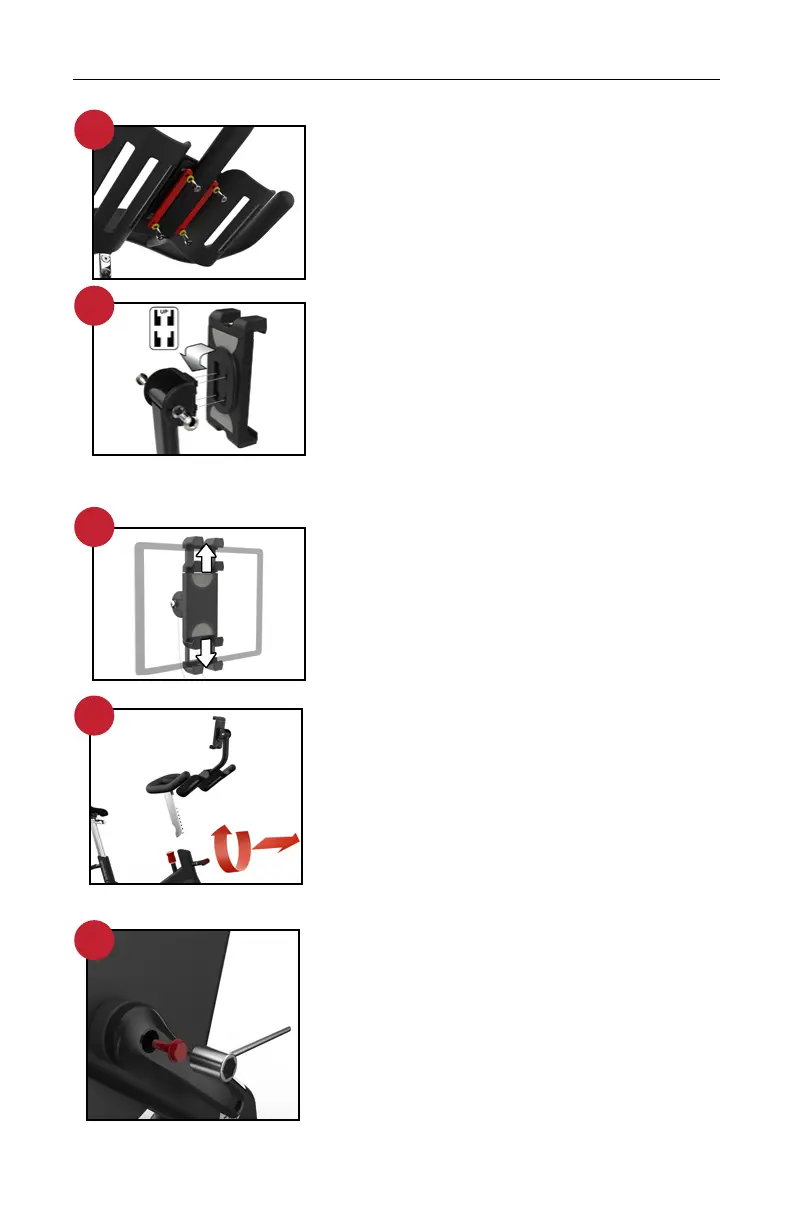
STEP 4A: INSTALL THE TABLET MOUNT
Locate the 2 bar washers and 4 bolts as
shown and align the holes with the threaded
bosses underneath the center section. Use
the allen wrench to tighten the allen bolts
securely.
STEP 4B: ATTACH THE TABLET CLAMP
TO THE ARM
Push in and slide down gently to fully engage
the snap locks as shown. Note the orientation
of the tabs and slots.
Pivot bolts can be tightened for a stier angle
adjustment and should always be snug.
Use caution and do not over-tighten these
bolts.
STEP 4C: ATTACH THE TABLET
Open holder tabs using two hands and place
tablet securely. Use caution to keep tablet
side controls away from holder tabs.
STEP 5: INSTALL THE HANDLEBARS
Unscrew, pull out and hold the handlebar
pop-pin. Slide the handlebar post all the
way into the handlebar tube. Release the
handlebar pop-pin and adjust the handlebars
to make sure that the pop-pin is engaged.
Tighten the handlebar pop-pin securely
before riding.
STEP 6: INSTALL THE CRANK
Locate the left side crank and push it onto
the axle in the opposite orientation of the
drive side crank. Give the crank a tap with
the hand at that axle bolt location to make the
connection snug. Now find the 14mm crank
bolt on the assembly card and hand thread
the bolt into the axle hole as far as possible,
making sure that the threads are engaged
and the bolt is straight. Use the supplied
14mm socket wrench to tighten the bolt
clockwise. Make sure it is tight and then snap
the dust cap into the bolt hole.
5
6
4A
4B
4C