24
© SPX
Form No. 1000528
Rev. 1 December 2, 2011
Place the ratchet into the crank bore, and install the drive shoe and springs. Verify that the ratchet 2.
teeth are driving in the correct direction and engaged with the drive shoe teeth.
Verify that the crank pin is located in the top of the crank and held in its retracted position. If it is not, 3.
install the pin and position the face of the small diameter of the pin parallel with the crank surface.
Slightly tighten the crank pin retaining screw to hold it in position.
Install the crank into the wrench body, and engage the crank driving head into the slider.4.
Loosen the crank pin retaining screw, and using a screwdriver, slide the crank pin into the slider. 5.
Tighten the crank pin retainer screw.
Slide the square drive into the wrench body and attache the square drive cap.6.
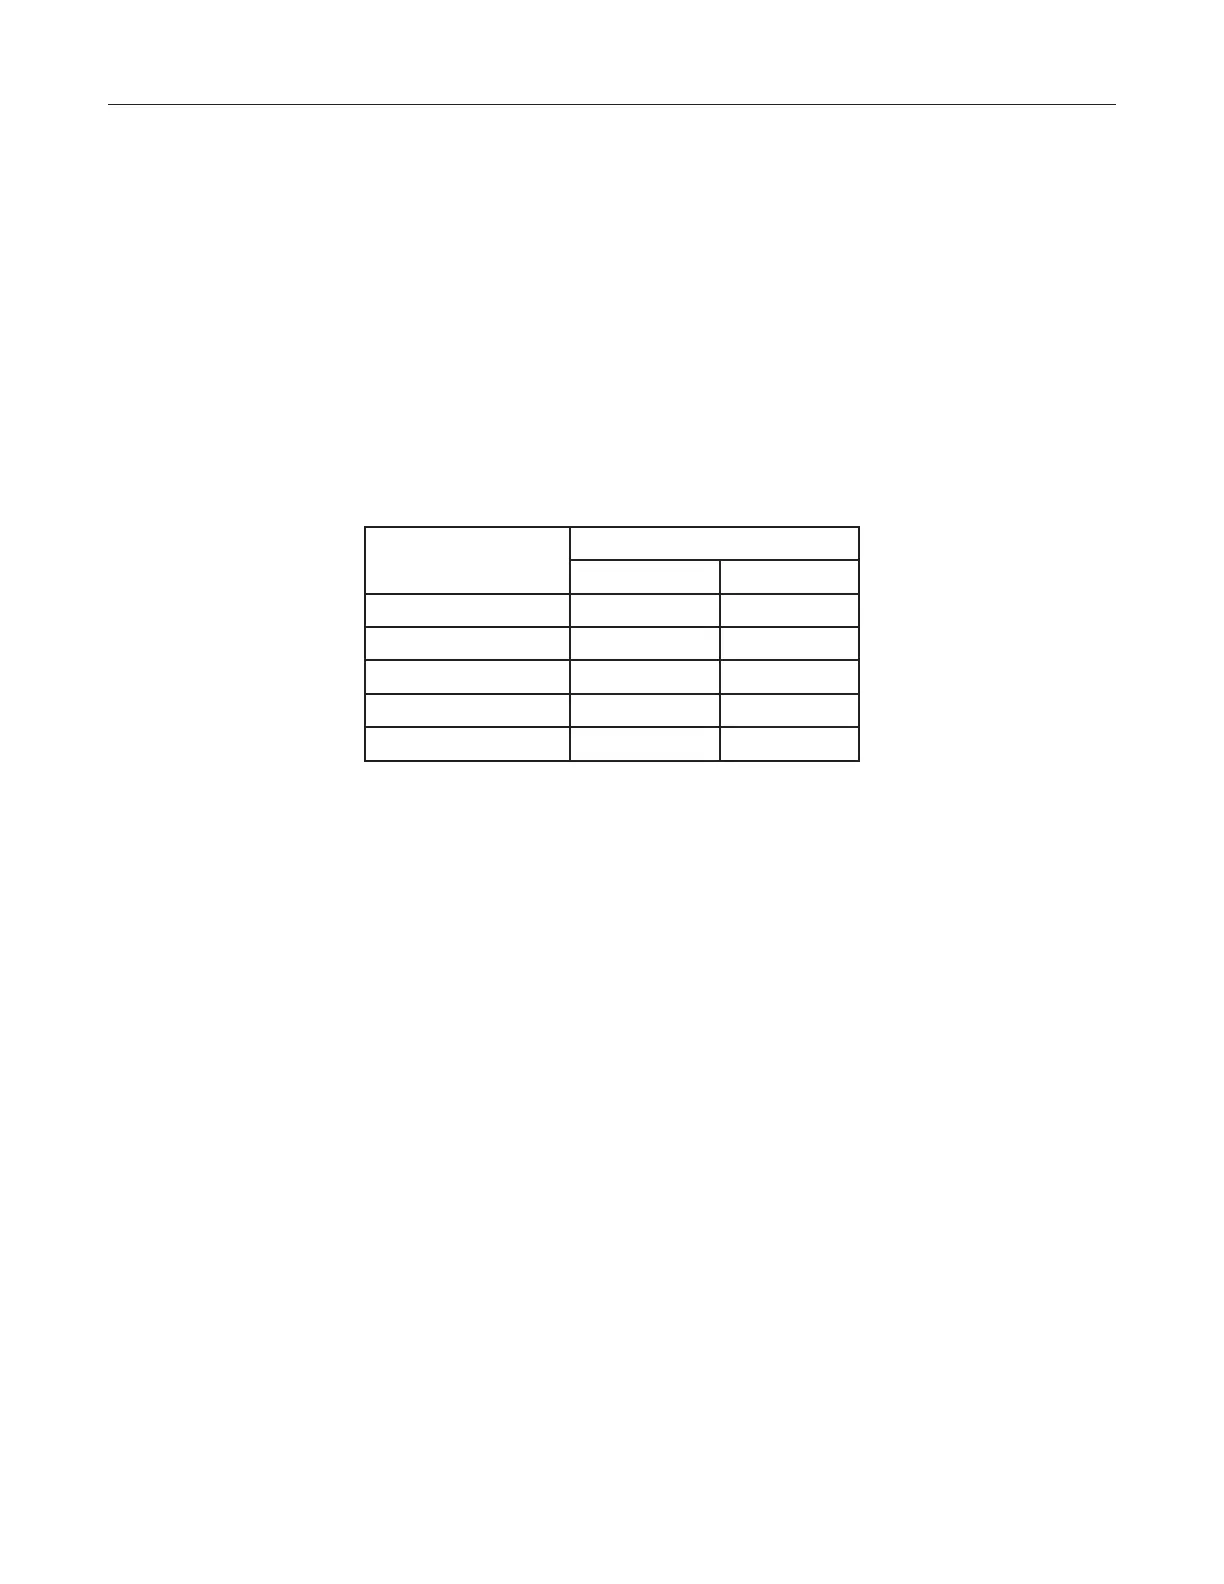
Apply one drop of low-strength thread-locking adhesive to the threads of the shoulder screw, slide 7.
it through the piston, and screw it into the shuttle. Tighten the should screw in accordance with the
following torque specications.
Wrench Size Torque
Nm in-lb
TWSD1 20 178
TWSD3 20 178
TWSD6 30 266
TWSD11 30 266
TWSD25 50 443
Inspect the o-ring seal on the piston plug, replace if damaged, and insert into the piston. Install the 8.
internal circlip to retain the piston plug in position.
Inspect the o-ring seal on the endcap, replace if damaged, and install into the body. Tighten the 9.
endcap using a pin wrench.
Test the operation of the hydraulic torque wrench by connecting to the appropriate pump unit. 10.
Keeping hands clear of the torque wrench, advance and retract the torque wrench several times,
and observe the movement of the shuttle mechanism to check for fee and correct movement. Apply
full pressure to the torque wrench (690 bar (10,000 psi) advance; 103 bar (1,500 psi) retract), and
check for leaks.
Replace the torque wrench guard.11.
Following stripdown and/or lubrication, the hydraulic torque wrench should be calibrated to verify that
the torque output is within specied limits.
Repair Procedures continued
 Loading...