23
© SPX
Form No. 1000528
Rev. 1 December 2, 2011
See Figure 11. Remove the square drive and square 10.
drive cap.
See Figure 12. Withdraw the crank complete with 11.
ratchet drive assembly from the torque wrench.
See Figure 13. Remove the shuttle and slider 12.
assembly from the body.
Remove the ratchet, drive shoe, and springs from 13.
the crank.
Thoroughly clean all components, removing the old
lubricant using a mild degreasing agent. Inspect all
components for damage and/or excessive wear.
Inspect the ratchet and drive shoe teeth for damage,
cracks, etc. Any substandard component must be
replaced immediately using genuine parts supplied by
SPX Bolting Systems.
Drive Component Assembly
Before assembly, apply a liberal coat of Revol R5 Moly
Anti Seize to the following areas:
Inside surfaces of both sideplates including the •
shuttle bore.
Shuttle component (all surfaces except threaded •
hole).
Slider component (all surfaces).•
The pocket where the drive shoe is located within •
the crank (not the crank bore).
The driving head of the crank that assembles •
into the slider.
Body sideplate journals.•
Square drive bearing journals.•
Square drive cap bearing journals.•
Threads of endcap.•
IMPORTANT: Do not apply lubricant to the ratchet
and drive shoe teeth.
The hydraulic torque wrench drive components must
be lubricated using the specied product only. Using
alternative lubricants will affect the output and possibly
lead to premature component failures.
Assemble the slider to the shuttle and verify it slides 1.
freely (check that the slider is not installed upside-
down). Install the shuttle/slider assembly into the
wrench body.
Repair Procedures continued
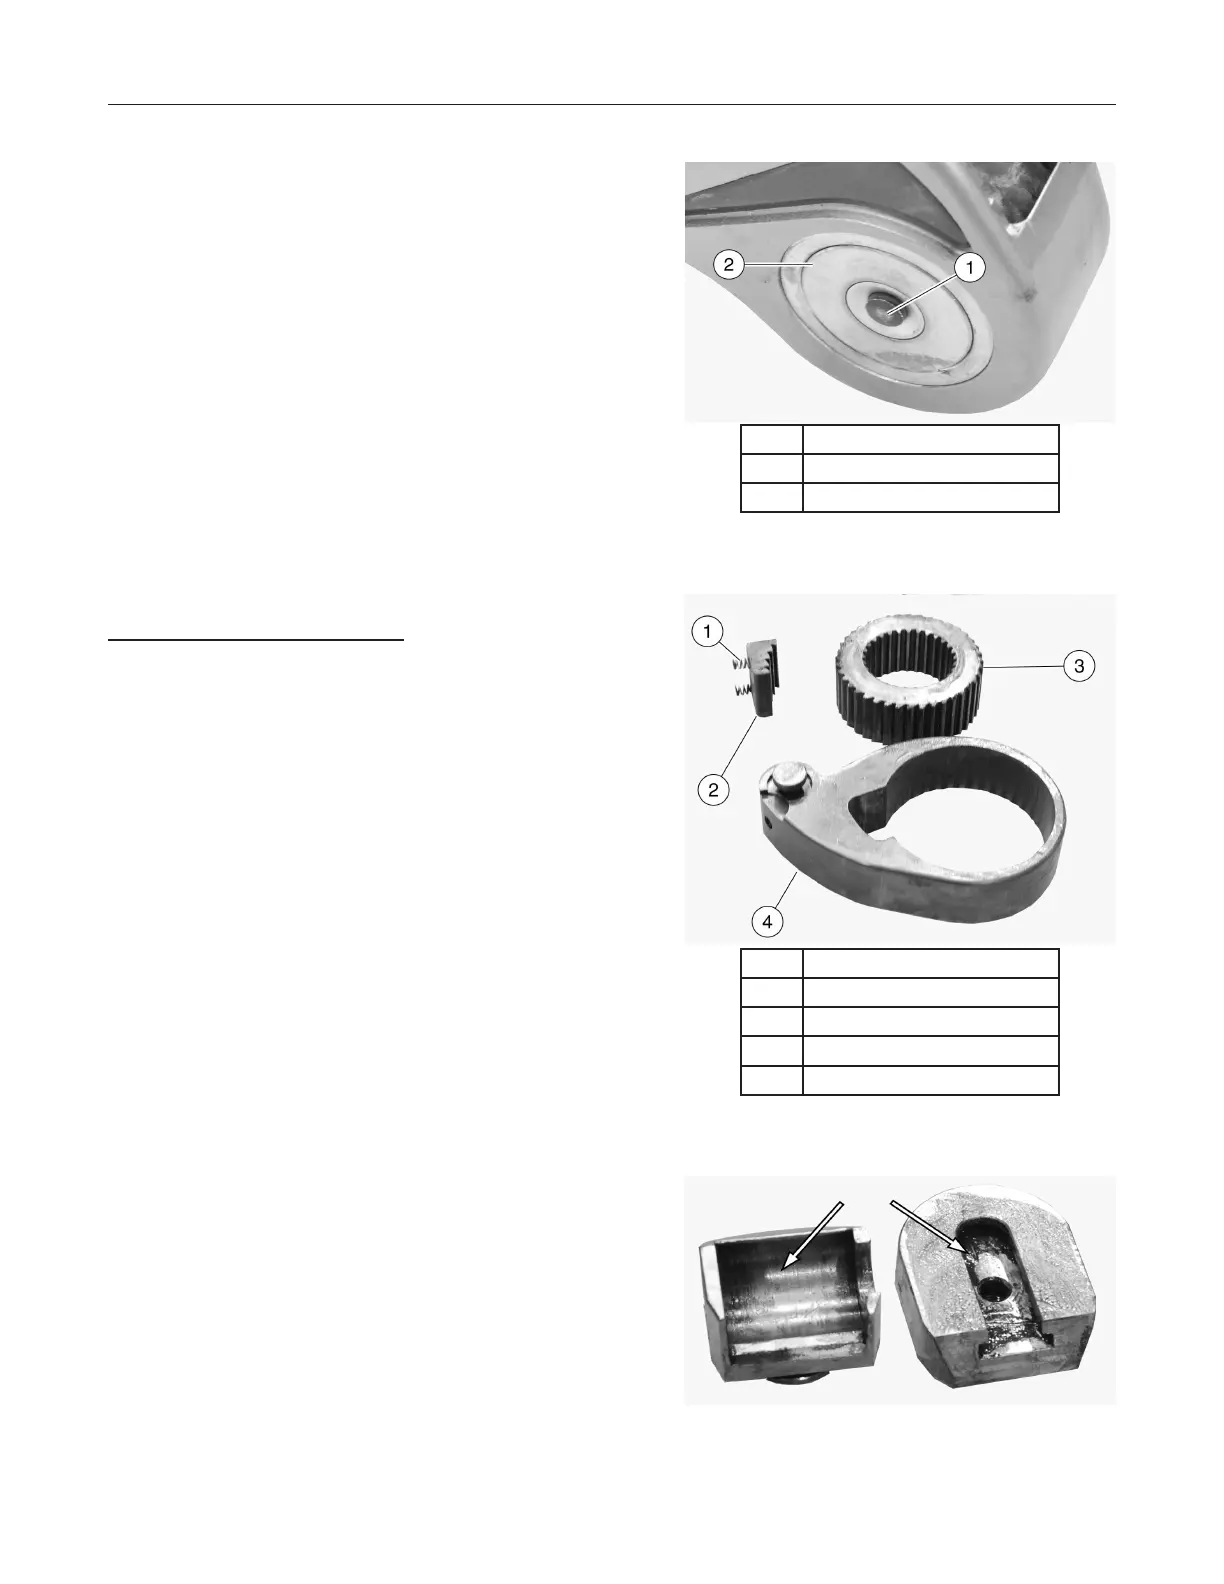
Item Description
1 Square drive lock button
2 Square drive cap
Figure 11. Square Drive Removal
Item Description
1 Drive shoe springs
2 Drive shoe
3 Ratchet
4 Crank
Figure 12. Crank Removal
Figure 13. Shuttle and Slider
Removal
 Loading...