Tip: The advantage of setting triggers is that you won’t have to review hours of
non-eventful footage.
Once you click OK, you’ll be able to view your choices on the calendar. Designated
time blocks are outlined in gray. As the legend at the bottom of the calendar shows, a
transparent block indicates an Always Record task. Blocks that are occupied by one
or more colored icons indicate that you’ve set one or more triggers:
Voice -Trigger Option
Vibration -Trigger Option
Motion -Trigger Option
You can always change your options by right-clicking within a block, then choosing
Edit Task or Delete Task. If you choose Edit Task, the Create Task box will appear
with your previous settings. If you choose Delete Task, the highlighted time block will
be deleted.
To activate your designated Schedule Settings on the Z12, make sure to click OK on
the Schedule Settings screen. Then, in the Settings screen, make sure to click on the
Sync Settings to DVR button.
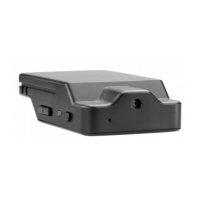
LEDs at a Glance
It’s important to pay attention to the Z12’s multi-color light emitting diode in order to
know the status of the camera. Here’s a quick guide:
While Powered from Camera’s Battery
Green steady: camcorder is booted up
Red steady: no card, card fail, battery low or card full (and not set for circular
recording)
Green ashing: recording in progress
Green/Red intermittent ashing: recording in progress but battery is low
While Powered from Electrical Outlet or Car Adapter
Red ashing: camera is charging
Red steady: no card, card fail or card full (and not set for circular recording)
Orange/Green intermittent ashing: charging and recording in progress
Green ashing: charging complete and recording in progress
LED off: charging complete and no recording
While Connected to Computer
Orange steady: charging
Green steady: charging complete
SPYTEC Z12 INTELLIGENT SECURITY CAMCORDER USER GUIDE 15