30
avid brake bleed procedure
18
Once the large bubbles at the lever have stopped, apply a
small amount of pressure on the syringe plunger then remove
the syringe and re-install the bleed port screw.
There will be a small amount of excess DOT fluid
that spills out as you remove the syringe and re-install the bleed port screw,
this is normal. be sure to wipe the fluid off the lever with a clean rag.
19
Spray isopropyl alcohol or water onto a clean rag and wipe off
the brake lever and caliper to remove any excess DOT fluid.
20
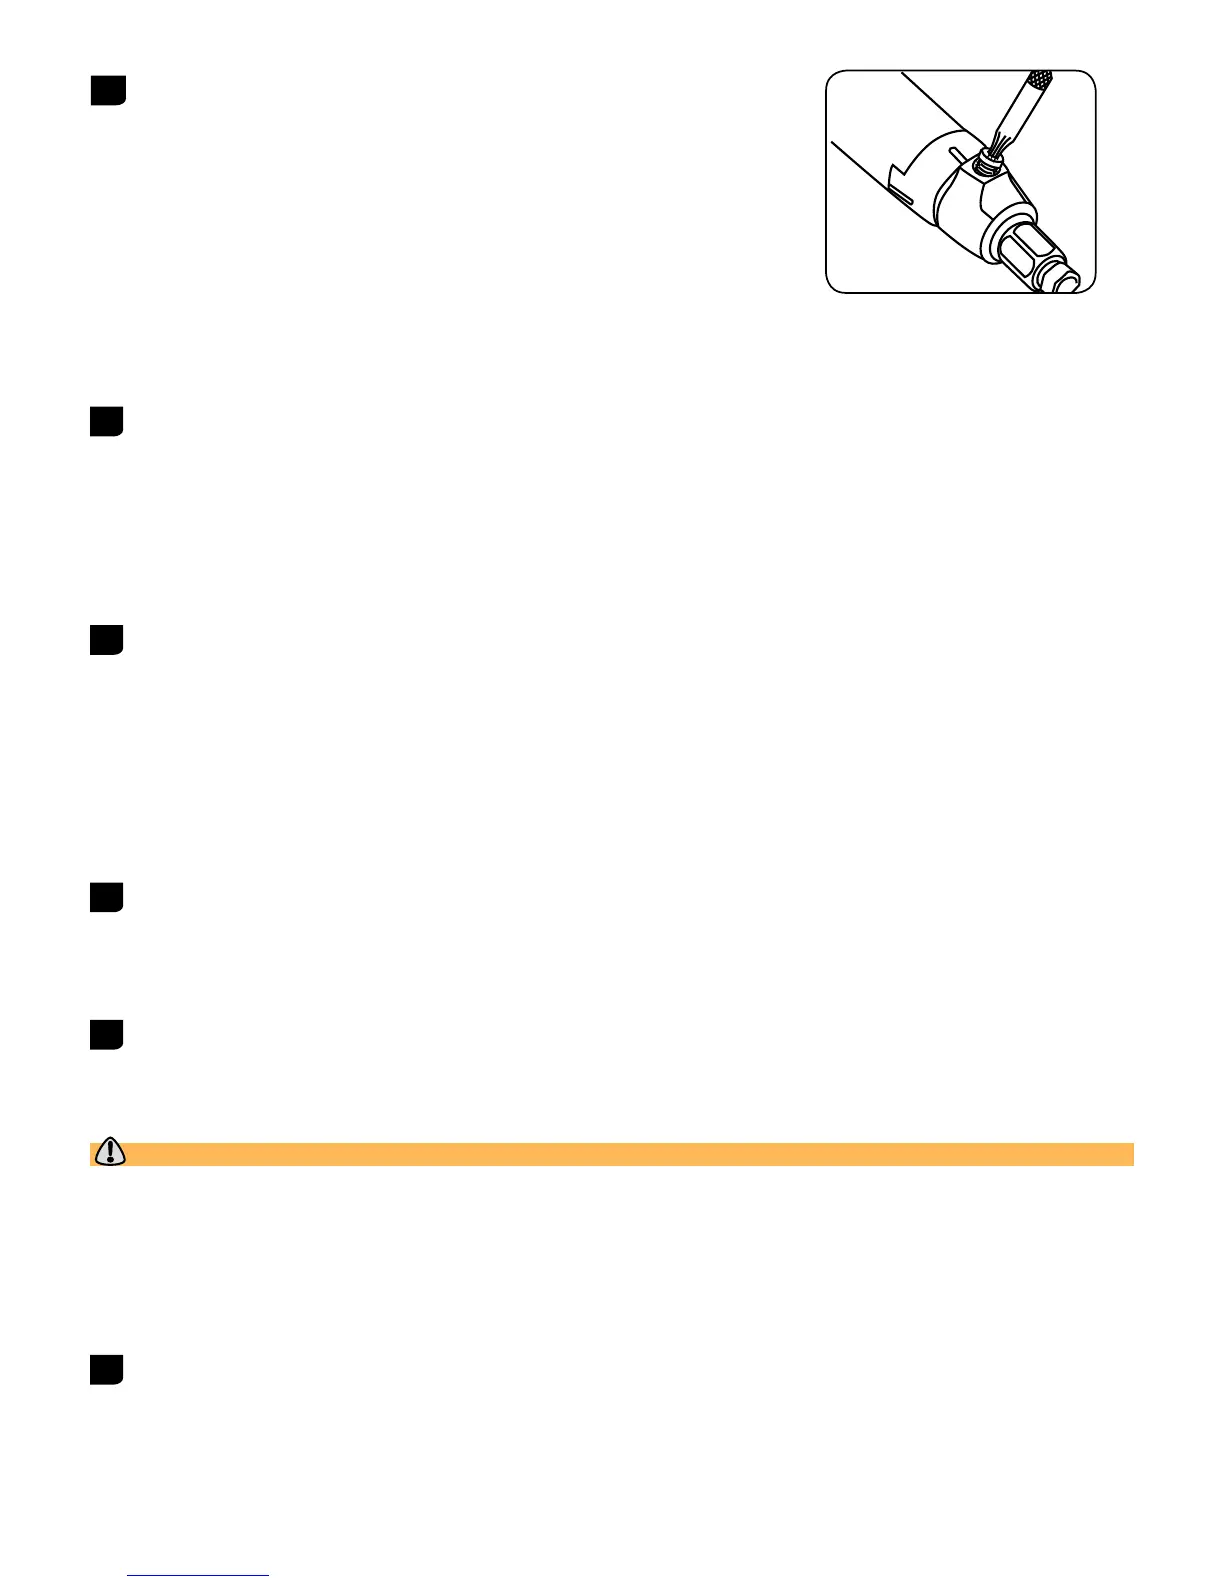
Visually check your work. Inspect the banjo bolt and banjo for
any protruding o-rings. If there are any o-rings that are
‘squeezed’ beyond the outside edges of the banjo or bolt,
remove and replace the o-rings, and then repeat the
installation process.
21
Remove the Bleed Block from the caliper and re-install the
brake pads and spreader clip.
22
Reinstall your wheel according to the manufacturer’s
instructions.
WARNING:
• Empty the syringes into a sealed container and dispose of the fluid properly. Remember, DOT fluid should be recycled or
disposed of in accordance to local and federal regulations.
• NEVER pour DOT fluid down a sewage or drainage system or into the ground or a body of water.
• Do not re-use this fluid.
• Do not leave the hose clamps closed, this will damage the clear tubing on the syringes.
23
You are almost ready to ride, but first it’s a good idea to test
your brakes. Pull on the lever extremely hard (as hard as you
can imagine yourself pulling the lever while you’re riding)
several times. Make sure to look around the compression nut
on the lever, and the banjo bolt on the caliper for any leaks.
Make one last check of all the bolts and fittings.If everything
checks out, YOU ARE READY TO RIDE!