10
ENGLISH
(Original instructions)
● DO NOT CLICK THE TRIGGER OF A STALLED DRILL
OFF AND ON IN AN ATTEMPT TO START IT. DAMAGE
TO THE DRILL CAN RESULT.
● Minimize stalling on breakthrough by reducing pressure
and slowly drilling through the last part of the hole.
● Keep the motor running while pulling the bit out of a drilled
hole. This will help reduce jamming.
● Make sure switch turns drill on and off.
Drilling in wood
Holes in wood can be made with the same twist drill bits used
for metal or with spade bits. These bits should be sharp and
should be pulled out frequently when drilling to clear chips
from the utes.
Drilling in metal
Use a cutting lubricant when drilling metals.
The exceptions are cast iron and brass which should be drilled
dry. The cutting lubricants that work best are sulphurized
cutting oil.
LED work light (Fig H)
When drill is activated by pulling the trigger switch (1), the
integrated LED work light (8) will automatically illuminate the
work area.
Note: The work light is for lighting the immediate work surface
and is not intended to be used as a ashlight.
Troubleshooting
Problem Possible cause Possible solution
Unit will not start. Battery pack not
installed properly.
Battery pack
not charged.
Check battery pack
installation.
Check battery pack
charging requirements
Unit starts
immediately upon
inserting battery
The switch has
been left in the
“on” position.
The switch must be
moved to “off” to prevent
the tool from immediately
starting when battery
is inserted.
Battery pack will
not charge.
Battery pack not
inserted into charger.
Charger not
plugged in.
Surrounding air
temperature too hot or
too cold.
Insert battery pack into
charger until LED lights.
Plug charger into a working
outlet.
Move charger and battery
pack to a surrounding
air temperature of above
45º C or below +40.5º C.
Unit shuts off
abruptly.
Battery pack has
reached its maximum
thermal limit.
Out of charge. (To
maximize the life of
the battery pack it is
designed to shutoff
abruptly when the
charge is depleted
Allow battery pack to cool
down.
Place on charger
and allow to charge.
Maintenance
Your STANLEY FATMAX tool has been designed to operate
over a long period of time with a minimum of maintenance.
Continuous satisfactory operation depends upon proper tool
care and regular cleaning.
Your charger does not require any maintenance apart from
regular cleaning.
Warning! Before performing any maintenance on
the tool, remove the battery from the tool. Unplug
the charger before cleaning it.
● Regularly clean the ventilation slots in your tool and
charger using a soft brush or dry cloth.
● Regularly clean the motor housing using a damp cloth.
● Do not use any abrasive or solvent-based cleaner.
Protecting the environment
Separate collection. Products and batteries marked
with this symbol must not be disposed of with
normal household waste.
Products and batteries contain materials that can be
recovered or recycled reducing the demand for raw materials.
Please recycle electrical products and batteries according to
local provisions. Further information is available at
www.2helpU.com
Technical data
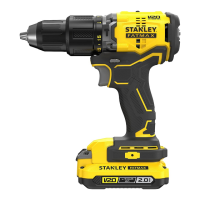
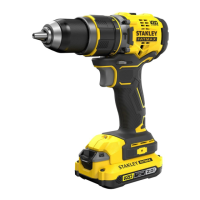
SCD700 SCD708
Voltage
V
DC
18V
(20V MAX)
18V
(20V MAX)
No-load speed
Min
-1
0-400/0-1500 0-400/0-1500
Max. torque Nm 50 52
Chuck capacity mm 13 13
Max Drilling capacity
Steel/wood mm 13/35 13/35
Weight kg 1.2 1.2
Charger SC125 SC200
SC400
SC401
Input Voltage
V
AC
220-240 220-240 220-240
Output Voltage
V
DC
18V
(20V MAX)
18V
(20V MAX)
18V
(20V MAX)
Current A 1.25 2 4