7
ENGLISH
(Original instructions)
Switching on and off (g. G)
u To switch the tool on, press the on/off switch (1).
u To switch the tool off, release the on/off switch.
Forward/reverse action (g. H)
u Move the selecter (2) to indicate the direction you require.
Selecting the operating mode (g. I)
The tool can be used in three operating modes.
u To operate the operating mode selector (3), push the
unlock button (21) and rotate the selector towards the
required position, as indicated by the symbols.
Drilling
u For drilling in steel, wood and plastics, and for
screwdriving set the operating mode selector (3) to the
position (22).
Hammer drilling
u For hammer drilling in masonry and concrete, set the
operating mode selector (3) to the
position (19).
When hammering, the tool should not bounce and run
smoothly. If necessary, increase the speed.
Hammering
u For hammering with spindle lock, and for light chiselling
and chipping, set the operating mode selector (3) to the
position (20).
u When changing from hammer drilling to chiselling, turn the
chisel to the desired position. If resistance is felt during
mode change, slightly turn the chisel to engage the
spindle lock.
Accessories
The performance of your tool depends on the accessory used.
Stanley accessories are engineered to high quality standards
and designed to enhance the performance of your tool. By
using these accessories you will get the very best from your
tool.
Maintenance
Your Stanley corded/cordless appliance/tool has been
designed to operate over a long period of time with a minimum
of maintenance. Continuous satisfactory operation depends
upon proper tool care and regular cleaning.
Warning! Before performing any maintenance on corded/
cordless power tools:
u Switch off and unplug the appliance/tool.
u Regularly clean the ventilation slots in your appliance/tool/
charger using a soft brush or dry cloth.
u Regularly clean the motor housing using a damp cloth. Do
not use any abrasive or solvent-based cleaner.
u Regularly open the chuck and tap it to remove any dust
from the interior (when tted).
Mains plug replacement (U.K. & Ireland only)
If a new mains plug needs to be tted:
u Safely dispose of the old plug.
u Connect the brown lead to the live terminal in the new
plug.
u Connect the blue lead to the neutral terminal.
Warning! No connection is to be made to the earth terminal.
Follow the tting instructions supplied with good quality plugs.
Recommended fuse: 5 A.
Protecting the environment
Separate collection. Products and batteries
marked with this symbol must not be disposed of
with normal household waste.
Products and batteries contain materials that can be
recovered or recycled, reducing demand for raw materials.
Please recycle electrical products and batteries according to
local provisions. Further information is available at
www.2helpU.com
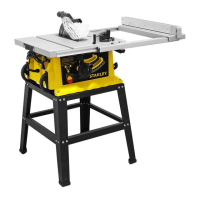
Technical data
SBR20
Input voltage V
DC
18
No-load speed min
-1
0 - 2200
Impact rate min
-1
0 - 5775
Weight kg
2.15
Max. drilling capacity
Concrete mm
20
Steel mm
13
Wood mm
30
Battery
Not Supplied
Voltage V
DC
Capacity Ah
type
Charger
Not Supplied
Input Voltage V
AC
Output Voltage V
DC
Current A
Approx. Charge time min
Level of sound pressure according to EN 60745:
Sound pressure (L
pA
)
88.1
dB(A), uncertainty (K)
3
dB(A)
Sound power (L
WA
)
99.1
dB(A), uncertainty (K)
3
dB(A)