16
CHAIN TENSION
WARNING: Wear protective gloves when handling the
chain. The chain is sharp and can cut you even when it is
not moving.
Note: When adjusting chain tension, make sure the chain bar nuts
are finger tight only. Attempting to tension the chain when the
chain bar nuts are tight can cause damage.
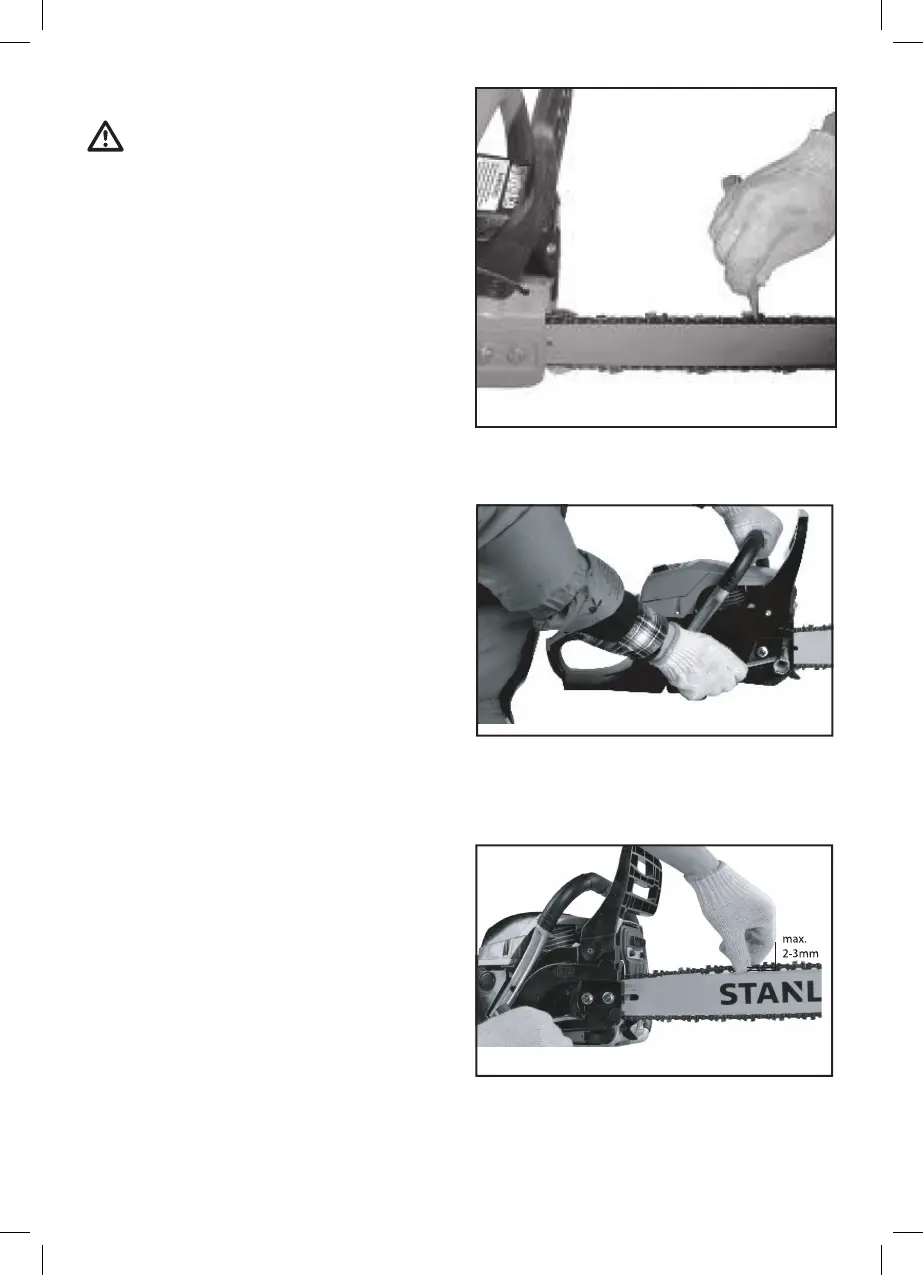
Checking the Tension Pic 12 to Pic 14
Use the screwdriver end of the chain adjustment tool (bar tool) to
move chain around guide bar. If the chain does not rotate, it is too
tight. If the chain is too loose, it will sag below the bar.
Ensure that the guide bar screws for adjusting the chain are only
hand tight. Undo them if necessary.
• To increase the tension of the chain, turn the chain adjustment
screw clockwise using a suitable screwdriver.
• To reduce the tension of the chain, turn the chain adjustment
screw anti-clockwise using a suitable screwdriver.
• The chain tension is correct if it can be raised a maximum of 2 -
3mm in the centre of the guide bar.
• Tighten the guide bar screws properly after you have adjusted the
chain tension.
NOTES
• Allow a new chain to run for approx. 5 minutes before actually
sawing with it. Check the chain tension again after this time and
adjust it if necessary.
• When it is warm, the chain will expand and may sag. This gives rise
to the risk that the chain will jump off the guide bar. Therefore you
must adjust the tension of the chain after it has carried out its first
sawing work.
• A chain that has been tensioned when warm will contract as it
cools and this would result in excessive chain tension, the chain
tension must be reduced after you have finished the sawing work.
IMPORTANT – the tension of the chain must be checked several
times over the course of a working day. Always wear gloves for
this work.
• Since the guide bar is subject to particularly high stress at the
return point and at the interface, we recommend that the guide
bar be turned each time you sharpen the chain so as to avoid it
wearing on one side.
PIC. 12
PIC. 13
PIC. 14