Easy
Setup Guide
Safety
Instructions
This Manual
Power Cable*AC Adapter
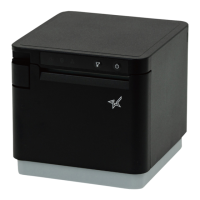
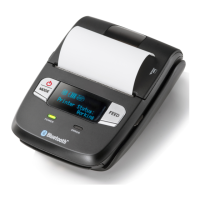
MCP31CI
Easy Setup Guide
1
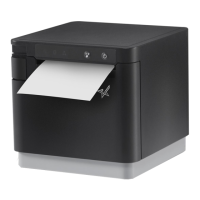
Installing the paper roll
Take the slack of the paper roll before paper
setting, install the paper roll as shown in the
illustration.
Pull the end of the paper roll out straight
, and use both hands to close the printer
cover
.
3
4
4
2
1
Pull the open lever
and open the printer
cover
.
ⓘ
When using a 58mm roll, install the
paper roll guide sold separately.
With the notch part A (triangle mark) of the
paper roll guide facing down, angle the
guide to the right and insert it
.
Position so that the notch part A is aligned
with the main unit rib B, then slide the
guide from the right
.
When the slid paper roll guide stops, stand
it up vertical
, and press until it clicks
into place
.
To change the paper width, it is necessary
to change the memory switch setting.
For details, refer to the Online Manual.
3
4
2
Turning ON the Main Unit Power
Press the power button
and confirm
that the LED (blue) illuminates
.
4
5
Connect the power cable to the AC adapter
, and connect the cable connector to the
printer as shown in the illustration
.
Insert the plug into the outlet
.
Place your nails into the gaps in the right
and left sides of the rear cover on the back
of the printer, and then remove the cover.
RESET
DC
24V
LAN
Cash Drawer
/Buzzer
0.5A
2.4A
0.5A
iPad
RESET
1
3
2
80879110
Introduction
If contents are missing or damaged, please contact the reseller that sold you the printer.
*accessories vary depending on the region where the printer was purchased.
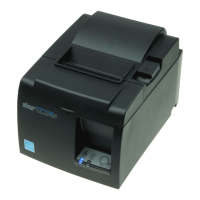
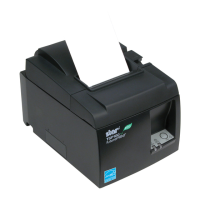
What's Included
This document explains the setup procedure for the mC-Print3.
For further instructions, please refer to the mC-Print3 (2nd Generation) online manual.
Please read the instructions before using the printer.
You can also see FAQ from the QR code on the inside of the printer.
FAQ
mC-Print3 online manual
A
1
2
Copyright 2023 Star Micronics Co., Ltd.
For the owners of other companies’ trademarks mentioned in this document,see Trademarks in our website (https://www.star-m.jp/eng/trademarks.html).
Star Windows Software
When using Windows
Star Quick Setup Utility
When using Android/iOS
Once a static IP address is assigned, IP address changes through the DHCP server will not occur, so the specied connection destination
device can be used continuously once set.
4
Preparing/setting up the conguration app
Use the conguration app to set up the printer from a tablet or PC.
Scan the QR code on the right side or search the app to access the
download site.
Conguration app
download site
Install [ Star Quick Setup Utility ].
Open the conguration utility, and select [ Start Guide (Initial
Settings)] - [ Search Printer].
Follow the instructions of the utility to connect and set up a tablet.
ⓘ
For a wired LAN connection, use the tablet that is connected to
the same network as the MCP31CI.
ⓘ
The Windows driver is included in the Star Windows Software.
The Star Windows Software can be used to configure the
printer settings and perform an operation test.
Download [ Star Windows Software ].
Extract the downloaded software and execute “Setup.exe”.
Follow the wizard instructions and complete software installation.
ⓘ
Driver download site for Mac / Linux environment. (https://www.star-m.jp/supportsite-wsw.html)
3
Connecting a Tablet or PC
Prepare and connect an appropriate cable to the connector on the printer
according to your device/PC.
When using a commercially available cable, be sure to perform full operation checks
before use.
RESET
DC
24V
LAN
Cash Drawer
/Buzzer
0.5A
2.4A
0.5A
iPad
RESET
12
LAN
iPad
Android
Windows
USB-C
20W(USB PD)
Wired LAN
LAN cable
*
4
Plug for the printer:
ⓘ
DHCP is enabled by default for the wired LAN settings. To continually
use the same IP address, set a static IP address before use. For the static
IP address setting procedure, refer to the Online Manual.
ⓘ
If your PC cannot communicate with the printer using C to C cable, refer
to "Switching the USB-C function manually" on the back page of this
manual, and then switch the function to "Data only".
Communication and Recharge
USB-C
®
USB cable
(Make sure that the connector type is appropriate for your device/PC)
iOS … C to C
*
1
or
C to Lightning
*
2
Android … C to C
*
1
PC … C to A
*
3
(Communication only
)
or
C to C
*
1
Plug for the printer:
*1
Cable that conforms to USB2.0 standards, supports current of 3.0A or
higher, and has a maximum length of 2 m.
*2
Apple genuine cable or MFi certified cable with a maximum length of 2 m.
*3
Cable that conforms to USB2.0 standards, has a maximum length of 2 m.
*4
Cable that is compatible with category 5 or higher.