EasyManua.ls Logo

Star mC-Print3 MCP31L - User Manual

Star mC-Print3 MCP31L
2 pages
Print Icon
To Next Page IconTo Next Page
Loading...
Connecting a Tablet or PC to the Printer
3
-A
Connecting an iOS terminal to the printer
Connect the LAN cable to the printer LAN connector
.
RESET
DC
24V
LAN
Cash Drawer
/Buzzer
0.5A
2.4A
0.5A
iPad
LAN
1
2
Connect the other plug to the connector of the router, hub, or other
LAN device
.
Wired LAN
interface
Connect the Lightning cable to the printer USB port (2.4A)
.
2
RESET
DC
24V
LAN
Cash Drawer
/Buzzer
0.5A
2.4A
0.5A
iPad
1
2.4A
iPad
Printer-side plug
(Type A)
USB
interface
Printer-side plug
DHCP is enabled by default for the wired LAN settings. To
continually use the same IP address, set a static IP address
before use.
For the static IP address setting procedure, refer to the On-
line Manual.
Connect the other plug to the smartphone/tablet
.
Image of connection
Image of connection
Installing the Printer
Check the Supplied Accessories
If any of the package contents are missing or damaged, contact the dealer where the
product was purchased.
*
Accessories vary depending on the region where the printer was purchased.
This document explains the procedures for use of mC-Print3. Please store it carefully after reading it.
Introduction
Paper Roll
Guide
Paper Roll
Easy
Setup Guide
Safety
Instructions
This Manual
Power Cable*AC Adapter
Flyer
(Q&A reference)
What the utility can do
The utility can be used to change the settings of the printer and peripheral devices.
Examples) • Bluetooth pairing • memory switch changes, logo registration
• Bluetooth settings, LAN settings • Sample printing etc.
• Firmware update/diagnosis
To use the utility, download it from the site at right.
To perform setup using this manual, proceed to Step
1
.
www.star-m.jp/mcprint-app.html
mC-Print3
Utility Download
www.star-m.jp/mcprint3-oml.html
mC-Print3
Online Manual
In Case of Trouble
If you experience trouble with the setup procedure, refer to the Online Manual.
Place the enclosed yer close to the printer and use it when necessary.
MCP31L
Easy Setup Guide
You will need:
• Commercially available Lightning
cable or Lightning cable that
was provided with the smart-
phone/tablet.
You will need:
• Commercially-available LAN cable
1
Installing the paper roll
Take the slack of the paper roll before paper
setting, insert the paper roll as shown in the
illustration.
Pull the end of the paper roll out straight
,
and use both hands to close the printer cover
.
3
4
4
2
1
Pull the open lever
and open the printer
cover
.
When using a 58 mm roll, install the pro-
vided paper roll guide.
B
A
1
2
With the notch part A (triangle mark) of the
paper roll guide facing down, angle the guide
to the right and insert it
.
Position so that the notch part A is aligned
with the main unit rib B, then slide the guide
from the right
.
When the slid paper roll guide stops, stand
it up vertical
, and press until it clicks into
place
.
To change the paper width, it is necessary to
change the memory switch setting. For de-
tails, refer to the Online Manual.
3
4
2
Turning ON the main unit power
Press the power button
and conrm that
the LED (blue) illuminates
.
4
5
Connect the power cable to the AC adapter
, and connect the cable connector to the
printer as shown in the illustration
. Insert
the plug into the outlet
.
Place your nails into the gaps in the right and
left sides of the rear cover on the back of the
printer, and then remove the cover.
RESET
DC
24V
LAN
Cash Drawer
/Buzzer
0.5A
2.4A
0.5A
iPad
1
3
2
USB Cable*
Question and Answer IconNeed help?

Do you have a question about the Star mC-Print3 MCP31L and is the answer not in the manual?

Summary

Introduction and Setup

Check Supplied Accessories

Lists all included accessories in the printer package, varying by region.

Printer Utility Functions

Details the capabilities of the mC-Print3 utility software for printer settings and updates.

Troubleshooting Reference

Advises referring to the Online Manual for any setup difficulties encountered.

Connecting to a Tablet or PC

Connecting an iOS Terminal

Instructions for connecting an iOS device to the printer using a Lightning cable.

Connecting via Wired LAN

Steps to connect the printer to a network using a commercially available LAN cable.

Connecting an Android Terminal

Steps to connect an Android device to the printer using a USB cable and adapter.

Connecting Android via Wired LAN

Instructions for connecting an Android device to the printer through a wired network.

Connecting a Mac;Linux Terminal

Guidance on downloading drivers and connecting Mac/Linux systems to the printer.

Connecting a Windows Tablet or PC

Steps for connecting Windows devices to the printer using a USB cable.

Connecting Windows via Wired LAN

Instructions for connecting Windows devices to the printer via a wired network.

Initialize Wired LAN Communication Settings

Procedure to reset and initialize wired LAN communication settings if connection fails.

Printer Installation Steps

Installing the Paper Roll

Guide on how to properly load the paper roll into the printer, including the paper roll guide.

Turning ON Main Unit Power

Procedure for correctly attaching the rear cover and powering on the printer.

Installing the Rear Cover

Instructions on how to attach the rear cover to the back of the printer unit.

Overview

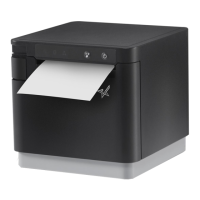
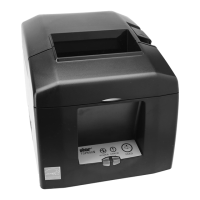
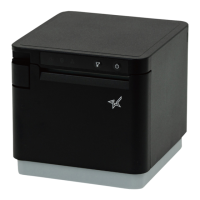
The Star mC-Print3 is a versatile and compact thermal printer designed for various point-of-sale and receipt printing applications. It offers multiple connectivity options, including USB and wired LAN, making it compatible with a wide range of devices such as iOS terminals, Android terminals, Mac/Linux computers, and Windows tablets/PCs.

Function Description

The primary function of the mC-Print3 is to print receipts, tickets, and other transactional documents quickly and efficiently. It utilizes thermal printing technology, which means it does not require ink cartridges or ribbons, simplifying maintenance and reducing operational costs. The printer is capable of handling different paper roll widths, specifically 58 mm and 80 mm, providing flexibility for various printing needs.

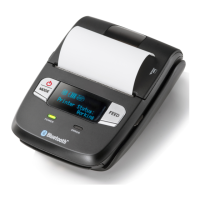
Beyond basic printing, the mC-Print3 integrates advanced features through its utility software. This utility allows users to customize printer settings, manage peripheral devices, and perform diagnostic checks. Key functionalities include Bluetooth pairing, adjusting Bluetooth and LAN settings, modifying memory switch settings, registering logos for custom receipts, and performing sample prints to verify functionality. Firmware updates can also be managed through the utility, ensuring the printer remains up-to-date with the latest features and bug fixes.

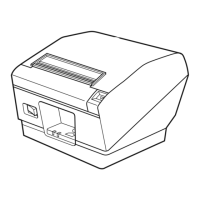
The printer is designed for ease of use, from initial setup to daily operation. Its compact footprint makes it suitable for environments where space is limited, while its robust construction ensures reliability in demanding retail or hospitality settings.

Usage Features

Paper Roll Installation:

Installing the paper roll is a straightforward process. Users begin by pulling an open lever to open the printer cover. For 58 mm paper rolls, a provided paper roll guide must be installed. This guide has a notch (triangle mark) that faces down and is angled into the printer, aligning with a main unit rib before being slid into place. Once the guide is set, the paper roll is inserted into the compartment, ensuring any slack is removed. The end of the paper roll is pulled straight out, and the printer cover is closed using both hands. If the paper roll guide was used, it is then stood upright and pressed until it clicks into place. The printer also supports 80 mm paper rolls without the need for the guide.

Powering On:

To power on the mC-Print3, the rear cover must first be removed by placing nails into the gaps on the right and left sides and pulling it off. The power cable is then connected to the AC adapter, and the cable connector is plugged into the printer. Finally, the plug is inserted into an electrical outlet. The power button on the printer is pressed, and the blue LED illuminates to confirm that the device is powered on.

Connectivity Options:

The mC-Print3 offers diverse connectivity to accommodate various host devices:

  • iOS Terminal Connection (USB): For iOS devices, a commercially available Lightning cable (or one provided with the smartphone/tablet) is used. The Lightning cable connects to the printer's USB port (2.4A).
  • iOS Terminal Connection (Wired LAN): A commercially available LAN cable is used. One end connects to the printer's LAN connector, and the other end connects to the router, hub, or other LAN device.
  • Android Terminal Connection (USB): A USB cable and a USB adapter (matching the connector shape of the smartphone/tablet) are required. The USB cable connects to the printer's USB (Type B) connector.
  • Android Terminal Connection (Wired LAN): Similar to iOS, a commercially available LAN cable connects the printer's LAN connector to a router, hub, or other LAN device.
  • Windows Tablet/PC Connection (USB): Before connecting, the StarPRNT for mCollection Windows driver must be downloaded and installed. A USB cable and a USB adapter (matching the connector shape of the tablet/PC) are used. The USB cable connects to the printer's USB (Type B) connector.
  • Windows Tablet/PC Connection (Wired LAN): After driver installation, a commercially available LAN cable connects the printer's LAN connector to a router, hub, or other LAN device.
  • Mac/Linux Terminal Connection: For Mac and Linux devices, the appropriate CUPS driver (Mac CUPS driver or Linux CUPS driver) must be downloaded. Specific connection details are referred to in the Online Manual.

Network Settings (Wired LAN):

By default, DHCP is enabled for wired LAN settings, allowing the printer to automatically obtain an IP address. For environments requiring a consistent IP address, users can set a static IP address. The procedure for setting a static IP address is detailed in the Online Manual.

Initializing Communication Settings (Wired LAN Interface):

If communication issues arise, the wired LAN settings can be initialized. This involves ensuring the printer power is OFF. A small-tipped pen or similar item is used to press the RESET button on the back of the printer. While holding RESET, the power switch on the front of the printer is pressed until the POWER LED turns on. The RESET switch is held until the Network LED (green) on the front of the printer flashes. Finally, the FEED button is pressed and held to confirm the initialization. After initialization, the connection procedure (3-A, B, or D) should be repeated.

Installing the Rear Cover:

After initial setup or maintenance, the rear cover is reinstalled by pressing the hooks at the bottom of the cover into the notches in the printer main unit. Then, the hooks on the left and right sides of the rear cover are fitted into the printer main unit until they click into place.

Maintenance Features

The mC-Print3 is designed for low maintenance, primarily due to its thermal printing technology which eliminates the need for ink or toner replacement.

Utility Software for Diagnostics and Configuration:

The mC-Print3 Utility is a key maintenance tool. It allows users to:

  • Change Printer Settings: Adjust various operational parameters.
  • Manage Peripheral Devices: Configure and monitor connected peripherals.
  • Perform Diagnostics: Troubleshoot issues and verify printer functionality.
  • Firmware Updates: Keep the printer's internal software up-to-date, which can resolve bugs, improve performance, and add new features.
  • Memory Switch Changes: Adjust internal settings related to paper width or other operational characteristics. For example, changing paper width might require adjusting memory switch settings, with details available in the Online Manual.

Online Manual Support:

For detailed troubleshooting and advanced procedures, the mC-Print3 Online Manual is readily available. This resource provides comprehensive instructions for various scenarios, including static IP address configuration and specific connection details for different operating systems. An enclosed flyer can also be kept near the printer for quick reference.

Simple Paper Roll Replacement:

The easy-to-access paper roll compartment and straightforward installation process minimize downtime during paper changes, which is a frequent operational task.

Reset Functionality:

The physical RESET button provides a quick way to restore communication settings, which is useful for resolving network connectivity issues without extensive troubleshooting.

Overall, the Star mC-Print3 is a user-friendly and robust printer with features that simplify setup, operation, and maintenance, making it an ideal choice for various business environments.

Star mC-Print3 MCP31L Specifications

General IconGeneral
Print MethodDirect Thermal
Resolution203 dpi
Paper Width80 mm / 58 mm
ConnectivityUSB, Ethernet
CutterAuto Cutter
Dimensions132 x 140 x 125 mm
Paper Thickness0.053 - 0.075 mm
Print Speed250mm/s (9.8 ips)

Related product manuals