EasyManua.ls Logo

Star futurePRNT ECO TSP100 - User Manual

Star futurePRNT ECO TSP100
30 pages
Print Icon
To Next Page IconTo Next Page
Loading...
Hardware Manual
Model: TSP143IIU
Question and Answer IconNeed help?

Do you have a question about the Star futurePRNT ECO TSP100 and is the answer not in the manual?

Summary

Unpacking and Installation

Unpacking

Check that all necessary accessories are included after unpacking the unit.

Printer Placement and Safety

Choosing a place for the printer

Consider placement points like surface, power, computer proximity, sunlight, heat, and environment.

General Safety Warnings

Important warnings about smoke, repair, disassembly, and potential hazards.

Printer Nomenclature

Nomenclature

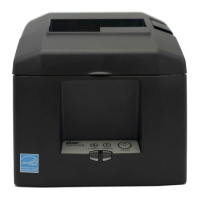
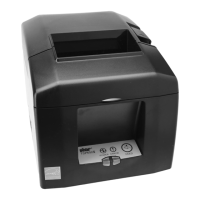
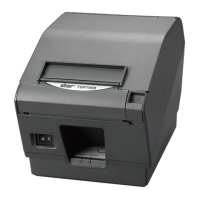
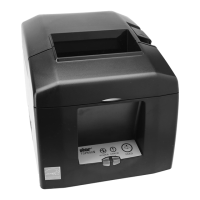
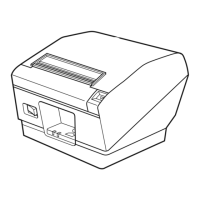
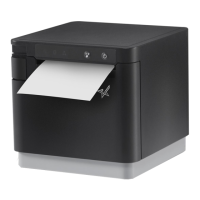
Identifies printer parts like the cover, control panel, connectors, and sleep switch.

Product Features

Product Features Overview

Details printer's power-on behavior, paper saving, and power consumption modes.

Operation Modes

Explains System Off Mode, Print Ready Mode, and Printing states.

Setup Procedures

Connecting the Power Cord

Instructions for checking voltage, attaching the cord, and plugging into an outlet.

Connecting the USB Cable to the Printer

Guide on connecting the USB interface cable and precautions for USB connections.

Connecting to a Peripheral Unit

How to connect peripheral units using a modular plug and associated cautions.

Turning Power On and Power Off

Details on how the printer turns on and off without a power switch.

Turning Power On (Print Ready Mode)

Explains manual and automatic methods to turn the printer power on.

Turning Power Off (System Off Mode)

Describes manual and automatic methods to turn the printer power off.

Loading the Paper Roll

Instructions for loading a 79.5 mm width paper roll into the printer.

Using 57.5 mm Width Paper Roll

How to install the paper guide for 57.5 mm width rolls and associated precautions.

Caution Symbols and Warnings

Caution Symbol Explanation

Explains various warning symbols found on the printer related to heat, cutters, and electrical hazards.

General Safety Warnings

Important warnings regarding touching hot parts, cutter blade, and electrical hazards.

General Cautions

Lists cautions regarding printer cover operation, thermal head care, static electricity, and paper handling.

Notes on Using the Auto Cutter

Provides notes on handling auto cutter errors, recommended margins, and paper removal during cuts.

Attaching Accessories

Attaching the Upper Guide

Step-by-step guide to attach the upper guide using screws.

Attaching the Holder Plate

Instructions for attaching the holder plate to the wall and precautions.

Installation Precautions

Cautions for ensuring secure installation to the wall to prevent injury or damage.

Attaching the Rubber Feet

Instructions for attaching the four rubber feet to the printer base.

Thermal Roll Paper Specifications

Compliant Paper Roll Specifications

Specifies compliant paper thickness, width, diameter, and core dimensions.

Control Panel and Functions

Control Panel Overview

Identifies the POWER lamp, ERROR lamp, and FEED button on the control panel.

Lamp Indicator Status

Details the status indicated by the POWER and ERROR lamps during printing and system states.

Lamp Indicator Error Details

Lists recoverable and non-recoverable error conditions based on lamp status.

Self-Printing Procedure

Procedure for initiating test printing to check version and printer settings.

Paper Jam Handling

Preventing Paper Jams

Advice on avoiding paper jams by not touching paper during ejection or cutting.

Removing Paper Jam

Step-by-step instructions to clear a paper jam, including unplugging and cover opening.

Releasing a Locked Cutter

Procedure to release a locked auto cutter by removing jammed paper and manual operation.

Periodical Cleaning

Cleaning the Thermal Head

Instructions for cleaning the thermal head using alcohol-dipped swabs and safety notes.

Cleaning the Rubber Roller

Procedure for cleaning the rubber roller with a dry, soft cloth.

Cleaning the Paper Holder and Surrounding Area

Guidance on cleaning debris and dust from the paper holder and surrounding areas.

Overview

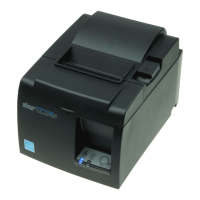
This document is a hardware manual for the Star Micronics TSP100 futurePRNT printer, specifically model TSP143IIU. It provides comprehensive instructions for unpacking, setup, operation, and maintenance of the device.

Function Description

The TSP100 futurePRNT is a thermal roll paper printer designed for commercial environments. It operates by connecting to a host computer via a USB cable and is primarily used for printing receipts or other transactional documents. The printer is not equipped with a power switch; it turns on automatically when the connected computer is powered on and the USB cable is connected, provided the power cord is plugged into an AC outlet. It also features a "Sleep Switch" (available from January 2014 production) to manage power states. The printer supports both 79.5 mm and 57.5 mm width paper rolls, with a paper roll holder provided for the narrower width. It includes an auto cutter for clean paper cuts after printing. The device is designed to reduce power consumption by automatically entering a "Print Ready Mode" when not actively printing and a "System Off Mode" when the computer is turned off or hibernates.

Usage Features

The printer is designed for straightforward setup and operation.

  • Unpacking and Installation: The manual details how to unpack the printer and verify all necessary accessories are included, such as the USB cable, power cord, screws, upper guide, rubber feet, holder plate, CD-ROM, and installation sheet. It emphasizes choosing a suitable location that is firm, level, dry, dust-free, and away from direct sunlight, heat sources, or appliances that cause power spikes.
  • Connecting the Power Cord: Users are instructed to check the voltage label on the printer, plug the power cord into the AC inlet on the back of the printer, and then into a properly grounded AC outlet.
  • Connecting the USB Cable: The USB cable should be passed through a cable support and connected directly to the computer's USB port. The manual cautions against using USB hubs or extension boards, as this may affect printer operation. It also highlights the printer's electrical current requirement (100 mA/USB port or more) during operation.
  • Connecting to a Peripheral Unit: The printer allows connection to peripheral units, such as cash drawers, via a modular plug. Users are warned not to connect a telephone line to this port or any wiring that may carry peripheral voltage.
  • Turning Power On/Off: Since there is no power switch, the printer turns on when the computer is on, the power cord is plugged in, the USB cable is connected, and the sleep switch (if available) is set to "Active." To turn off, users can disconnect the USB cable or turn off the computer. For complete power off, both the USB and power cables must be disconnected.
  • Loading the Paper Roll: Instructions are provided for loading both 79.5 mm and 57.5 mm width paper rolls. For 79.5 mm paper, the cover open lever is pushed, the paper roll is placed into the hollow, and the leading edge is pulled forward before closing the cover. For 57.5 mm paper, the supplied paper guide and paper roll holder must first be installed. The manual warns against pulling the paper diagonally to prevent jams and advises against switching back to 79.5 mm paper after using 57.5 mm paper due to potential printer head deterioration.
  • Control Panel and Lamp Indicator: The control panel features a POWER lamp (Green LED), an ERROR lamp (Red LED), and a FEED button. The POWER lamp indicates the printer is on, while the ERROR lamp indicates various errors, often in combination with the POWER lamp. The FEED button is used to manually feed roll paper. A table explains the lamp indications for different printer statuses (Printing, Print Ready, System Off, Errors).
  • Self-Printing: The printer can perform a self-test print by holding down the FEED button while connecting the USB cable. This prints the version number and current printer settings.
  • Mounting the Printer: The manual describes how to attach the upper guide and holder plate for wall mounting or vertical positioning. It specifies the types of screws to use and the required shear and pulling-out strength for wall screws, given the printer's weight (approximately 2.4 kg with the largest paper roll). It also explains how to attach rubber feet for vertical positioning.

Maintenance Features

The manual provides instructions for preventing and clearing paper jams, as well as periodical cleaning to ensure optimal performance.

  • Preventing Paper Jams: Users are advised not to touch or pull the paper during ejection or before it is cut, as this can cause jams or cutting failures.
  • Removing Paper Jams: In case of a paper jam, the power cord and USB cable should be disconnected. The cover open lever is pushed to open the printer cover, and the jammed paper is removed. Users are cautioned not to forcibly pull the paper with the cover closed to avoid damaging internal parts like the thermal head or rubber roller. After removing the jam, the paper roll should be positioned straight, and the printer cover closed securely.
  • Releasing a Locked Cutter: If the auto cutter locks up, the USB cable and power cord should be disconnected and reconnected to restart the printer. If this doesn't work, the front cover can be removed to access the auto cutter. A Philips screwdriver can be inserted into a manual operation hole on the side of the cutter to manually open the rear cover. Users are warned to be careful not to damage the printer or touch the thermal print head during this process.
  • Periodical Cleaning: To prevent unclear printing due to accumulated paper dust and dirt, periodical cleaning is recommended every six months or one million lines.
    • Cleaning the Thermal Head: The thermal head surface should be wiped clean with a cotton swab or soft cloth dipped in alcohol (ethanol, methanol, or isopropyl alcohol). Users are cautioned that the thermal head is easily damaged, hot after printing, and susceptible to static electricity.
    • Cleaning the Rubber Roller: A dry, soft cloth should be used to wipe dust from the rubber roller, rotating the platen to clean the entire surface.
    • Cleaning the Paper Holder and Surrounding Area: Any debris, dust, paper particles, or glue accumulated in the paper holder and surrounding area should be cleaned.

Star futurePRNT ECO TSP100 Specifications

General IconGeneral
Print MethodDirect Thermal
Resolution203 DPI
Paper Width80 mm
Power SupplyInternal
Weight1.72 kg
Energy Star CertifiedYes
Print Speed250 mm/sec
ConnectivityUSB
Dimensions142 x 204 x 132 mm
CutterAuto Cutter

Related product manuals