To view manuals, videos, drivers, downloads, technical drawings, and more visit www.startech.com/support
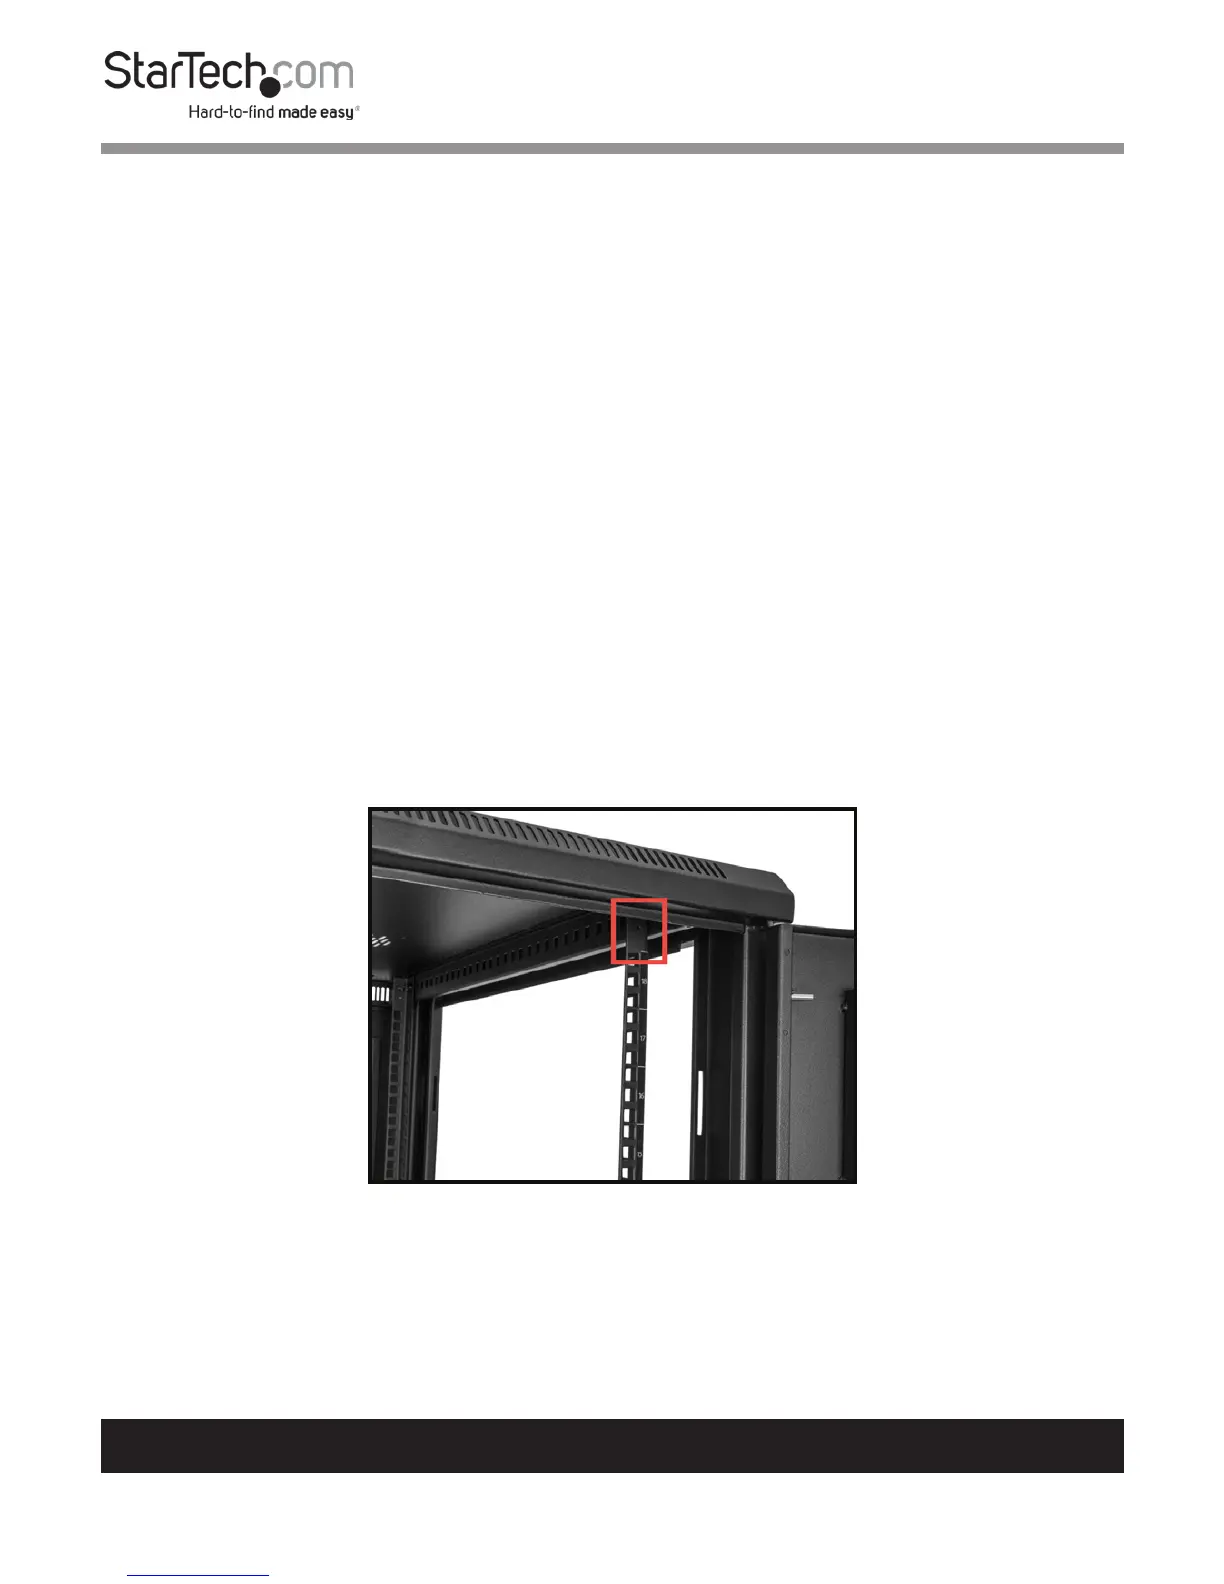
Adjusting the Vertical Mounting Rails
or Cable Management Rails
The Mounting Rail Depth can be adjusted from 2.76” (70 mm)
to 30.51” (775 mm).
Note: Follow the steps below to adjust the depth of the
Mounting Rails.
1. Each Mounting Rail has two M6 Screws and two Cage Nuts
securing the Mounting Rail to two Depth Adjustment
Rails. One M6 Screw and Cage Nut is located at the top and
one M6 Screw and Cage Nut is located at the bottom of the
Mounting Rail.
2. Using a Phillips Head Screwdriver, remove the two M6
Screws from the Cage Nuts on the Mounting Rail.
Removing the M6 Screw
3. Slide the Mounting Rail to access the Cage Nuts.