Instruction manual
12
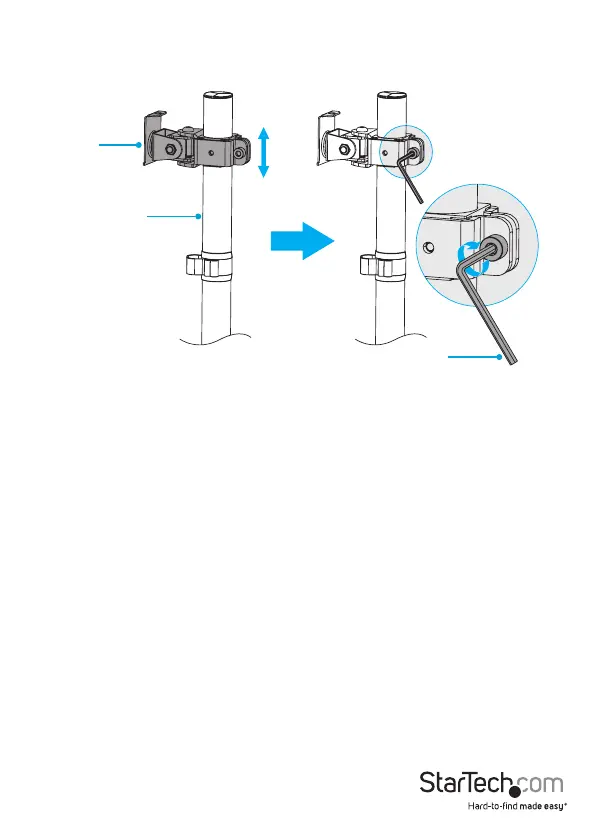
2. When the VESA pole clamp is at the desired height, use the 6 mm hex key to
tighten the screw in the VESA pole clamp. (gure 9)
gure 9
Pole
6 mm hex key
VESA pole
clamp
Attach a monitor to the VESA monitor mount
To accommodate dierent monitor sizes, the ARMPIVOTV2 comes with four sets of
screws that are dierent lengths and diameters, and a set of spacers.
To decide if the spacers are necessary and to select the appropriate screws for the type
of monitor that you’re using, complete the following:
• Determine the depth of the mounting holes on the monitor.
• Determine the diameter of the mounting holes on the monitor.
1. If required, place the spacers over the mounting holes on your monitor.
2. Place the VESA monitor mount over the mounting holes on your monitor.
3. Place the washers over the mounting holes on the VESA monitor mount.
4. Insert the M4x12 mm screws, M4x16 mm screws, M5x12 mm screws, or the
M5x16 mm screws through the washers, the VESA monitor mount, and into the
back of the monitor. (gure 10)
5. Use a Phillips screwdriver to tighten the screws.
Warning! Do not over-tighten the screws. If you encounter resistance while you’re
tightening the screws, stop tightening. Failure to do so could result in damage to the
monitor.