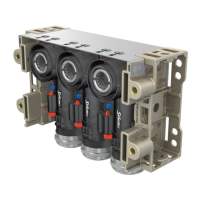
8 / 12
7
8
9
10
11
12
(ill. 7)
Dénuder le câble sur une longueur de
6,0 à 7,5 mm�
(ill. 7)
Strip cable to dimension 6,0 to
7,5mm.
Attention
Ne pas couper de brins lors du
dénudage !
Attention
Do not cut individual strands
when stripping!
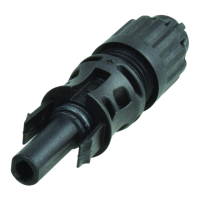
Sertissage Crimping
(ill. 8)
■
Ouvrir l’étrier (K) et le maintenir
■
Insérer le contact dans la zone de
section appropriée de la pince à ser-
tir�
■
Tourner les languettes de sertissage
vers le haut�
■
Relacher l’étrier (K)�
■
Le contact est xé�
(ill. 8)
■
Open and hold the clamp (K) �
■
Place the contact in the appropriate
cross-section range�
■
Turn the crimping aps upwards.
■
Release clamp (K)�
■
The contact is xed.
Remarque:
S‘assurer que le contact est en
place et soit maintenu par l‘étrier�
Note:
Make sure that the contact is
placed in the housing and is held by
the clamping bracket�
(ill. 10)
Serrer légèrement la pince pour que
les pattes de sertissage se trouvent
à coup sûr dans la matrice de sertis-
sage�
(ill. 10)
Press the pliers gently together until
the crimping aps are properly located
within the the crimping die�
(ill. 11)
Introduire le câble dénudé jusqu’à ce
que l’isolant bute sur la matrice de
sertissage� Fermer complètement la
pince à sertir�
(ill. 11)
Insert the stripped cable end until the
cable strands come up against the
locator� Completely close the crimping
pliers�
(ill. 12)
Contrôler le sertissage�
(ill.12)
Check the crimping�
 Loading...