9
730927 | Z04 | 1440
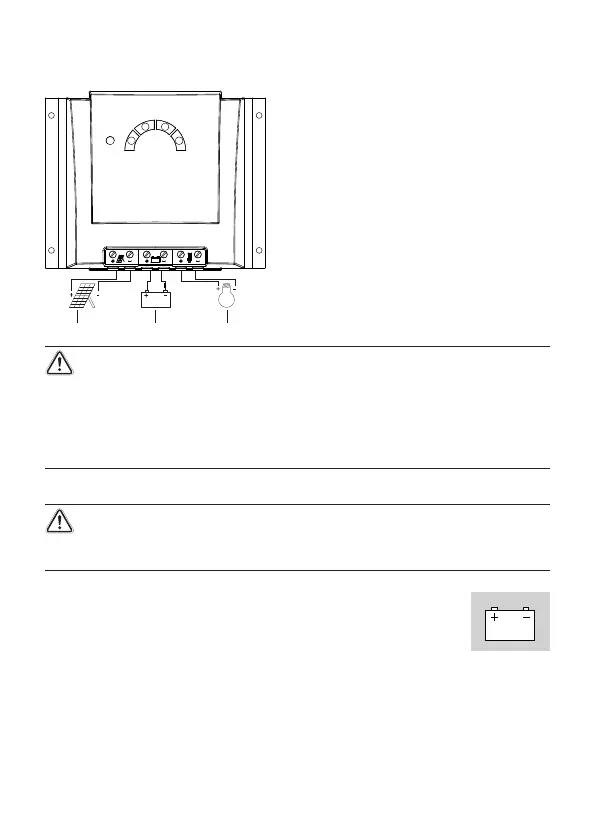
4.2.2 Connection
2
1
3
WARNING
Danger of explosion from sparking! Danger of electric shock!
X At a voltage of > 75 V, particularly with regard to module open circuit volt-
age (over the entire temperature range), the entire solar energy system must
be installed with protection class II.
1st step: connect the battery
CAUTION
X The device will be destroyed if the battery is connected with the wrong polarity.
X Label the battery connection cables as a plus cable (A+) and a
minus cable (A–).
X Lay the battery cables in parallel between the solar charge
controller and the battery.
X Connect the battery connection cable with the correct polarity to the middle
pair of terminals
on the solar charge controller (with the battery symbol).
X Connect battery connection cable A+ to the positive pole of the battery.
X Connect battery connection cable A– to the negative pole of the battery.
X If the connection polarity is correct, the info LED illuminates green.
X If necessary, remove any external fuse.
 Loading...