4 5
FAUCET INSTALLATION FAUCET INSTALLATION
MALMO 1000
MALMO
. Shut o the water supply.
. Drill a hole ( to mm. ) where you want to install
the spout of the faucet, and a small hole just above
the previous one for the anti-rotation pin.
mm
. Screw the faucet base female connection
(½” external standard) to the male connection of the
piping at the wall.
. Place the wall rosette over the faucet base.
.Mount the faucet body onto the base. Ensure the
sensor is aligned facing down. Secure the body with
screw M5 using the supplied Allen key.
. Remove the protecting sticker that covers the
sensor.
. Turn on the central water supply.
. Check for leaks.
Note: Malmo includes a special aerator that allows you
to adjust the water stream direction on site in order
to prevent water splashing if needed. To change the
angle of the water stream, simply move the adjustable
tilting plate by pressing it smoothly.
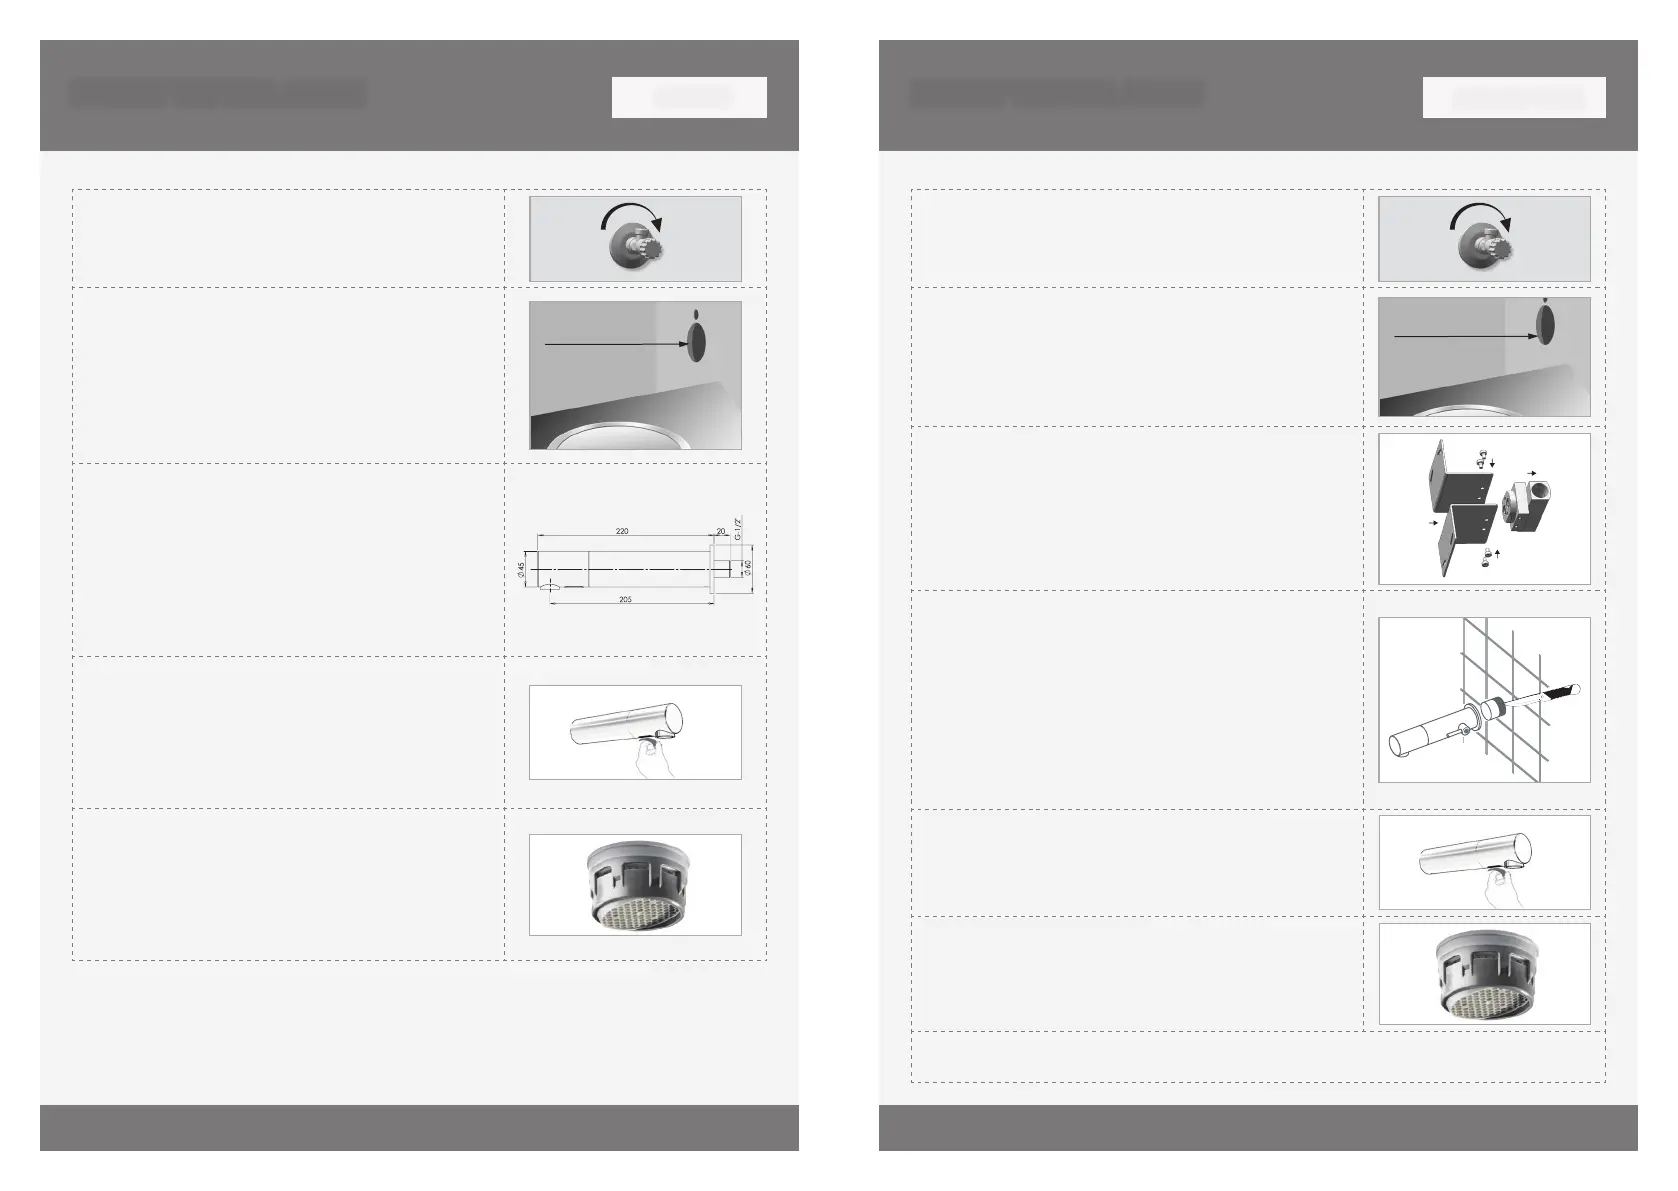
. Shut o the water supply.
. Prepare the support bar at the faucet base by assem-
bling the angle supports with the provided screws.
. Cut an adequate opening in the wall at the place
where you want to install the spout of the tap.
. Drill two orices at the wall for the anchors.
mm
. Mount the faucet base to the opening cut in the wall,
and set it using the four M x 6 screws.
. During the base xation process, pay attention to the
alignment. The faucet base should be installed so that
the outside surface of the nished wall falls between
the minimum and maximum lines marked at protective
plastic cover.
. The protective plastic cover should be installed at the
faucet base until the tiles work is nished.
. At this point, cut the temporary protective cover at the
proper mark at the wall level.
. Connect the hot and cold water supply pipes to the
faucet base
. Screw the wall rosette to the faucet base.
. Install the faucet to the rosette; close the set screw
using the mm Allen key. Make sure that the faucet is
properly aligned so that sensor is facing down.
. Remove the protecting sticker that covers the sensor
. Open the water supply.
. Check for leaks
Note: Malmo includes a special aerator that allows you
to adjust the water stream direction on site in order to
prevent water splashing if needed. To change the angle
of the water stream, simply move the adjustable tilting
plate by pressing it smoothly.
If the sensor range is not satisfactory, please refer to the section entitled “Settings
adjustment”.
 Loading...