INSTALLATION
Alternative installation methods
34 | DHB-E LCD www.stiebel-eltron.com
13.4 Connecting a load shedding relay
Install a load shedding relay in the distribution board in conjunc-
tion with other electric appliances, e.g.electric storage heaters.
The relay responds when the instantaneous water heater starts.
!
Material losses
Connect the phase that switches the load shedding relay
to the indicated terminal of the mains terminal in the
appliance (see chapter "Specification/ Wiring diagram").
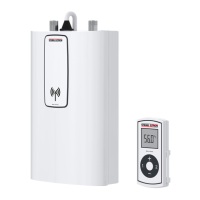
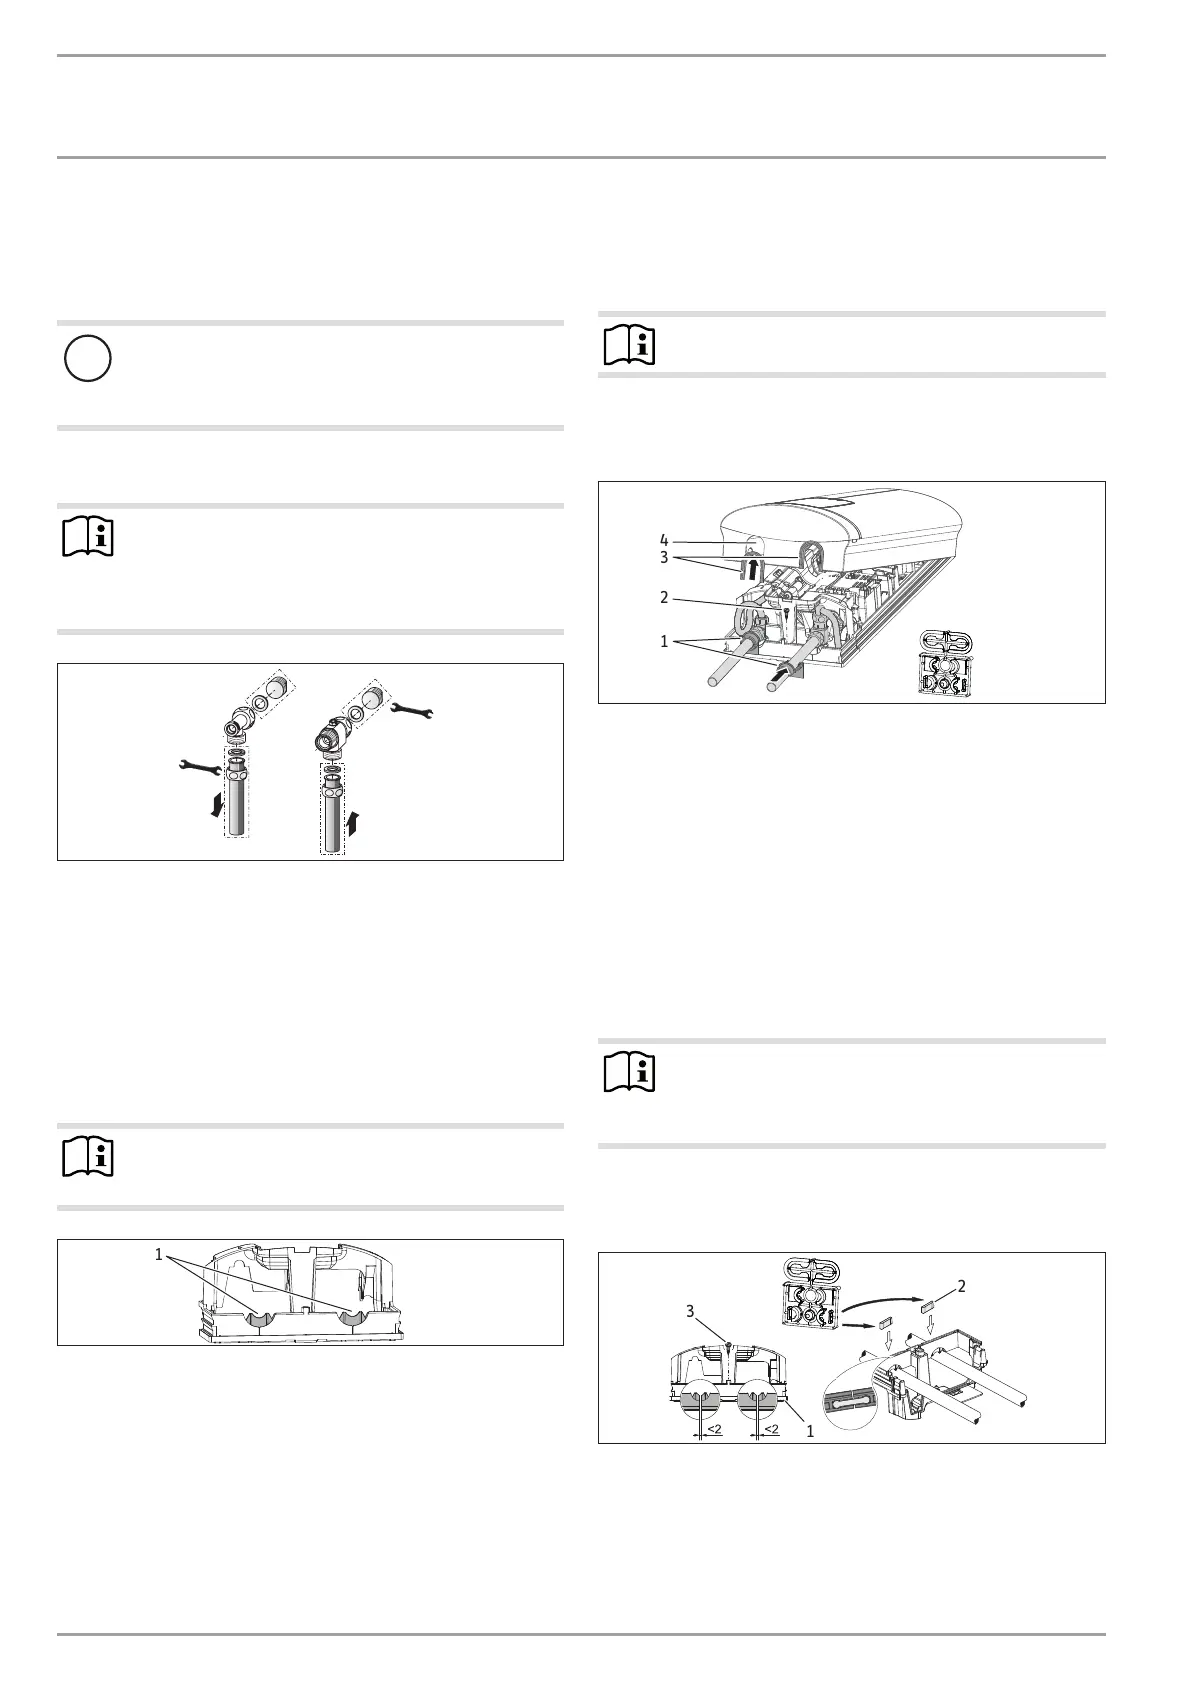
13.5 Water installation on finished walls
Note
This type of connection changes the IP rating of the ap-
pliance.
Change the type plate. Cross out "IP25" and mark
the box "IP24". Use a ballpoint pen to do this.
19
24
5 Nm
18 Nm
D0000033104
Fit water plugs with gaskets to seal the concealed connec-
tions. All taps obtained as accessories are supplied with
plugs and gaskets as standard. For pressure taps other than
those recommended by us, plugs and gaskets can be ordered
as accessories.
Fit a suitable pressure tap.
Push the lower back panel section under the connecting
pipes of the tap and push it into the back panel.
Secure the connection pipes to the tee and the 3-way ball
shut-off valve.
Note
You can break off the pipe fitting tabs on the lower back
panel section if required.
D0000056194
1
1 Tab
13.6 Water installation on finished walls with
solder/press-fit fittings
You can connect copper or plastic pipes using the accessories
"solder fitting" or "press-fit fitting".
With "solder fitting" with threaded fitting for 12mm copper pipes,
proceed as follows:
Push the union nuts over the connection pipes.
Solder the inserts to the copper pipes.
Push the lower back panel section under the connecting
pipes of the tap and push it into the back panel.
Secure the connection pipes to the tee and the 3-way ball
shut-off valve.
Note
Observe the tap manufacturer's instructions.
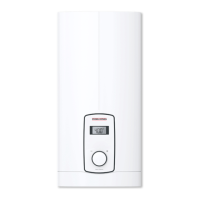
13.7 Fitting appliance cover over water installation
on finished walls
D0000073170
4
3
2
1
1 Back panel guides
2 Screw
3 Cover guides with sealing lips on the pipe side
4 Pipe knock-out
Cleanly saw and break out the pipe knock-outs in the appli-
ance cover. If necessary, use a file.
When installing the connection pipes without offset, break
off the sealing lips on the cover guides.
Click the cover guides into place in the knock-outs.
Position the back panel guides on the pipes. Push them to-
gether. Then push the guide pieces against the back panel as
far they will go.
Secure the lower back panel section with a screw.
Note
Use the cover guides with sealing lips if the connection
pipes are slightly offset. In this case, the back panel
guides are not fitted.
13.8 Lower back panel section installation with
threaded fittings on finished walls
D0000053286
2
3
1
1 Lower back panel section
2 Connection piece in the standard delivery
3 Screw
If using threaded fittings on finished walls, the lower back panel
section can also be installed after fitting the taps/valves. To do
this, carry out the following steps:
 Loading...