WORKSHOP MANUAL
EDITION
PAGE
32 /
124
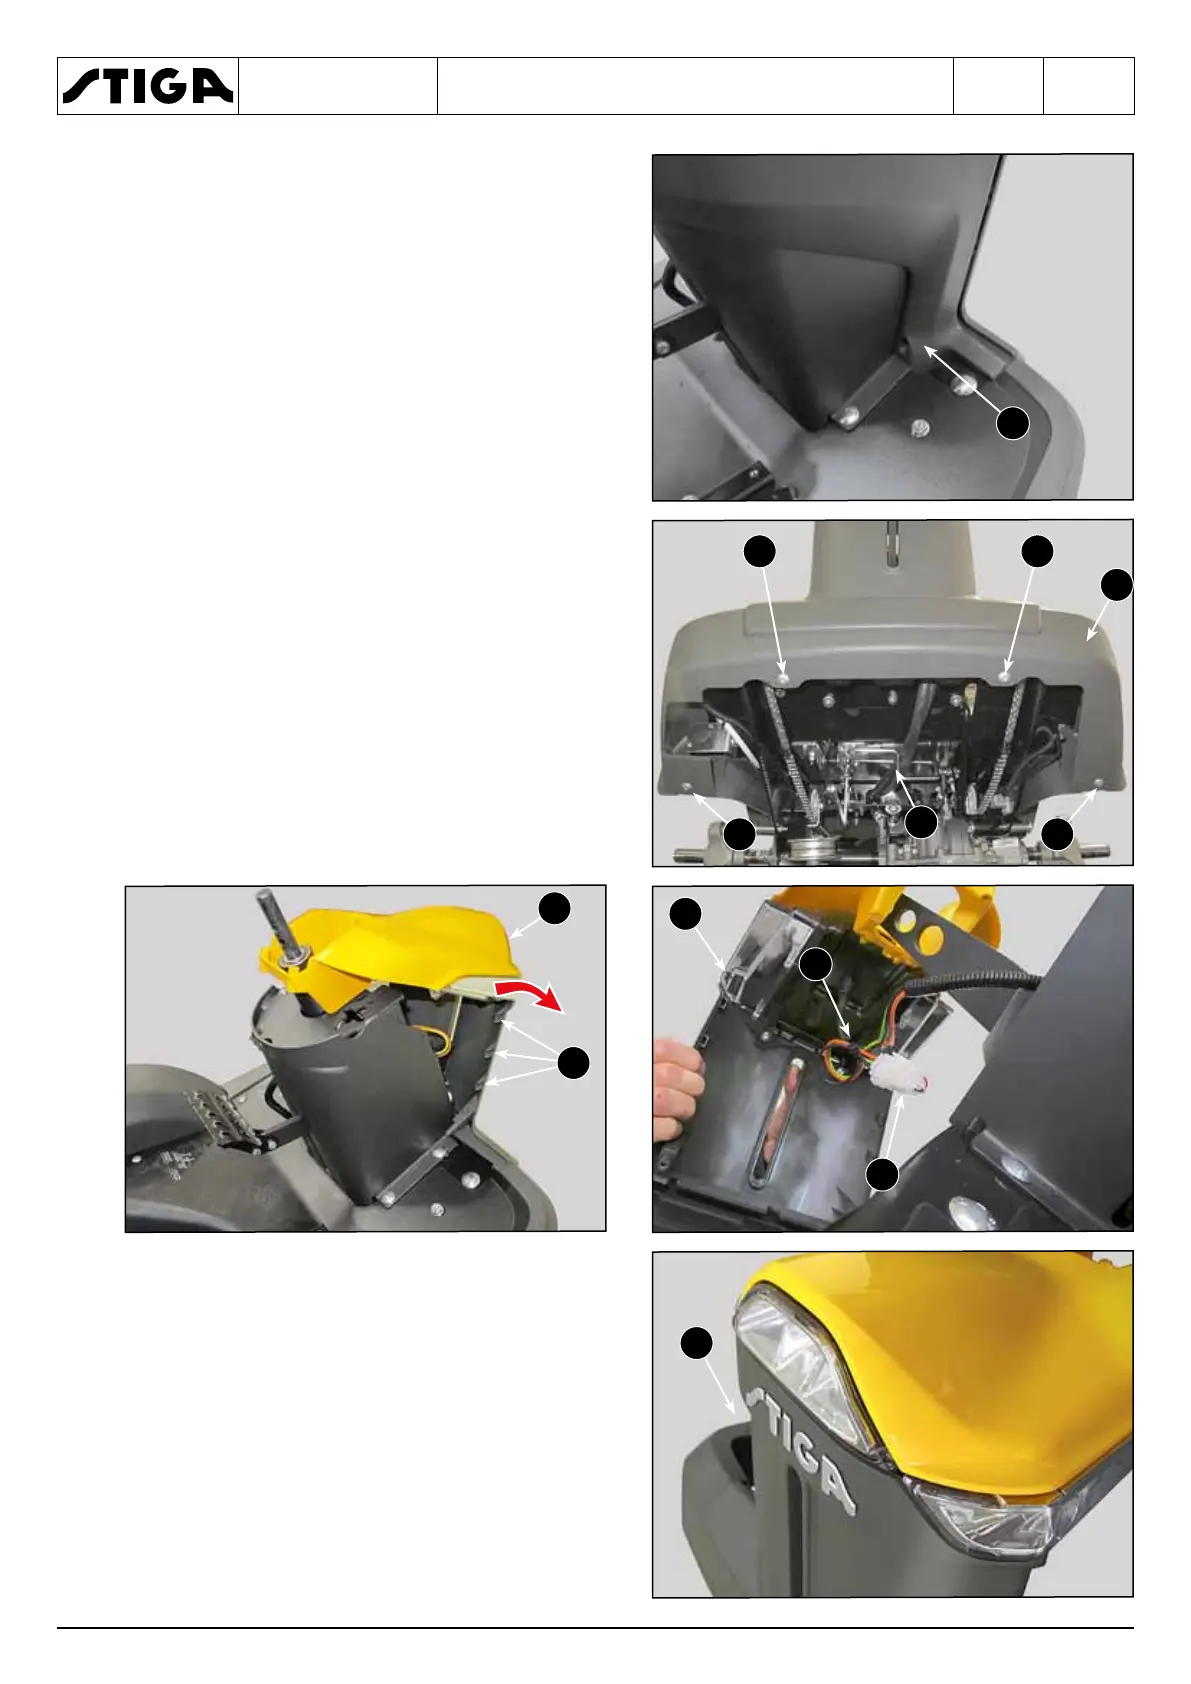
5. Unscrew the two side screws (9).
6. Unscrew the four screws (10) that secure the
bumper (11) to the frame.
7. Tilt the front part of the bumper (11) forward,
releasing it from the hooks (12) that secure it
to the rear of the column.
8. Cut the clamp (13) and disconnect the con-
nector (14), then remove the bumper (11) in-
cluding the front part of the column.
When assembling, carry out the steps described
above in reverse order, paying attention to cor-
rectly engage the six tabs (12) in their respective
seats and to adequately fix the cables of the wir-
ing by restoring the clamp (13).
 Loading...