WORKSHOP MANUAL
EDITION
PAGE
63 /
124
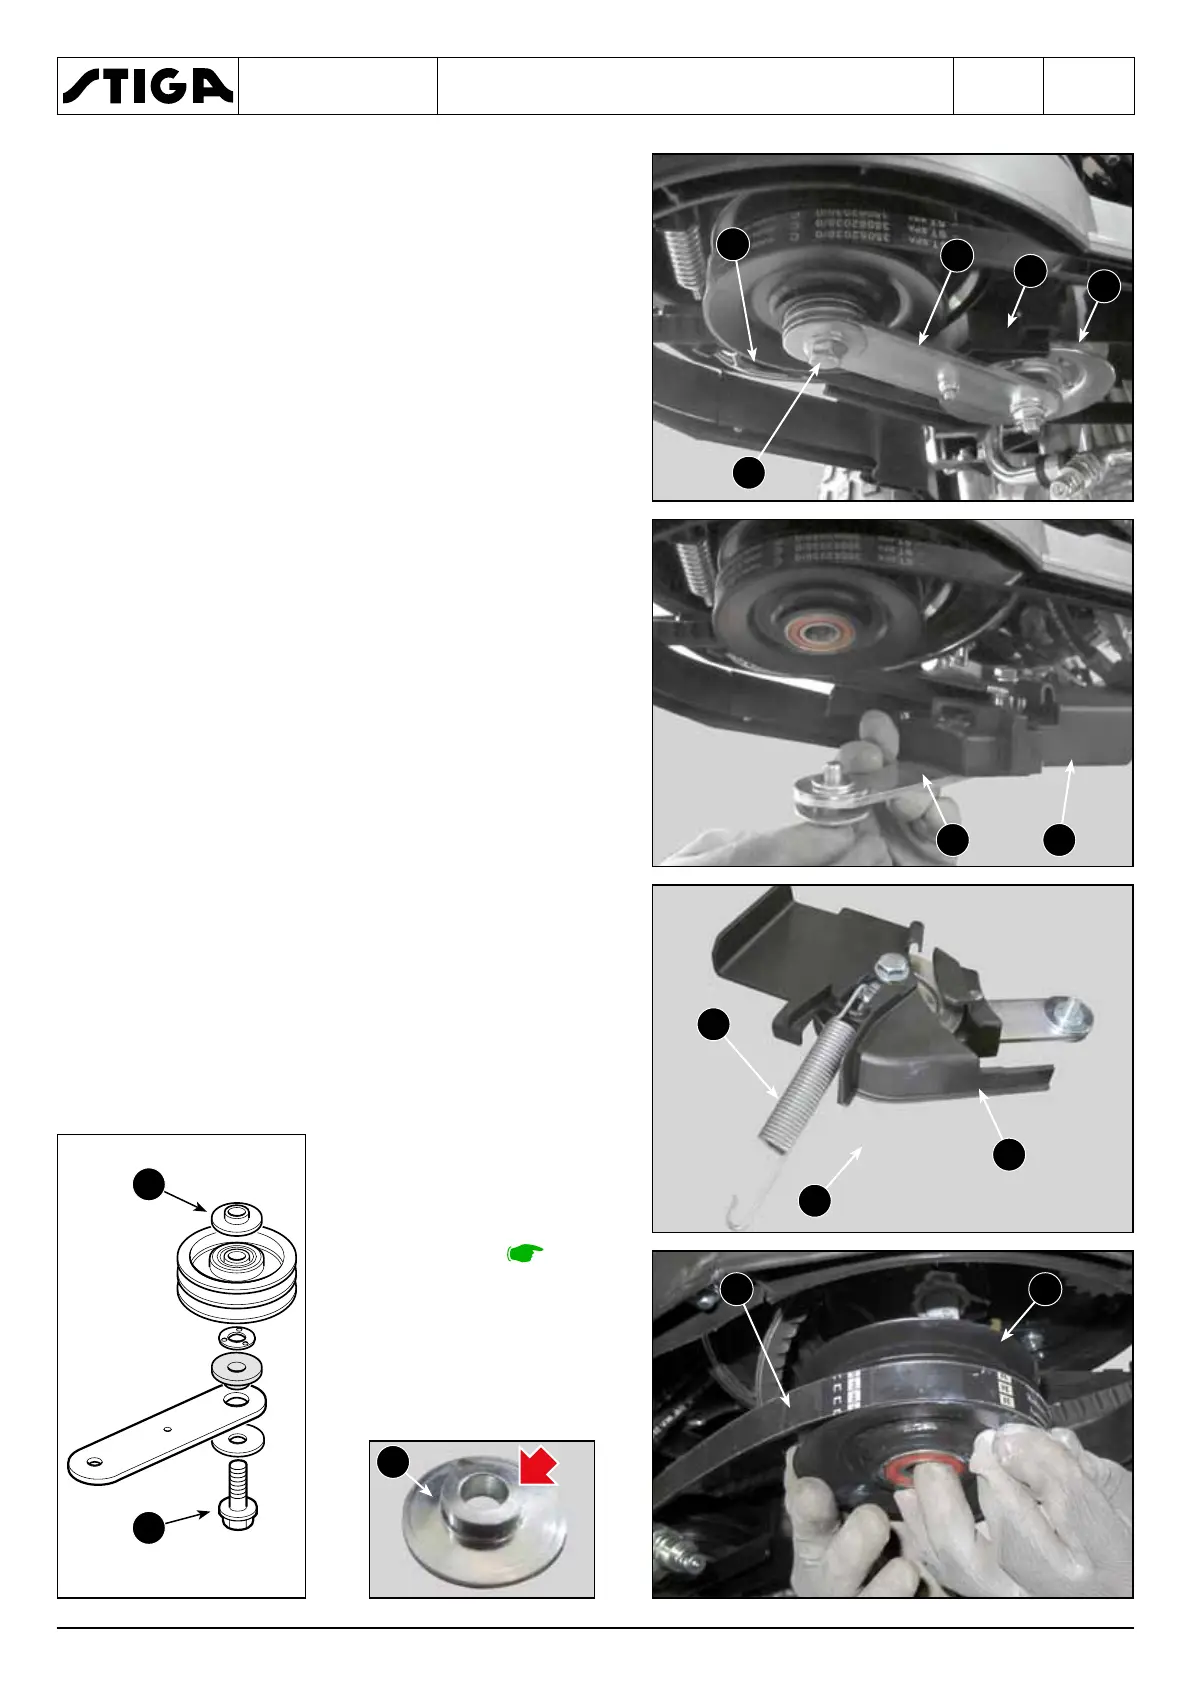
4. Unscrew the central screw (4) to remove the
arm (5) of the tightener (6) together with the
spring (1) and the protective casing (7).
5. Remove the double pulley (8) together with
the belt (9).
When assembling, perform the steps described
above in reverse order, taking care to:
– reassemble the spacer (10) with the stop facing
upwards and to observe the
correct assembly sequence
indicated in the exploded view
drawing and described in de-
tail in chapter 3.
– tighten the screw (4) to a
torque of 35-50 Nm.
 Loading...