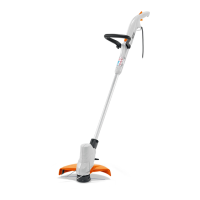
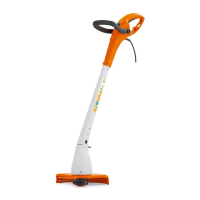
The STIHL FSE 52 is an electric trimmer designed for mowing grass. It is intended for use with an extension cable and must not be used in the rain. The trimmer is operated by a trigger that switches the motor on and off, and it features a control handle for operating, holding, and controlling the device. A connecting cable links the trimmer to an appliance plug, which then connects to an extension cable.
Usage Features:
The trimmer's shaft length is adjustable to suit the user's height and reach. This adjustment is made by depressing a lock button and moving the control handle to the desired position until it engages. The control handle itself can also be set to two positions (0° and 90°). To adjust the angle, the lock button is depressed, the control handle is turned 90° on the shaft, and then the button is released, allowing the handle to engage.
A loop handle is provided for holding and controlling the trimmer. This handle's position can be adjusted to suit the user's height and reach by loosening a star knob nut, swinging the loop handle to the desired position, and then tightening the nut firmly. The loop handle, once mounted, should not be removed.
Before operation, the trimmer requires preparation. This includes ensuring all components (trimmer, connecting cable, deflector, and mowing head) are in a safe condition, cleaning the trimmer, mounting the deflector, and fitting the appropriate spool for the mowing head. The loop handle must also be mounted and adjusted. Finally, the trimmer's plug is connected to an extension cable, which is then plugged into a wall outlet. The controls should be checked for proper function before starting work.
To switch on the trimmer, the user must firmly hold the control handle with one hand (thumb wrapped around the handle) and the loop handle with the other hand (thumb wrapped around the handle). The trigger lockout is depressed and held, then the trigger is pulled and held. This causes the motor to accelerate and the cutting attachment to rotate. To switch off, the trigger and trigger lockout lever are released, and the user waits for the cutting attachment to come to a standstill. If the cutting attachment continues to rotate, it indicates a malfunction, and the trimmer should not be used.
The strain relief (cable retainer) helps protect the connecting cable from damage. To use it, a loop is made in the extension cable, passed through an opening, slipped over a hook, and pulled tight. The extension cable's plug is then inserted into a properly installed wall outlet.
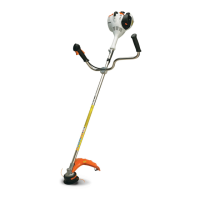
When operating, the brushcutter should be swung steadily back and forth in an arc, moving forward slowly and in a controlled manner. If a bump guard is used, it should be fully extended. The cutting height is determined by the distance of the cutting attachment from the ground.
The nylon line is adjusted by tapping the rotating mowing head on the ground, which advances approximately 30 mm of fresh line. The line limiting blade on the deflector trims the lines to the correct length. If automatic feed does not occur (e.g., if lines are shorter than 25 mm), the user can manually pull out the mowing lines after switching off the trimmer and disconnecting the extension cable. If lines cannot be pulled out, a new spool with mowing line is required, indicating the current spool is empty.
Maintenance Features:
After finishing work, the trimmer should be switched off, and the extension cable disconnected. If wet, it should be allowed to dry. The trimmer, deflector, and cutting attachment should be cleaned.
For cleaning, the brushcutter is cleaned with a damp cloth, vents with a paintbrush, and the area underneath the fanwheel with a soft brush. The deflector and cutting attachment are cleaned with a damp cloth or a soft brush.
For storage, the trimmer should be switched off, the extension cable disconnected, and the mowing head removed. It should be stored in a clean, dry condition, out of reach of children.
Maintenance intervals are dependent on environmental and operating conditions. STIHL recommends having the trimmer checked by a STIHL servicing dealer every 12 months. The trimmer and cutting attachment are not user-repairable; any damage requires contacting a STIHL servicing dealer.