38 MS 231, MS 231 C, MS 251, MS 251 C
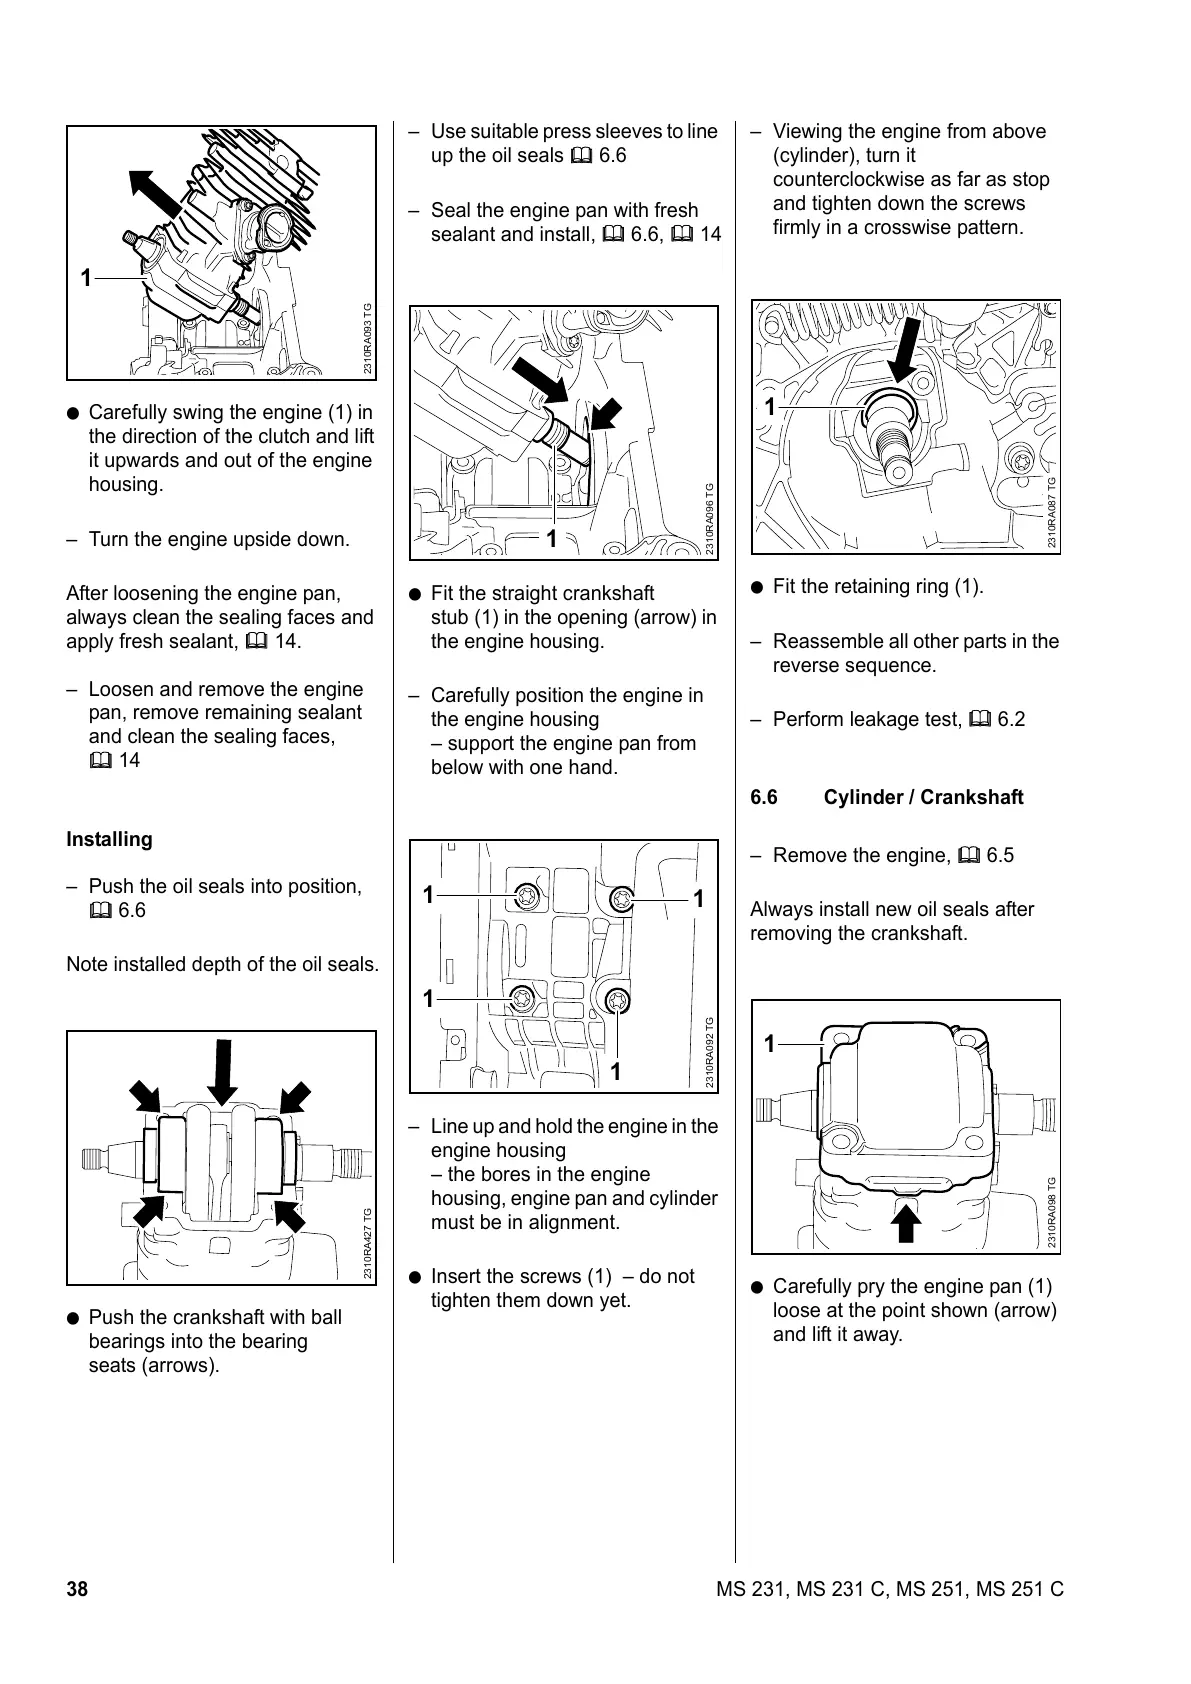
: Carefully swing the engine (1) in
the direction of the clutch and lift
it upwards and out of the engine
housing.
– Turn the engine upside down.
After loosening the engine pan,
always clean the sealing faces and
apply fresh sealant, b 14.
– Loosen and remove the engine
pan, remove remaining sealant
and clean the sealing faces,
b 14
Installing
– Push the oil seals into position,
b 6.6
Note installed depth of the oil seals.
: Push the crankshaft with ball
bearings into the bearing
seats (arrows).
2310RA093 TG
1
2310RA427 TG
– Use suitable press sleeves to line
up the oil seals b 6.6
– Seal the engine pan with fresh
sealant and install, b 6.6, b 14
: Fit the straight crankshaft
stub (1) in the opening (arrow) in
the engine housing.
– Carefully position the engine in
the engine housing
– support the engine pan from
below with one hand.
– Line up and hold the engine in the
engine housing
– the bores in the engine
housing, engine pan and cylinder
must be in alignment.
: Insert the screws (1) – do not
tighten them down yet.
2310RA096 TG
1
1
2310RA092 TG
1
1
1
– Viewing the engine from above
(cylinder), turn it
counterclockwise as far as stop
and tighten down the screws
firmly in a crosswise pattern.
: Fit the retaining ring (1).
– Reassemble all other parts in the
reverse sequence.
– Perform leakage test, b 6.2
6.6 Cylinder / Crankshaft
– Remove the engine, b 6.5
Always install new oil seals after
removing the crankshaft.
: Carefully pry the engine pan (1)
loose at the point shown (arrow)
and lift it away.
2310RA087 TG
1
2310RA098 TG
1