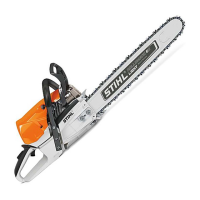
► Fit the guide bar and chain on the saw and
check the following points:
–
Chain drive links are seated in teeth of
chain sprocket (7).
–
Collar studs (5) are located in slot in tail of
guide bar (6).
–
Peg of tensioner slide (4) engages hole (8)
in guide bar (6).
The guide bar (6) may be either way round. The
logo on the guide bar (6) may also be upside
down.
► Disengage the chain brake.
► Turn the tensioning screw (3) clockwise until
the chain fits snugly against the bar. Make
sure the drive link tangs engage the bar
groove.
The guide bar (6) and chain are seated
against the saw.
► Fit the sprocket cover (2) so that it is flush with
the saw.
► Fit and tighten down the nuts (1) firmly.
6.1.2 Removing the Bar and Chain
► Shut off the engine and engage the chain
brake.
► Remove the depth limiter.
► Rotate the nuts counterclockwise until the
chain sprocket cover can be removed.
► Remove the sprocket cover.
► Turn the tensioning screw counterclockwise as
far as stop.
The chain is now slack.
► Remove the bar and chain.
6.2 Mounting and Removing the
Depth Limiter
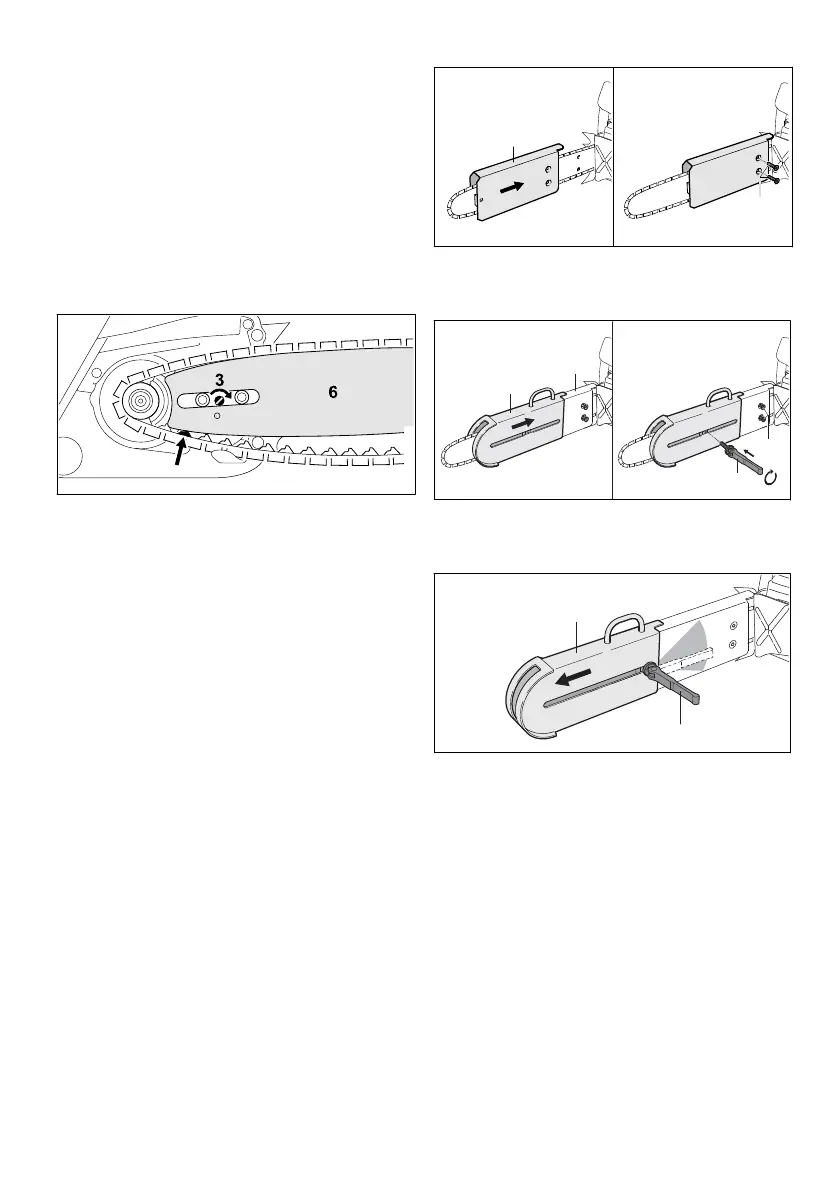
6.2.1 Mounting the Depth Limiter
► Shut off the engine and engage the chain
brake.
► Mount the bar and chain.
► Push the guard (1) over the guide bar so that
its opening faces down.
► Insert the screws (2).
► Push the depth limiter (3) over the guard (1).
► Screw home the quick-release clamp (4).
► Tighten down the screws (2) firmly.
► Slide the depth limiter (3) in direction of bar
nose.
► Fold down the quick-release clamp (4) in
direction of shaded area (A).
The depth limiter (3) cannot be moved and the
quick-action clamp (4) is lying flat against the
shaded area (A).
6.2.2 Removing the Depth Limiter
► Shut off the engine and engage the chain
brake.
6 Assembling the Saw English
0458-787-0121-B. VA0.M20. 11
 Loading...