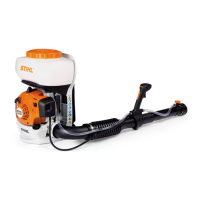
SR 200
English
13
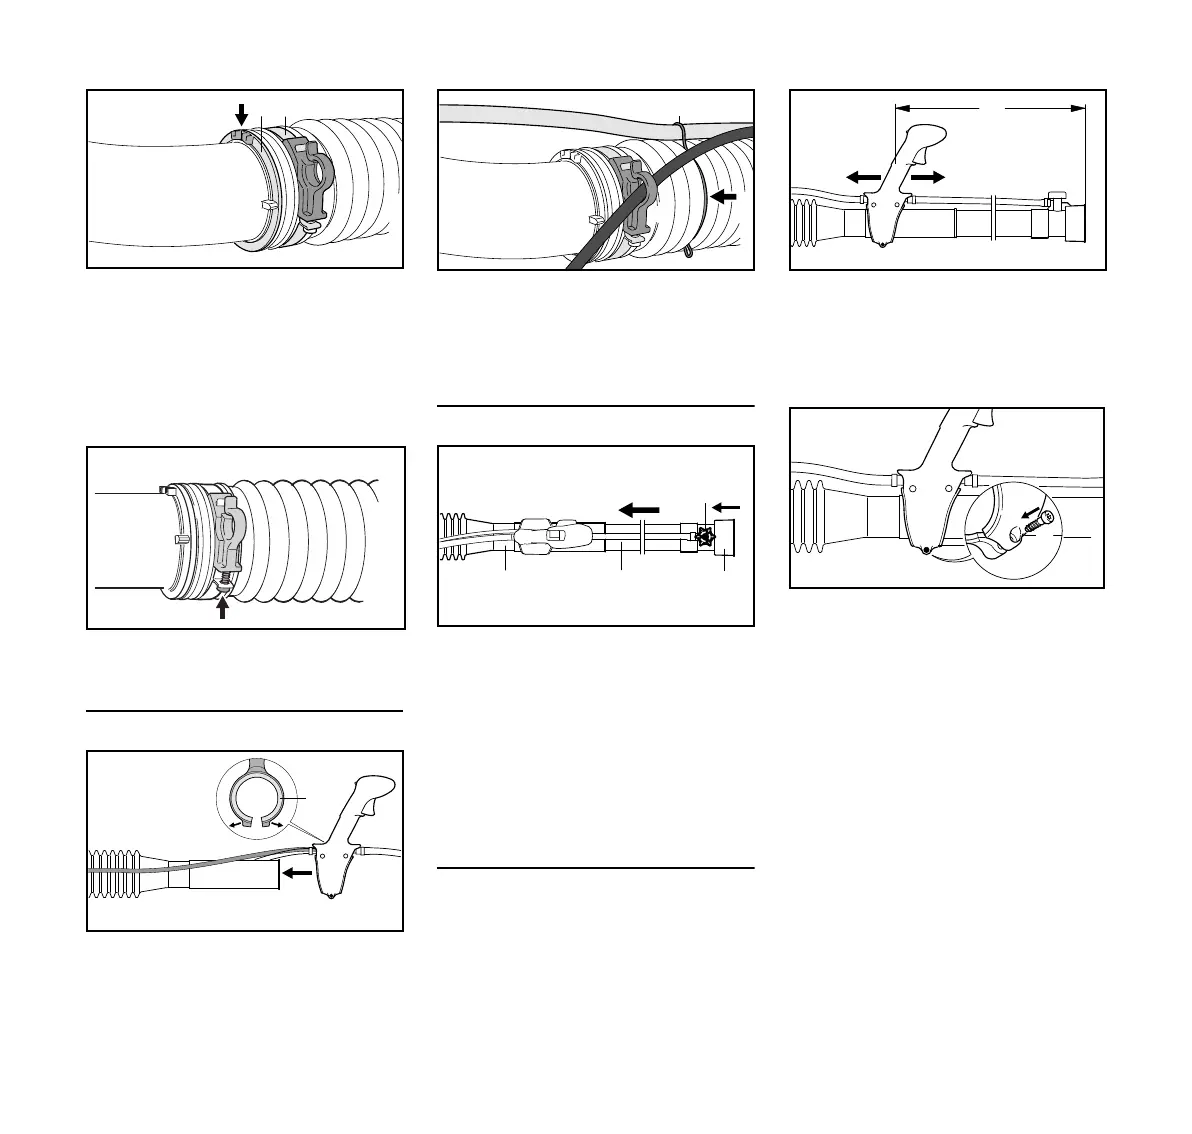
N Line up the hose clamp (1) and slip
ring (3):
– the two lugs (arrow) on the slip ring
face up.
– The hose clamp's hook faces
outwards.
N Tighten down the screw (arrow).
Mounting the Control Handle
N Open up the control handle (1) with
liner (2) and push it over the stub (3)
of the pleated hose.
N Attach throttle cable to retainer (4).
N Secure hose with retainer (5) to
third pleat (arrow) in pleated hose.
Mounting the Blower Tube and Nozzle
N Push the blower tube (1) into the
stub of pleated hose (2) as far as
the stop.
N Push the nozzle (3) onto blower
tube as far as stop – metering
knob (4) must be in line with the
control handle.
Adjusting and Securing the Control
Handle
N Put the machine on your back and
adjust the harness – see "Harness".
N Slide the control handle (1) along
the tube to the most comfortable
position – distance between nozzle
outlet (2) and the control handle (1)
must be at least 500 mm (20 in) (a).
N Secure the hose clamp (1) with the
screw (3).
9928BA019 AM
 Loading...