22
23
24
25
1. Screw brackets tightly to the ceiling.
(Fixing material to be supplied by the customer)
2. Hang the awning in from behind and center.
3. Tighten the bracket screws.
Ceiling installation: Hanging the awning /
Option: Installing the awning from the front /
1. Slightly tilt the awning’s mounting bar and push it up.
2. Insert the awning into the brackets.
3. Turn down the safety plate.
4. Center the awning and tighten the screws from the safety plate.
5. Install the safety plates at all additional brackets.
Option: Installing the awning from the front /
1. Drill al bracket holes.
(X = according to the fixing bracket distribution)
2. Screw brackets tightly to the wall.
(Fixing material to be supplied by the customer)
Option: Installing the awning from the front /
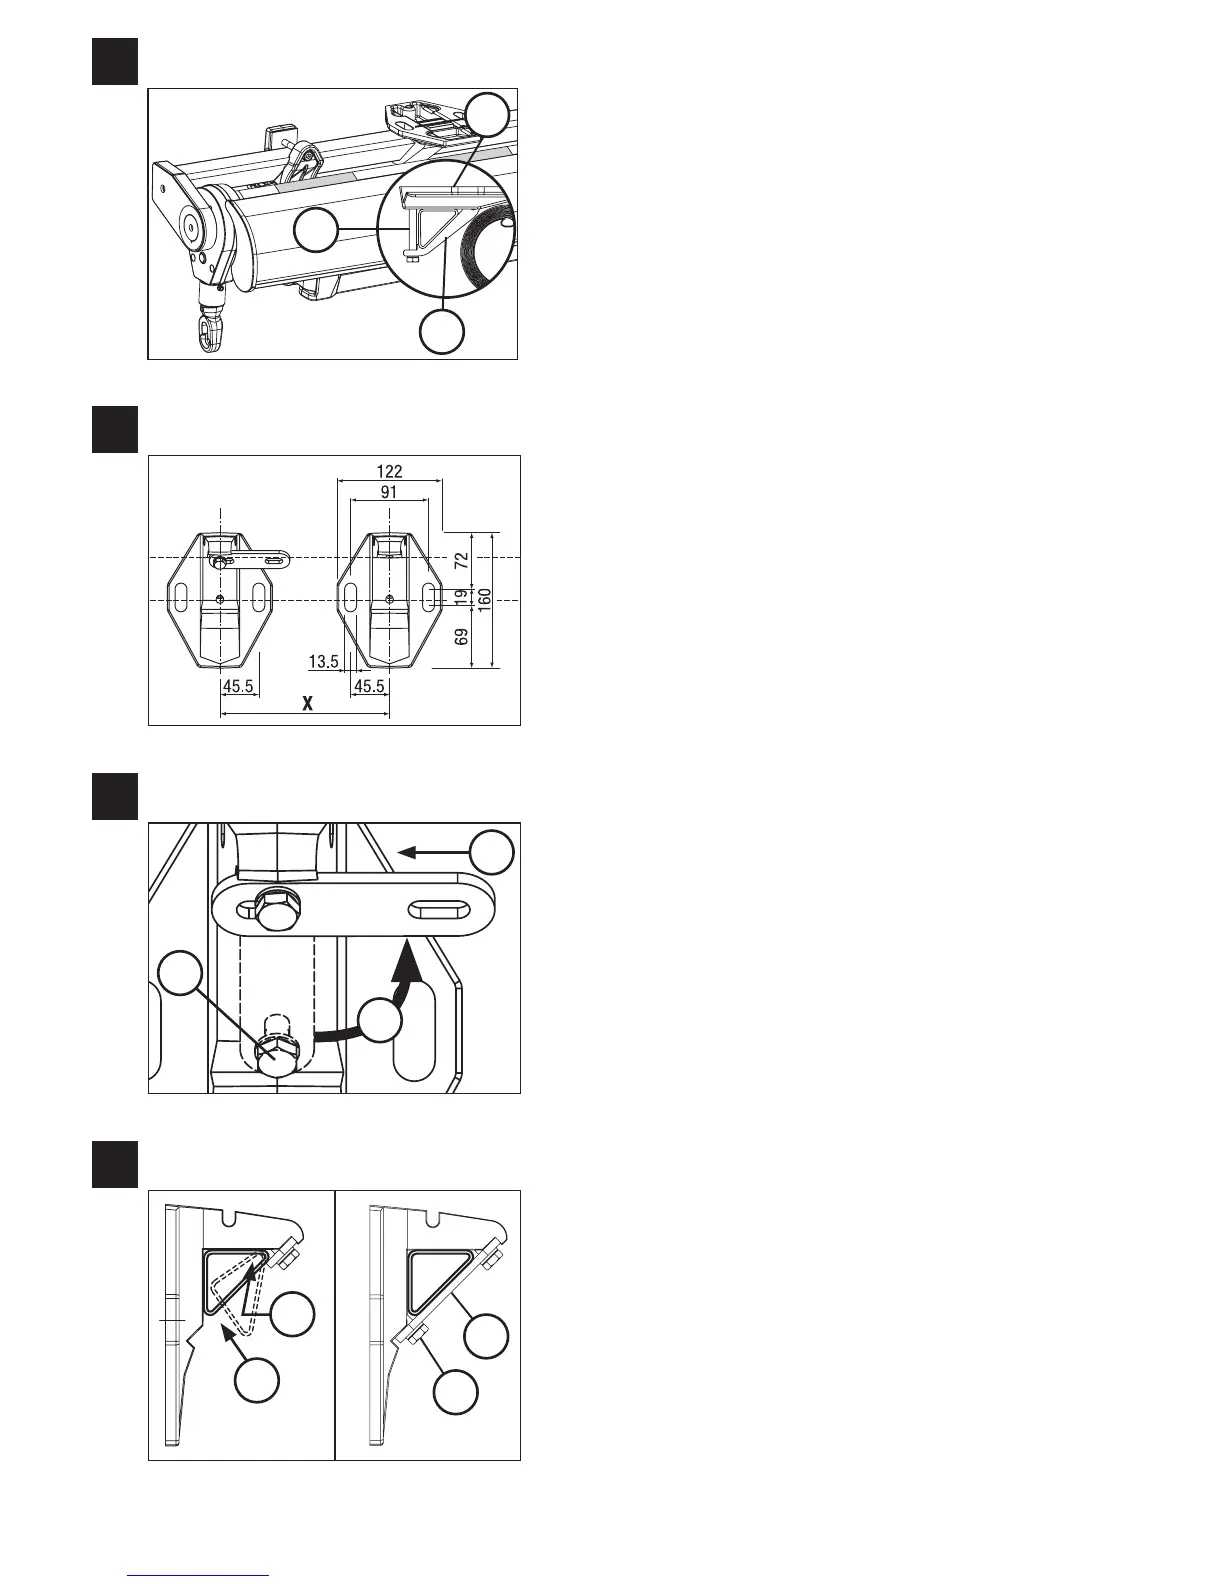
1. On the outer brackets (left and right), remove the lower screw from
the safety plate. If there are additional brackets, remove their
safety plates.
2. Put the safety plate in the horizontal position (screw loosend).
3. In order to secure the safety plate, turn it completely until the end
stop.
1. Atornillar bien los soportes de fijación al techo.
(el material de fijación no va incluido)
2. Colgar el toldo por detrás y centrar.
3. Fijar el tubo de carga con el tornillo del soporte.
1. Inclinar ligeramente el tubo de carga del toldo y empujarlo hacia
arriba.
2. Insertar el toldo en el soporte de fijación.
3. Bajar la placa de seguridad.
4. Centrar el toldo y fijar con el tornillo.
5. Instalar las placas de seguridad del resto de soportes de fijación.
1. Perforar todos los orificios de fijación.
(X = según la distribución de los soportes)
2. Atornillar bien los soportes de fijación a la pared.
(el material de fijación no va incluido)
1. En los dos soportes situados en los extremos (izquierda y derecha),
quitar el tornillo inferior de la placa de seguridad. En caso de haber
más soportes de fijación, quitar los dos tornillos y la placa.
2. Girar hacia arriba la placa de seguridad (se ha aflojado el tornillo).
3. Para asegurar la placa, girarla en el sentido de la flecha hasta
el tope.
Montaje a techo: colgar el toldo
Variante: instalación del toldo por delante
Variante: instalación del toldo por delante
Variante: instalación del toldo por delante